Thanks Dalj I'm pretty sure my setup is nigh on identical to yours, (with the exception of V1s vs V3s). Was it just the front springs you changed or the whole set?
Cheers
it was just the main front springs they recommended to change
I'm very jealous of the V3s! If you don't mind, how much did you pay for the performance springs? I've got a set of V1s and can always use a little improvement.
KW performance springs directly from KW are £65 part number 60110047. They probably have other spring rates, I emailed them directly with my setup and they recommended these rates.
Getting the new bush over the roll bar was seriously difficult! I double checked the box was for an eibach 22mm bar which it was but ended up cutting a small chamfer in the edge of the bush to at least get it in place then bashed it on
What I was aiming to get the car ready for was a long weekend in Snowdonia. Wales is one of my favourite places in the UK, such natural beauty and not far away. The climb up and down Mount Snowdon was also a great achievement
The suspension is great, haven’t really had time to open it up but the kit got a good test in Wales. On the standard mid setting, the KW’s feel softer than the softest setting on the old FK’s. The KW’s handle bump much better while keeping wheel travel to a minimum. I also found I’m not correcting the steering much when on slightly bumpy roads.
Thanks for reading. Next up is fitting a Fabless cross bar 😉
Tasty treat number 2 is a one piece full scuttle cover with an OEM style profile sent from Russia with love. It was the last piece he had so got lucky. Other companies like SWG make a similar one piece cover but it’s smooth with no OEM style recess. The VIN number is covered but that’s ok until Mr MOT inspector takes a look Fitting was spot on and didn’t interfere with the pollen filter.
Getting the ride height correct was a bit of a pain. Lots of driving (not a bad thing), measuring and adjusting each corner! Measuring and adjusting each cover, Measuring and adjusting each cover
Once I was happy with each corner it was time for tracking. Front camber set to -1.5. Originally it was -1 and I didn’t notice any uneven wear so went a bit further this time.
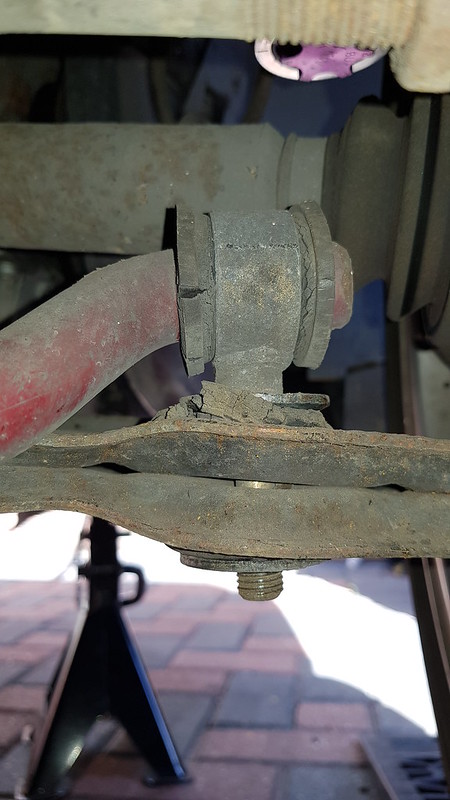
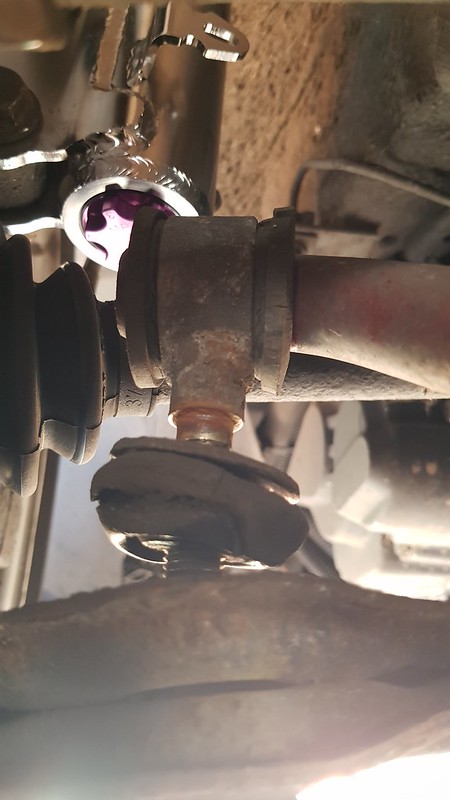
While under the car I noticed the roll bar bushes looked a bit sad so decided to change these for some power flex heritage items.
Easy job I thought but getting the old bushes and link off the roll bar was near impossible! Lot’s tugging, heating, screwdrivering, bladeing lubeing, and swearing later … they decided to come off.
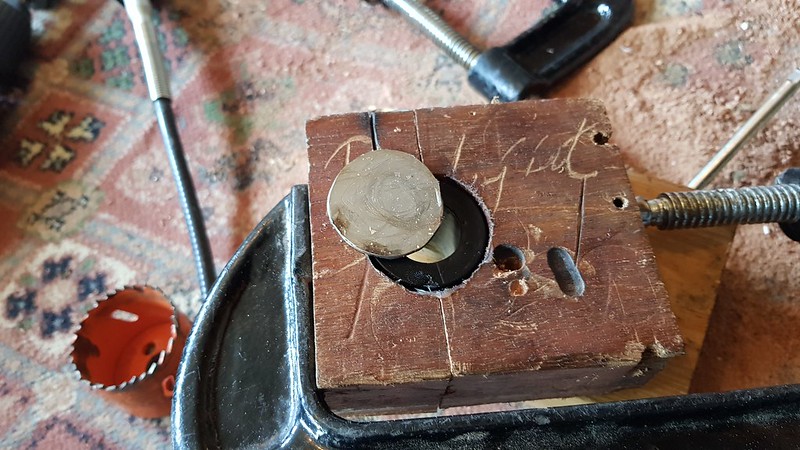
New roll bar bushes are a much harder material than what came off so getting the bush into the link was going to be a challenge. First I opted for squishing in a G clamp but as I suspected, it was going to fight me all the way and bush kept jumping out under load. For once, lube doesn’t help here.
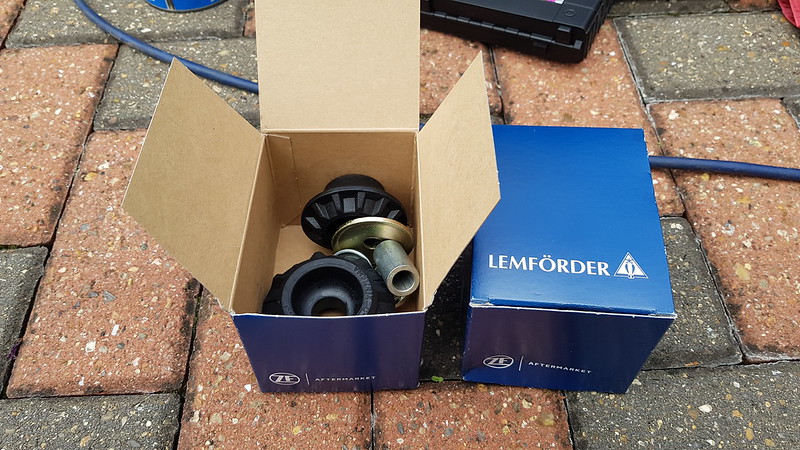
Moving onto the front. Again, nothing special here, standard swap out of the shock assembly with new Lemforder MK3 top mounts, bearings, MK3 top mount retaining nut and MK3 top cup.
I didn’t bother marking any of the alignment as the car would go in for full geometry.
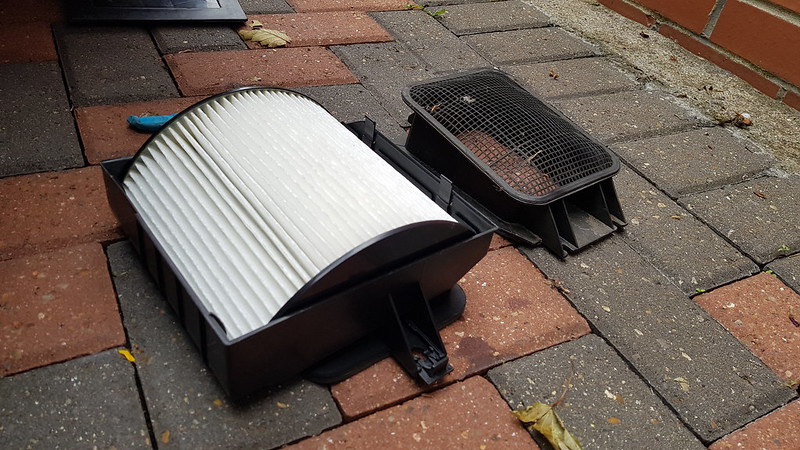
This may or may not be exciting you but I managed to get hold of some tasty treats. The first one came in the form of a Pollen filter. This isn’t a homemade or retro solution but a Chinese (no bats included) market filter designed for the MK2. It came in two pieces .. Lower cover Pollen filter, part number if you’re interested
Pollen filter, part number if you’re interested
Looks much larger than the original so let’s see how the scuttle cover fits
I knew it wouldn’t be too long until I hit a problem. This one came in the form of my nuts, they’re too big – that’s what she said FK use a larger half height nut compared to OEM, which is what KW use. No bother, quick trip to a local hardware store to get some new ones.
At the same time, the nasty looking turret liner was swapped for early type carpet. Now I won’t get a rash when I rub my cheeks against them
Shelf support nuts were swapped for MK3/4 items. Being deeper, they’re easier to get on and off than the standard tin type and look much nicer.
After driving my Wife’s car, I decided I need an Alcantara steering wheel in my life. My Momo wheel I’ve owned for like 20 years and love the feel of it so decided to get it updated. Leather came off (ooh kinky) and on went some Alcantara with red motorsporty type middle band and BMW M style stitching in red. Came out rather nice and feels great.
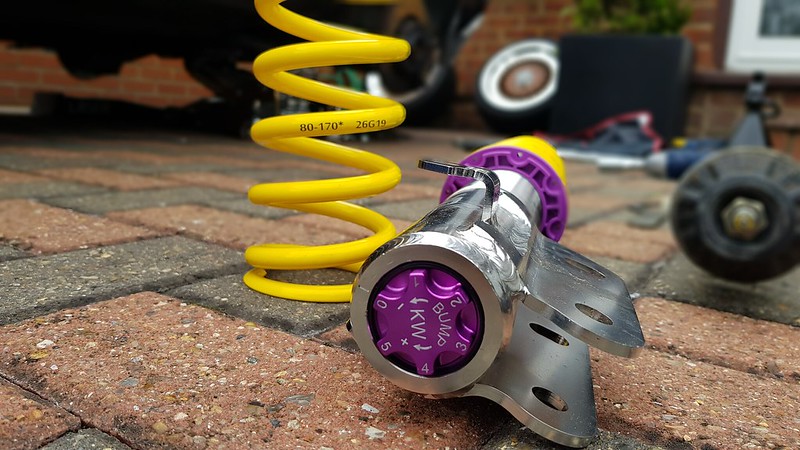
Something I’ve been itching to put on the car are a brand new set of KW V3’s.
Originally V2’s were on my list as that would have been more than good enough for what I use the car for but these came up at a good price so had to have them. The FK Konigsport have been reliable over the years and handle great but the ride is quite harsh, even on the softest setting.
Straight out the box the KW look amazing. No need to worry about spring platforms seizing up on these. KW recommended I fit their performance front springs to help with the extra weight of the V6 so these were also purchased.
Fitting was pretty standard really. Started with the rear…
I totally feel your pain on the lack of space at the front of the car. Ran into the exact same issues when I wired up my VDO gauges, though I as sorely tempted by the Digifiz ones. How do they perform, do they react quick enough?
Yeah they seem to react quick. When I have my audio really giving it some, the battery gauge turns into a graphic equaliser
Back again for more updates. Forget the KW’s, I’m installing some new gauges today
I was after a set of Duostyle gauges for while and joined in on the mailing list and new forum with the original guy who made them so long ago. Re-manufacture wasn’t going well, wasn’t going anywhere, then these from Digifiz mini popped up. I was instantly hooked; the look is perfect for the MK2.
After all the rewiring it was time to open it up again
New relay was installed to power the gauges. Digifiz mini do a plug and play kit but the spare slots on the fusebox to hold additional relays and fuses were taken up with my rewire so I opted to create a custom loom
The terminals are tiny for these gauges. My crimp tool was too big so soldered them instead.
Different wire colours used for easy identification
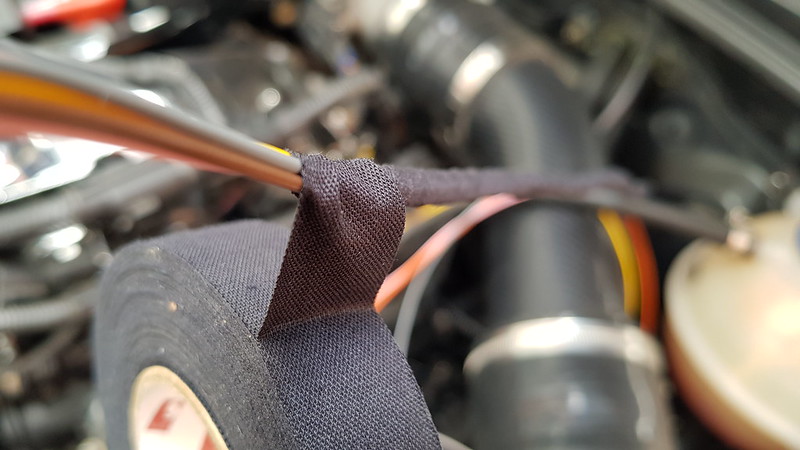
Loom was wrapped with loom tape
Test fitted the connector with wiring before threading the loom through the dash
With everything fitting well, the loom was threaded through the dash
First power up, no senders on the other end yet
Loom was pushed through the bulk and wrapped in a chemical repellent loom tape
The original senders needed earthing to stop the oil light flashing on the dash so added a new earth from the engine into the loom
Once the loom was in place it was time to cut the loom at the right length and start to add the connectors. Before that I decided to fit the senders for the correct wire length.
This is where I miss my 16V. There is literally no access to the front of the engine to get to the original oil sender.
Front end of the car had to come off. I was able to manoeuvre the rad for access without draining the system.
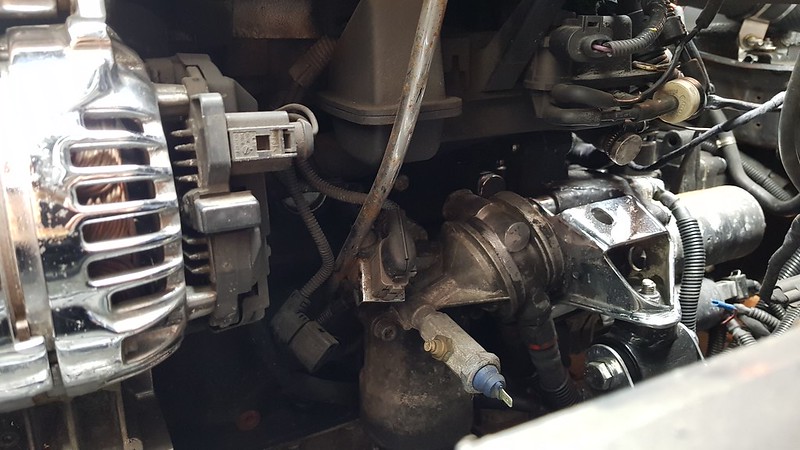
Original low pressure sender out. The idea was to move the original low oil pressure sender to the T piece, earth out high oil pressure and place oil temp in the original low oil sender hole.
Problem! The pressure senders were too long for the T piece! I could have hunted for a thick copper washer but wanted to use the car that evening, so, T piece was removed and replaced with the guage pressure sender.
Wires were cut and connectors wired in
Front end was put back together then realised I left the bonnet pull cable out
Grill back off then reassembled WITH the bonnet pull
On first start the low pressure dash light started flashing. A quick chat with the oracle RubJohnny, he told me the low pressure wire does not need to be earthed like the buzzer. Removed that earth and it stopped flashing
The gauges are lovely!. Look right at home and the correct level of light during the day and night. There is a dim feature but left if off so I can show them off at night.
Moving back to putting the undertrays back on. Driver side goes on with ease
Before moving to the other side, vehicle speed signal from the MK2 clocks was wired into the ECU. This should give me clock speed in the ECU settings and on a Bluetooth reader.
Passenger under tray needed a bit of trimming to clear the ECU
Then mocked up a sheet of textured plastic to cover the hole
To fit the panel and trim I used some Araldite adhesive. The idea was to use this to hold the panel in place while it was trimmed then fibreglass to secure.
While waiting on the glue to dry I looked at what needed to be done next. New bushes to fit while the KW's go on
Once the glue dried, Dremel was used to trim off the edges
The glue was strong enough so fibreglass wasn’t needed. To refine, one day, I’ll carefully remove all external glue but for now, I’m happy.
Last thing I did was change the door switch seals. Super easy with one screw. Seals are readily available on eBay
That's it for now. Next updates will include my KW suspension swap and all new front bushes. For now, I'll pump Flex FM and watch people gasp at an electric aerial
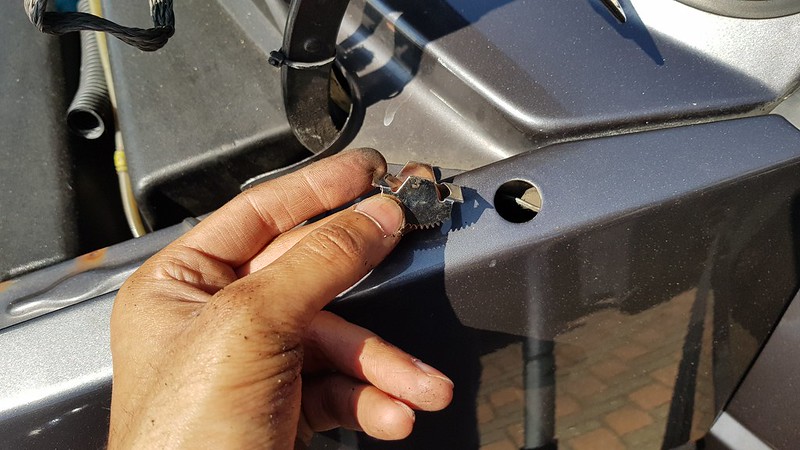
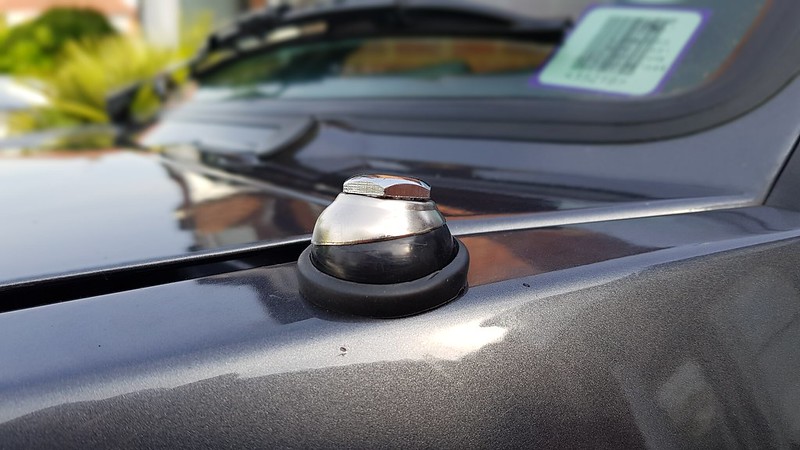
What will be a problem is the aerial hole. The wing moulding covers a majority of the hole so space is going to be very tight
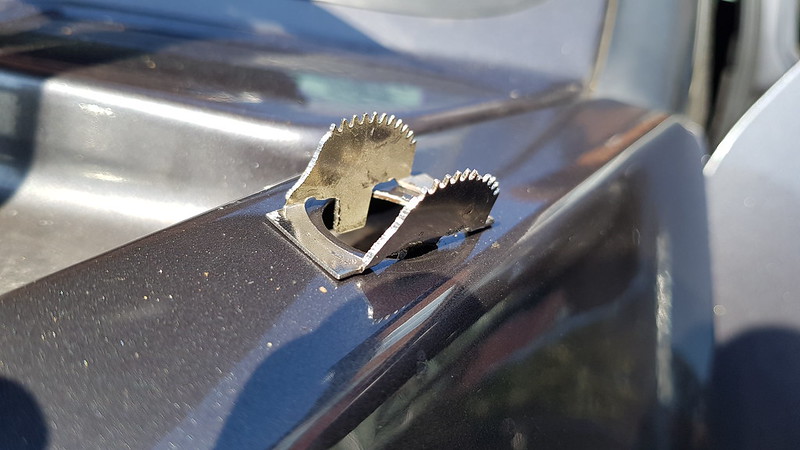
The aerial kit came with this fitting that is supposed to sit under the hole. As you can see it doesn’t fit so I used a Dremel to cut it away into a usable shape.
Even after modifying the fitting, there was not enough space for the aerial to sit with this fitting as the bulk of the mechanism hits the inner wing. I didn’t want to give up so looked around at something else to replace the fittings. Luckily I remembered I had a round bar for such an occasion, it was the same bar I used to make a spacer for my engine mount bracket a while back.
Unbelievably it was a perfect fit so angle grind a piece off for a test fit
Without much effort the aerial now slides into place with easy. The top of the new adaptor was angled to match the wing.
The adaptor was painted with Hammerite and coated with a chemical resistant tape to avoid metal against the wing and potential rust
If you’ve been following this build thread you may remember I fed through a couple of spare cables for such occasions. Those two spare cables are now Live and antenna switch.
Bonnet earthing point was used as the earth. I need to replace the broken bonnet cable at some point
To secure the underside of the aerial mechanism VW conveniently placed this stud here for us. The aerial kit came with a securing strap so that was bolted to the stud then screwed to the underside of the aerial.
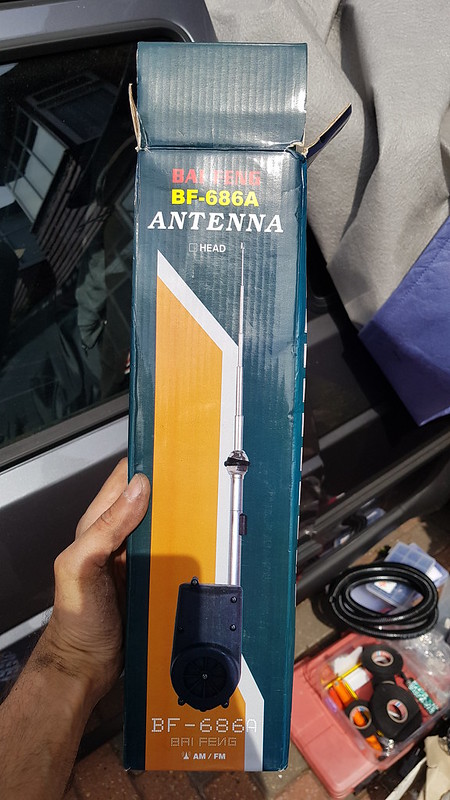
This is the aerial I used
Next I wired the antenna switch feed to the head unit. Live feed was left permanently live so even with the key out, the aerial will come back down. What I didn’t realise was that the Alpine head unit, probably others, switch the antenna ON as soon as it powers up, even if not on Tuner source. This is annoying as I don’t want it up all the time. Antenna dash switch for MK2’s are impossible to get hold of and they go for silly monies when they do appear. A spare fog light switch I had lying around will do for now
Had to buy an aerial cable adaptor
Size does matter
In my excitement I didn’t take any pics of the underside fitted. What I can say is that the arch liner leans up against the bottom of the aerial mech but not enough to cause an issue.
Once it arrived, I wired up a power plug. The LC-2 is much easier to wire up, calibration and status LED are integrated opposed to separate wires and components like the LC-1. The controller is much smaller too so mounting would be easier.
Old lambda out
Fitted and calibrated the new sensor. ECU is now showing AFR.
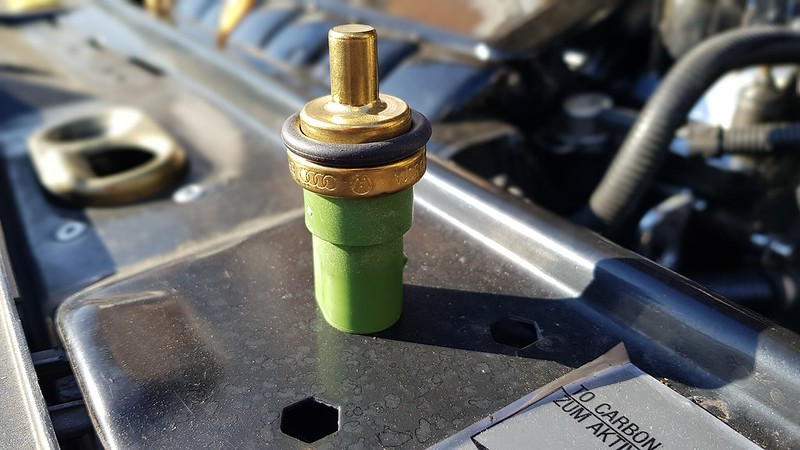
New coolant sensor also turned up so fitted that. Easy to change with minimal coolant loss.
No more odd readings for coolant.
With everything wired in and running, the engine didn’t sound right. The exhaust note was ‘boomy’ compared to before. The AFR was showing over fuelling and there was a noticeable smell of fuel and black smoke on hard throttle. I gave Emerald a call and they advised me to do a throttle calibration over the phone. Just those simple steps fixed it and all was well in the land of nod.
Getting very excited now as I can see the light at the end of the tunnel. In my excitement I decided to have a go at fitting an electric aerial. I haven’t seen many MK2’s with electric aerials so I was anticipating a battle.
Firstly, Inner arch liner was removed. Inside the arch looks really clean and no signs of the wing ever being off the car. Drainage holes look big enough to accommodate some extra wires without impeding drainage so wiring won’t be an issue.