Monkeys guide to 1.8ting your mk2

(thanks to Monkey)
Ok then, first off the disclaimer
I've noticed more and more people asking the same kind of questions, so I'm writing this guide to give people a decent amount of information concerning the ever popular 20vt swap.
It is not trying to be the best/ultimate guide, I acknowledge there are probably better methods/engine combinations etc to go for. These are my findings though my own experience of performing the conversion and I accept no responsibility for anything, ever.
Now that's take care of, on with the guide...
Before you undertake a conversion such as this, please be aware that it is a large job not to be taken on a whim. You'll need a decent space to do the work in (preferably under cover) and deep pockets. Just because you see an engine being sold for £600, doesn't mean you won't be spending another grand or two on other things before the car can move under it's own power again!
If people want me to, I'll go into more depth including a wiring guide to get the OEM management working.
Choosing your mk2
If you want to make your job the easiest possible, a 90 spec 16v is definitely the way to go. Reasons for this are the CE2 fusebox and wiring are easier to match with the donor engine. The front brake setup can be upgraded to G60 items using the least amount of parts and the fueling system runs at 5 bar, which is very useful when you upgrade the 20v fpr to a 4 bar one later on. I'd certainly want to avoid using any car lesser than a GTI as you have more issues to deal with, such as the rear beam having drum brakes and the fueling being nowhere near the job.
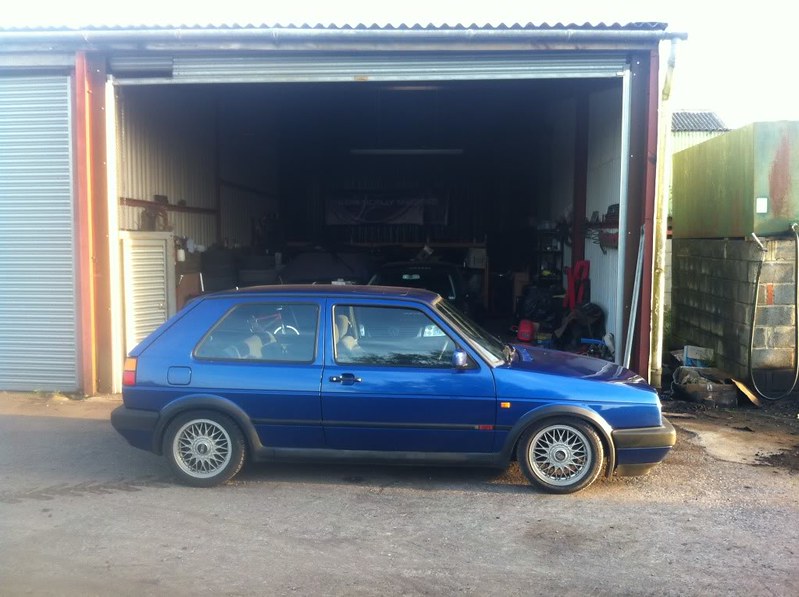
My choice of car was based purely on the colour (!) so I ended up using a 90 spec 8v GTI in a rather striking blue. 
Typical Cost £400-£2000 (depending on condition etc)
Choosing your engine
There are dozens of different spec engines you can go for, from the early mk4 AGU lumps, to the latest ones being used in modern Polos. All of them are a good (lets face it, it's why you're thinking about doing the conversion and reading this!), but there are choices you can make to make your life easier depending on what you want to end up with. For example, I'd try to avoid longitudinally mounted engines from the likes of Passats/A4s because you'll have to be swapping things like manifolds/oil filter housings for ones from transverse engined ones. You may be able to get cheaper/lower mileage ones because of this, but just keep in mind that you'll be paying out a little extra in the long run.
Another thing to consider is that the engine is up to 15 years old now and some may have serious mileage on. Because of this I'm a big fan of paying a little extra and buying a whole donor car so I can drive the car and find out what I'm getting myself into before getting all the way through a conversion to find out that I have no compression/no oil pressure/a death rattle etc. I may cost a little more, but you can usually make some back in the long run buy selling redundant parts and scrapping the shell. Not everyone has the space to break a car as well as perform a conversion, but if you can at least hear the engine running before you buy, it'll be a load of your mind while you're performing the conversion. Other things to consider if you're buying a donor car is the gearbox. If you choose a 5 speed donor, the chances are you can re-use that box in your mk2, a 6 speed box won't go in without fabricating some serious engine mounts to hold it in.
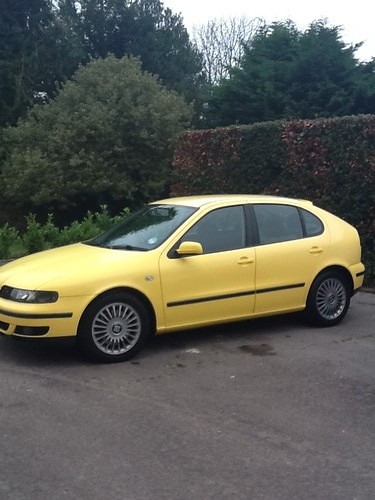
My choice was a 2002 Seat Leon Cupra with the 180bhp, K03 sport equipped AUQ engine. While this has a 6 speed box and goes against what I mentioned above, I was particularly after this engine due to my trouble free 5 year ownership with a Bora Sport with said engine. I found the 180bhp engine with a remap plenty quick enough in the Bora combined with decent mpg and bulletproof reliability. So in a lighter mk2 with a stage 2 map...
I paid £1000 for the car, which was fully road legal and had about 85k on the clocks and 8 months tax on it. But most importantly had been serviced regularly and ran sweet as a nut. After selling off the parts etc the engine stands me at £500-£600.
Typical cost £400-£1200
Gearbox/Pedalbox Setup
So you've got your engine and your mk2. Next up is the gearbox, if you've bought a 20vt with a 5 speed box, congratulations, you've got it already. Otherwise, you may have to do a little shopping. There are two ways you can go about the box, the first way I've been warned off and wouldn't recommend personally but it's worth mentioning as it cuts through a load of hassle and this is using the original 020 mk2 box. This would allow you to re-use all the mk2 shifter/clutch cable mechanism. However, I dare say you wouldn't spend a long time on the road before you were picking up pieces of cogs from the tarmac.
The setup I do recommend is the 02A/02J box from a mk3/4. This will bolt up to the engine and sit nicely on your subframe. They also have the added benefit of having the same size output cups as a standard mk2 GTI so your GTI drive shafts will bolt straight up. The downside is the gearbox uses a cable change, hydraulic clutch setup and an 02A starter motor. This means you 'll have to swap your shifter out as well as (potentially) your pedalbox. Using this setup, you can bin off any dual mass flywheel setup in favour of a G60/ABF flywheel and couple it to a VR6 clutch, making things much easier and cheaper. Also, you can get the flywheel lightened while you're at it
For the shifter, you can use a mk3/Corrado 02A item, they are very cheap/plentiful and will mount up to your exhaust tunnel without too much trouble. For a better shift, you can use a mk4 02J shifter and corresponding shifter tower, they are slightly harder to mount up and a little more expensive, but In my opinion, much better in the long run. They are also very easy to calibrate; you lock the black plastic connectors back on the end of the cables, next the tower has a nipple you pull out to lock the mechanism. The shifter itself has two holes that line up (just to left of where 2nd would be) and can be locked in place with an Allen key. Once both are locked, just pop the black plastic connectors back on so they grip, unlock both tower and shifter and there you go, done!
Next is the clutch. You can do this one of two ways:
The first is the easiest and cheapest, you get a Seat cable clutch mechanism and use the mk2 clutch pedal. I bought a car with this very mechanism on and wasn't best impressed, the pedal felt very stiff and I got the impression the pedal box could break at any moment. I do have friends who swear by this and say I just had a bad one, but Seat pedal boxes are known for snapping. Either way I'm always willing to be proven wrong. I tend to go for the second option...
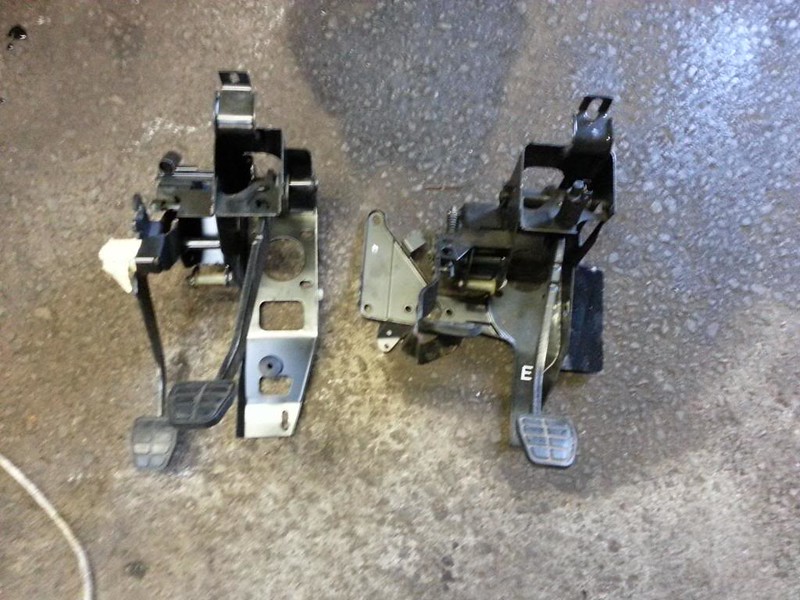
This is where you get a Corrado/Passat (as long as the Passat has hydraulic clutch) pedal box, clutch master cylinder, clutch slave cylinder, associated pipework and (often forgotten) brake fluid reservoir with connecting pipe. Then all you have to do is fit it to your car! I've done 5 or 6 of these now and it's always the first thing I fit once the strip down as finished. It leaves a nice feeling pedal and will also serve as an early warning system should you ever have a break fluid leak.
Mk2 on the left, Corrado on the right with an accelerator pedal mod I'll go into later
Typical Cost up to £150 for the gearbox, up to £120 for the pedal box setup
Management
When dealing with the management you really have 2 choices, after market or OEM. After market systems such as Qpeng, Emerald, Megasquirt or the like are all out there to get you going. If you're thinking about the latter two I mentioned, you probably already know more than I do on the subject! Qpeng however, is designed to be an easy plug and play kit to get you going and from what I hear, it works. Though I have heard a couple problems with cold starting and diagnosing faults etc. A friend had a problem with his Qpeng system cutting out and deciding when it wanted to start. Turned out to be an engine speed sensor, took him ages to figure it out. If the same fault had occurred on an OEM system, the rest of the system could have delt with it, the car would have continued to run and he'd have had a light and a fault code to identify the problem.
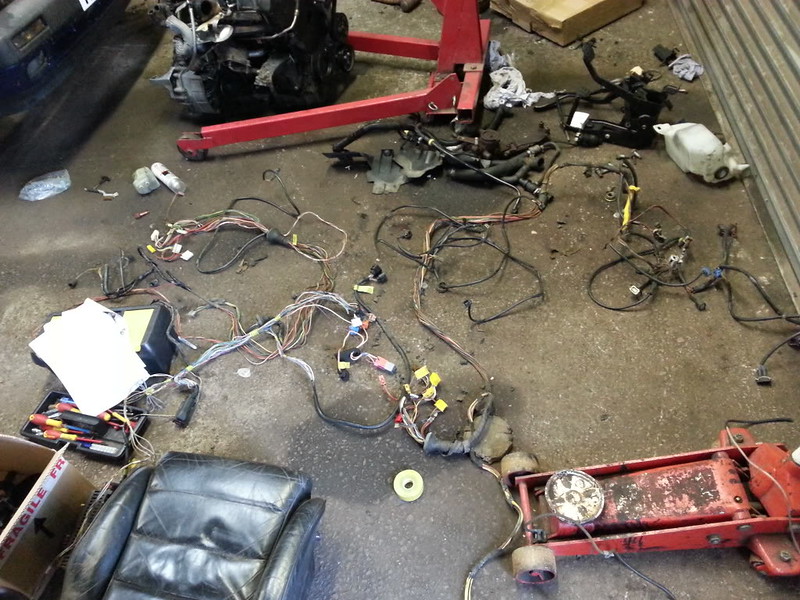
If you do go down the OEM route, you have to get your ECUs immobiliser defeated and splice the loom into your mk2s fuse box to get it to run correctly. If you're confident with soldering, it's not particularly difficult, you have to split the engine loom out take the connectors apart, figure out that wires to splice where and fit another small fusebox to accommodate some of the electrical requirements. If you're not feeling up to the job, there are people out there, such as rubjonny on here who will take your looms and splice them together for you for a very reasonable price.Worth pointing out, to get your rev counter to work properly, you'll need a tach adaptor. Also you're going to have to either get hold of a cable throttle body, or make a bracket to hold the 20v accelerator pedal.
I went for the OEM route, wiring myself using the DBW throttle pedal, hence the small bracket on the pedal box in the above picture
Typical Cost around £400 for remap/immobiliser defeat, between £1000 - £1500 for Qpeng plug and play
Exhaust System
There are plenty of mk2 systems out there that will deal with a 20vs gasses. Through research I found the smallest you should get is a 2.5" system. Fortunately, mk2 16v systems are generally 2.5" so there are loads to choose from depending on what you want your car to sound like. The down pipe is another matter, I've only heard of 2 places that will do a mk2 20v downpipe. The first is Qpeng, I bought one of them and have to say the quality on the KO3s system was spot on and fitted a treat. I've heard about and seen pictures of TrackSlag systems and they certainly seem impressive as well so worth considering both.
I opted for the Qpeng downpipe mated to a Jetex system
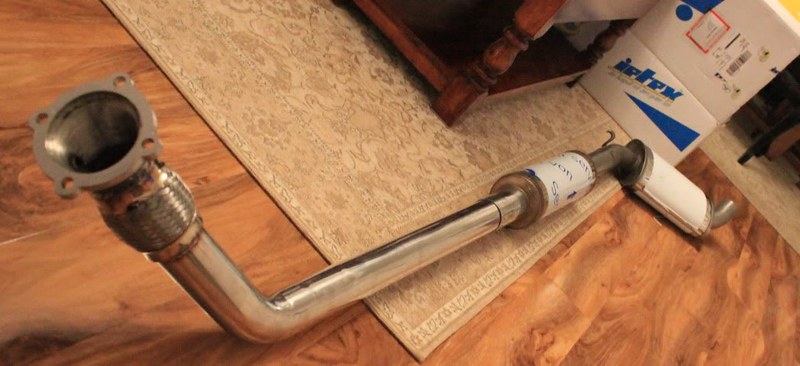
Typical cost £200 for downpipe from either Qpeng or Trackslag, £50 - £350 for rest of the system in stainless
Brakes!
You're going to put a fair bit more power through your mk2, so you'd be a bloody fool not to improve the brakes while you're there, I've already written a guide to stopping...
http://www.vwgolfmk2.co.uk/viewtopic.php?f=37&t=17&p=18#p18
But in this case, you may have issues with master cylinder clearance, an option is to run a seat 'stubby' master cylinder. Apparently the reservoirs are a pain to get hold of though. You can fit the normal 22mm master cylinder (and I did) but you'll have to drop the engine down a little at the front, which I 'll cover in the next section...
I swapped the hub so I could run 280mm brakes using the normal 16v master cylinder
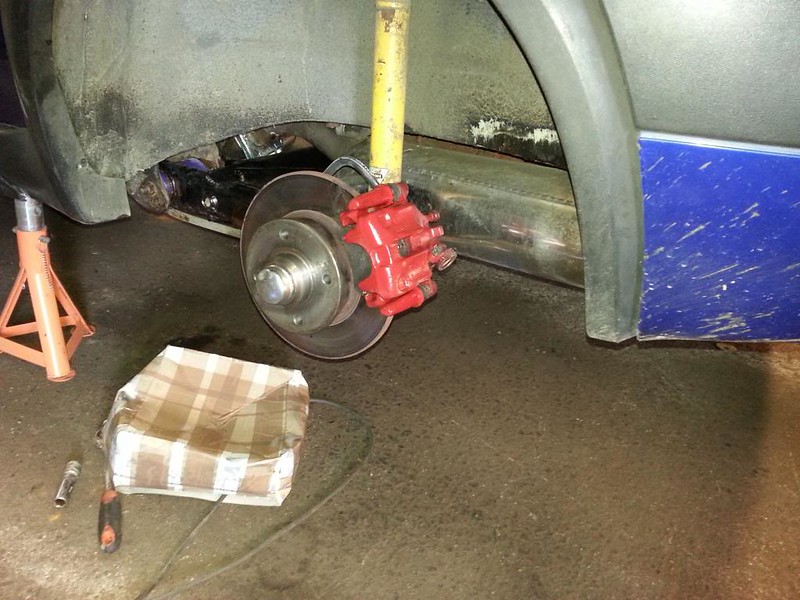
Typical cost of overhauling front brakes £150
Getting the engine in the car
So you've got the engine and the box together, got the loom modified and in place, the shifter ready and the exhaust fitted, next you have the fun part where the engine goes in. However, most of the 20v engines have one mount on box, one on the side of the block by the cambelt and a dog bone one at the bottom rear, none will fit the mk2 subframe. Well the gearbox will fit straight onto the subframe without any issues if you get an 02A bracket and bolt it on. The front engine mount will be taken care of by using a Corrado 4 pot engine mount bracket. I'm pretty sure that any mk3 02A front bracket will fit as well as the boxes are pretty much identical where those bolt holes are concerned, can't say 100% as I didn't use it in this conversion but I'd say it's a safe bet. I heard the rear mount bracket should be a Corrado or Passat item, so I fitted one of those. Seem to push the engine a little further forward to help square it up, but not by much.
Once the brackets are taken care of you can fit fresh mounts, a G60 rear mount will fit up to a mk2, as will the gearbox one. For the front, I'd say it all depends on what master cylinder you want to run, I'm a fan of the solid T-Mount, so if you're going to fit a stubby master cylinder, a normal T-Mount will do. If like me you want a normal 16v master cylinder, I found a VR6 T-Mount very useful, you have to re profile the top to match the front bracket I mentioned above, but once it's on, the engine will fit and not foul the master cylinder.
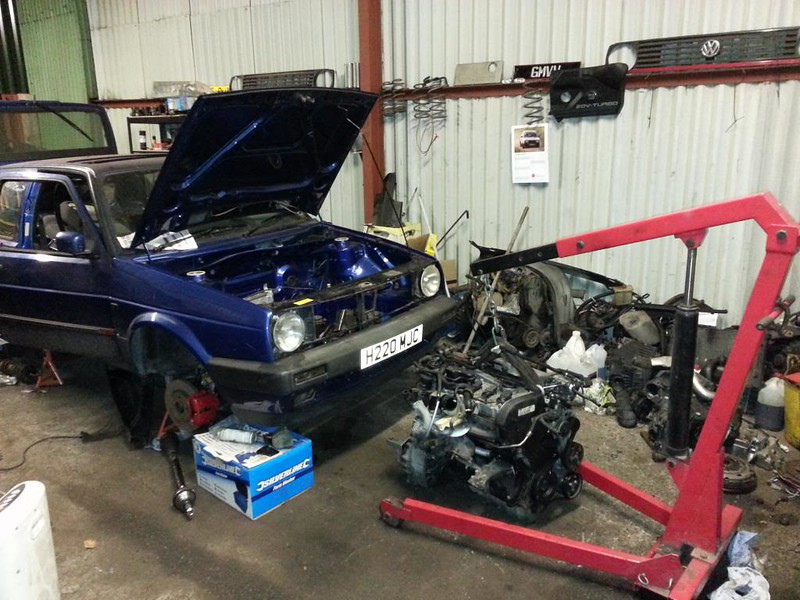
Typical cost for various brackets and new mounts £200
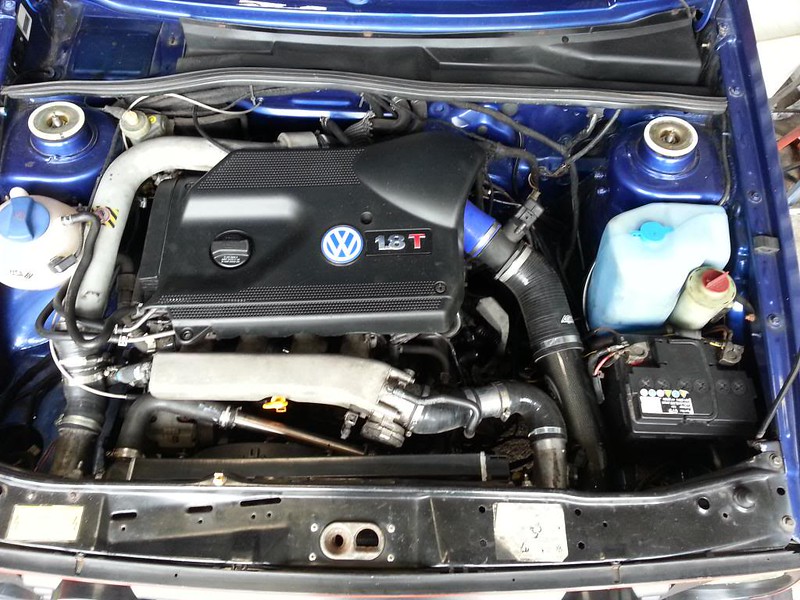
Coolant/Induction Systems
So now the engine is in the bay and connected up, you need to get the coolant around and the inter cooler piped up. I found that a 16v radiator fitted up very closely to the original mounts and the bottom coolant pipe fitted straight on. The top was a case of extending the pipe a few inches as you can see in the right of this picture...

In the middle of the picture, you can see the relocated header tank, done quite easily by modifying the mk2 tank bracket and bolting it to the off side turret leaving all the pipework as VW intended.
The next system is the induction, be sure to buy a filter that won't upset the MAF as they're delicate and the wrong choice of filter can leave you £70 out of pocket for a new one. As for the intercooler, there are literally hundreds out there to choose from and your choice of engine will effect which intercooler setup you need. So all I can really do is advise against the setup I chose: That was using an Audi TT inlet manifold and crossover pipe, this allowed me to use a normal intercooler (as opposed to a twin pass) being cheaper and easier to fit in the bay...
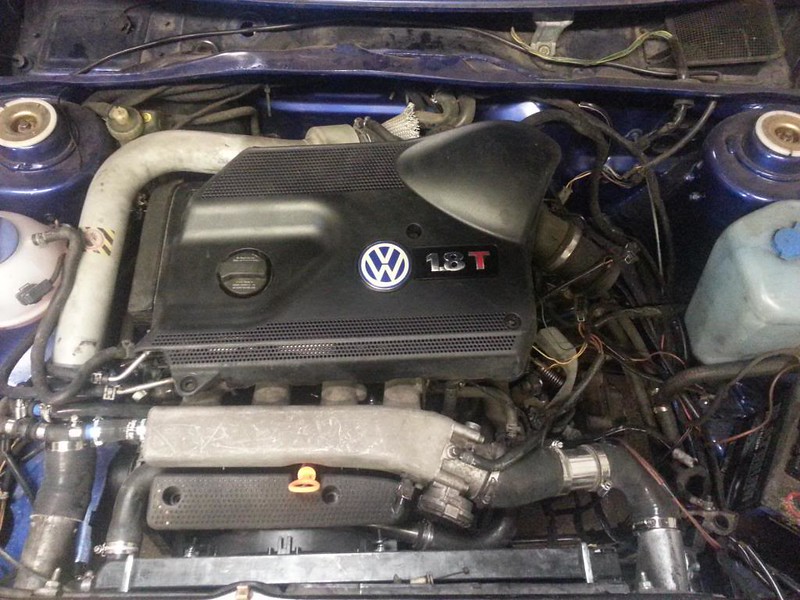
Typical cost for induction kit, radiator, pipework and intercooler £300-£450
So by now you should be ready to fire it up, chances are there'll be bits and pieces that will need attention, maybe another £100-£200 but the vast majority should be done. As I stated at the beginning, this is all based on my experiences and research and there are probably better ways to do things. I'll probably return and write some things up in greater detail, such as the pedalbox and wiring guide.
Either way, if you're still reading, hopefully you've got a better understanding of what's involved in a 20v conversion :thumbs:
Cheers
Dave
 Topic: Monkeys guide to 1.8ting your mk2 (Read 40002 times)
previous topic - next topic
Topic: Monkeys guide to 1.8ting your mk2 (Read 40002 times)
previous topic - next topic