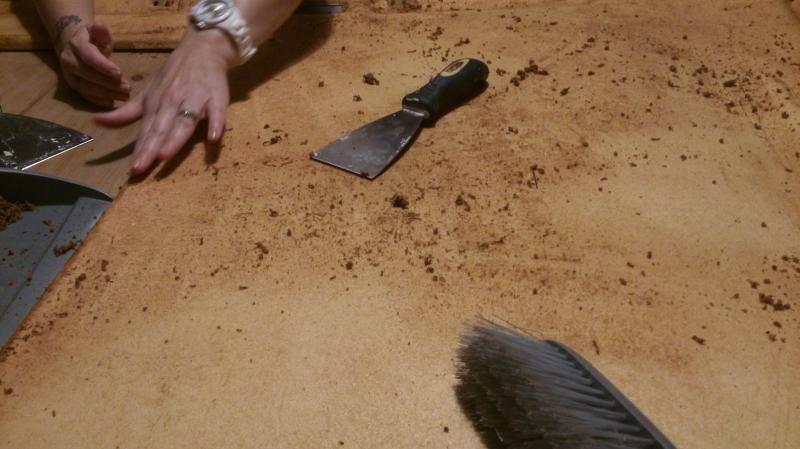
You should fine the glue has pretty much dried up and evaporated leaving the perished foam behind. It should brush off, a stiff brush as found with a dustpan should be ideal. And glue residue can be rolled off with your thumb or fingers.
I would avoid any kind of solvent, I would expect it to dissolve the backboard but if needed try a small sample.
Useful pic, I couldn’t tell from the heritage link how big it was. I thought fitment would probably be obvious once you’re under the car. Would you say this is a worthwhile part to have? Does it feel like it’s formed up the bumper/splitter?
I started this just for fun on the old forum, so I thought I’d bring it across. Sorry to anyone that posted before, I haven’t copied over your posts.
I’ve made a list of the various vehicles I've owned. In chronological order starting in 1990 when I bought a 13 year old TR7 as a fixer upper whilst I was just 15 myself (A month before my 16th) - 2 years in the garage and ready to drive when I was 18!
1977 Triumph TR7 1982 Yamaha DT50MX 1981 Suzuki GP100 1977 Yamaha RS100 1981 Datsun Cherry 1981 Mk3 Ford Escort Van 1990 Peugeot 405 GD 1994 Mk5 Ford Escort LX 1987 VW Mk2 Golf GTI 8v (GTi Engineering) 1980 VW Scirocco (For the gearbox for ^^^ ) 1990 BMW 318i lux touring e30 1999 Peugeot Speedfight 100 1997 Yamaha YZF Thundercat 1997 BMW 318i SE e36 1988 Yamaha FZR 1000 Genesis 1997 Vauxhall Omega Estate 1989 Ford Transit SWB 1993 Kawasaki ZZR600 E1 2002 Ford Fiesta 1.6 Ghia 2003 Seat Leno 1.6s 1997 Kawasaki ZX-7r P2 2001 Kawasaki ZX-9r E2 2008 Ford Focus Zetec Est. 1986 VW Mk2 Golf GTI 8v 1993 BMW e30 318i lux Touring 1993 BMW e30 316i lux Touring - parts car for the above 1988 VW Mk2 Golf GTI 8v "one in ten million" 2003 VW Mk4 Golf GT TDI PD130 2004 Honda CRV - was given to my wife by a friend, nothing to do with me! 1971 VW Beetle 1302S 1980 Suzuki GS1000G 2006 Audi A3 2.0 TDI (170bhp mapped to 210) 2007 Polo 9n3 1.4 S Petrol 2005 Kawasaki ZRX1200s 2006 VW Mk5 Golf GTI 2.0 TFSI DSG 1991 VW Mk2 Golf GTI 8v
I don't think I've missed anything out.
I've also had a couple of JetSki's Kawasaki 400 (with a custom sonic the hedgehog paint job) and Yamaha Superjet 650 - awesome machine.
2 x banger racing cars (Mk2 Escort and Chevette) and long term borrowed or had shares in a mix of other vehicles including: Series 2a Land Rover LWB Safari Hillman Avenger Shocking choice in vehicle Viva Estate (Which later got banger raced by my mate when I had the chevette. And shared a few off-road bikes.
I bought a NOS rocker cover from VW classic parts in Germany. It came in satin black and looked very much like the black protective paint new panes come in, so just a coating really which is probably why they’re all rusty now. I prep’ed and painted gloss black. I knew it wasn’t OEM but was a nicer finish.
However on one of mine, there appeared to be silver paint flecks left in parts that hadn’t fully rusted so may have been silver from factory???
The current 2 wheeler, owned since the January 2019.
So I've had this for a couple of weeks now...
And although the weather has been absolutely atrocious I've still managed to put a few hundred miles on it already and loving every minute.
Even though it's basically got a small car engine in it, 1200cc 16v, It's not the fastest bike I've ever owned with only 10.9 seconds for a 1/4 mile and a top speed of just 160mph but hey ho ... that's probably just as well.
Well this kind of thing doesn't happen everyday, but the guy that bought this off me has just been in touch and sent me this pic... fresh paint, factory decals the correct year (earlier) indicators and lots of polishing!
Anyway I guy messaged me, then nothing. Then he followed up, "sorry been a way - but interested" we exchanged numbers, then nothing.
Then yesterday out of the blue I got a text. Had family stuff going on but back on track and wanted to see the bike. Was local to where I work and I just so happened to have been on the bike that day so he came over, met me at work and looked round the bike in the office car park.
No offer, had to judge what he thought but said he's get back to me.
Text this morning, slept on it and wants it! :clapping: a smidge off the asking price but I'm happy with the deal. Money and bike still to actually change hands so I guess either of us could back out. But that's basically it.
A good 18 months, and just over 5000 miles completed. Time for the next chapter... watch this space.
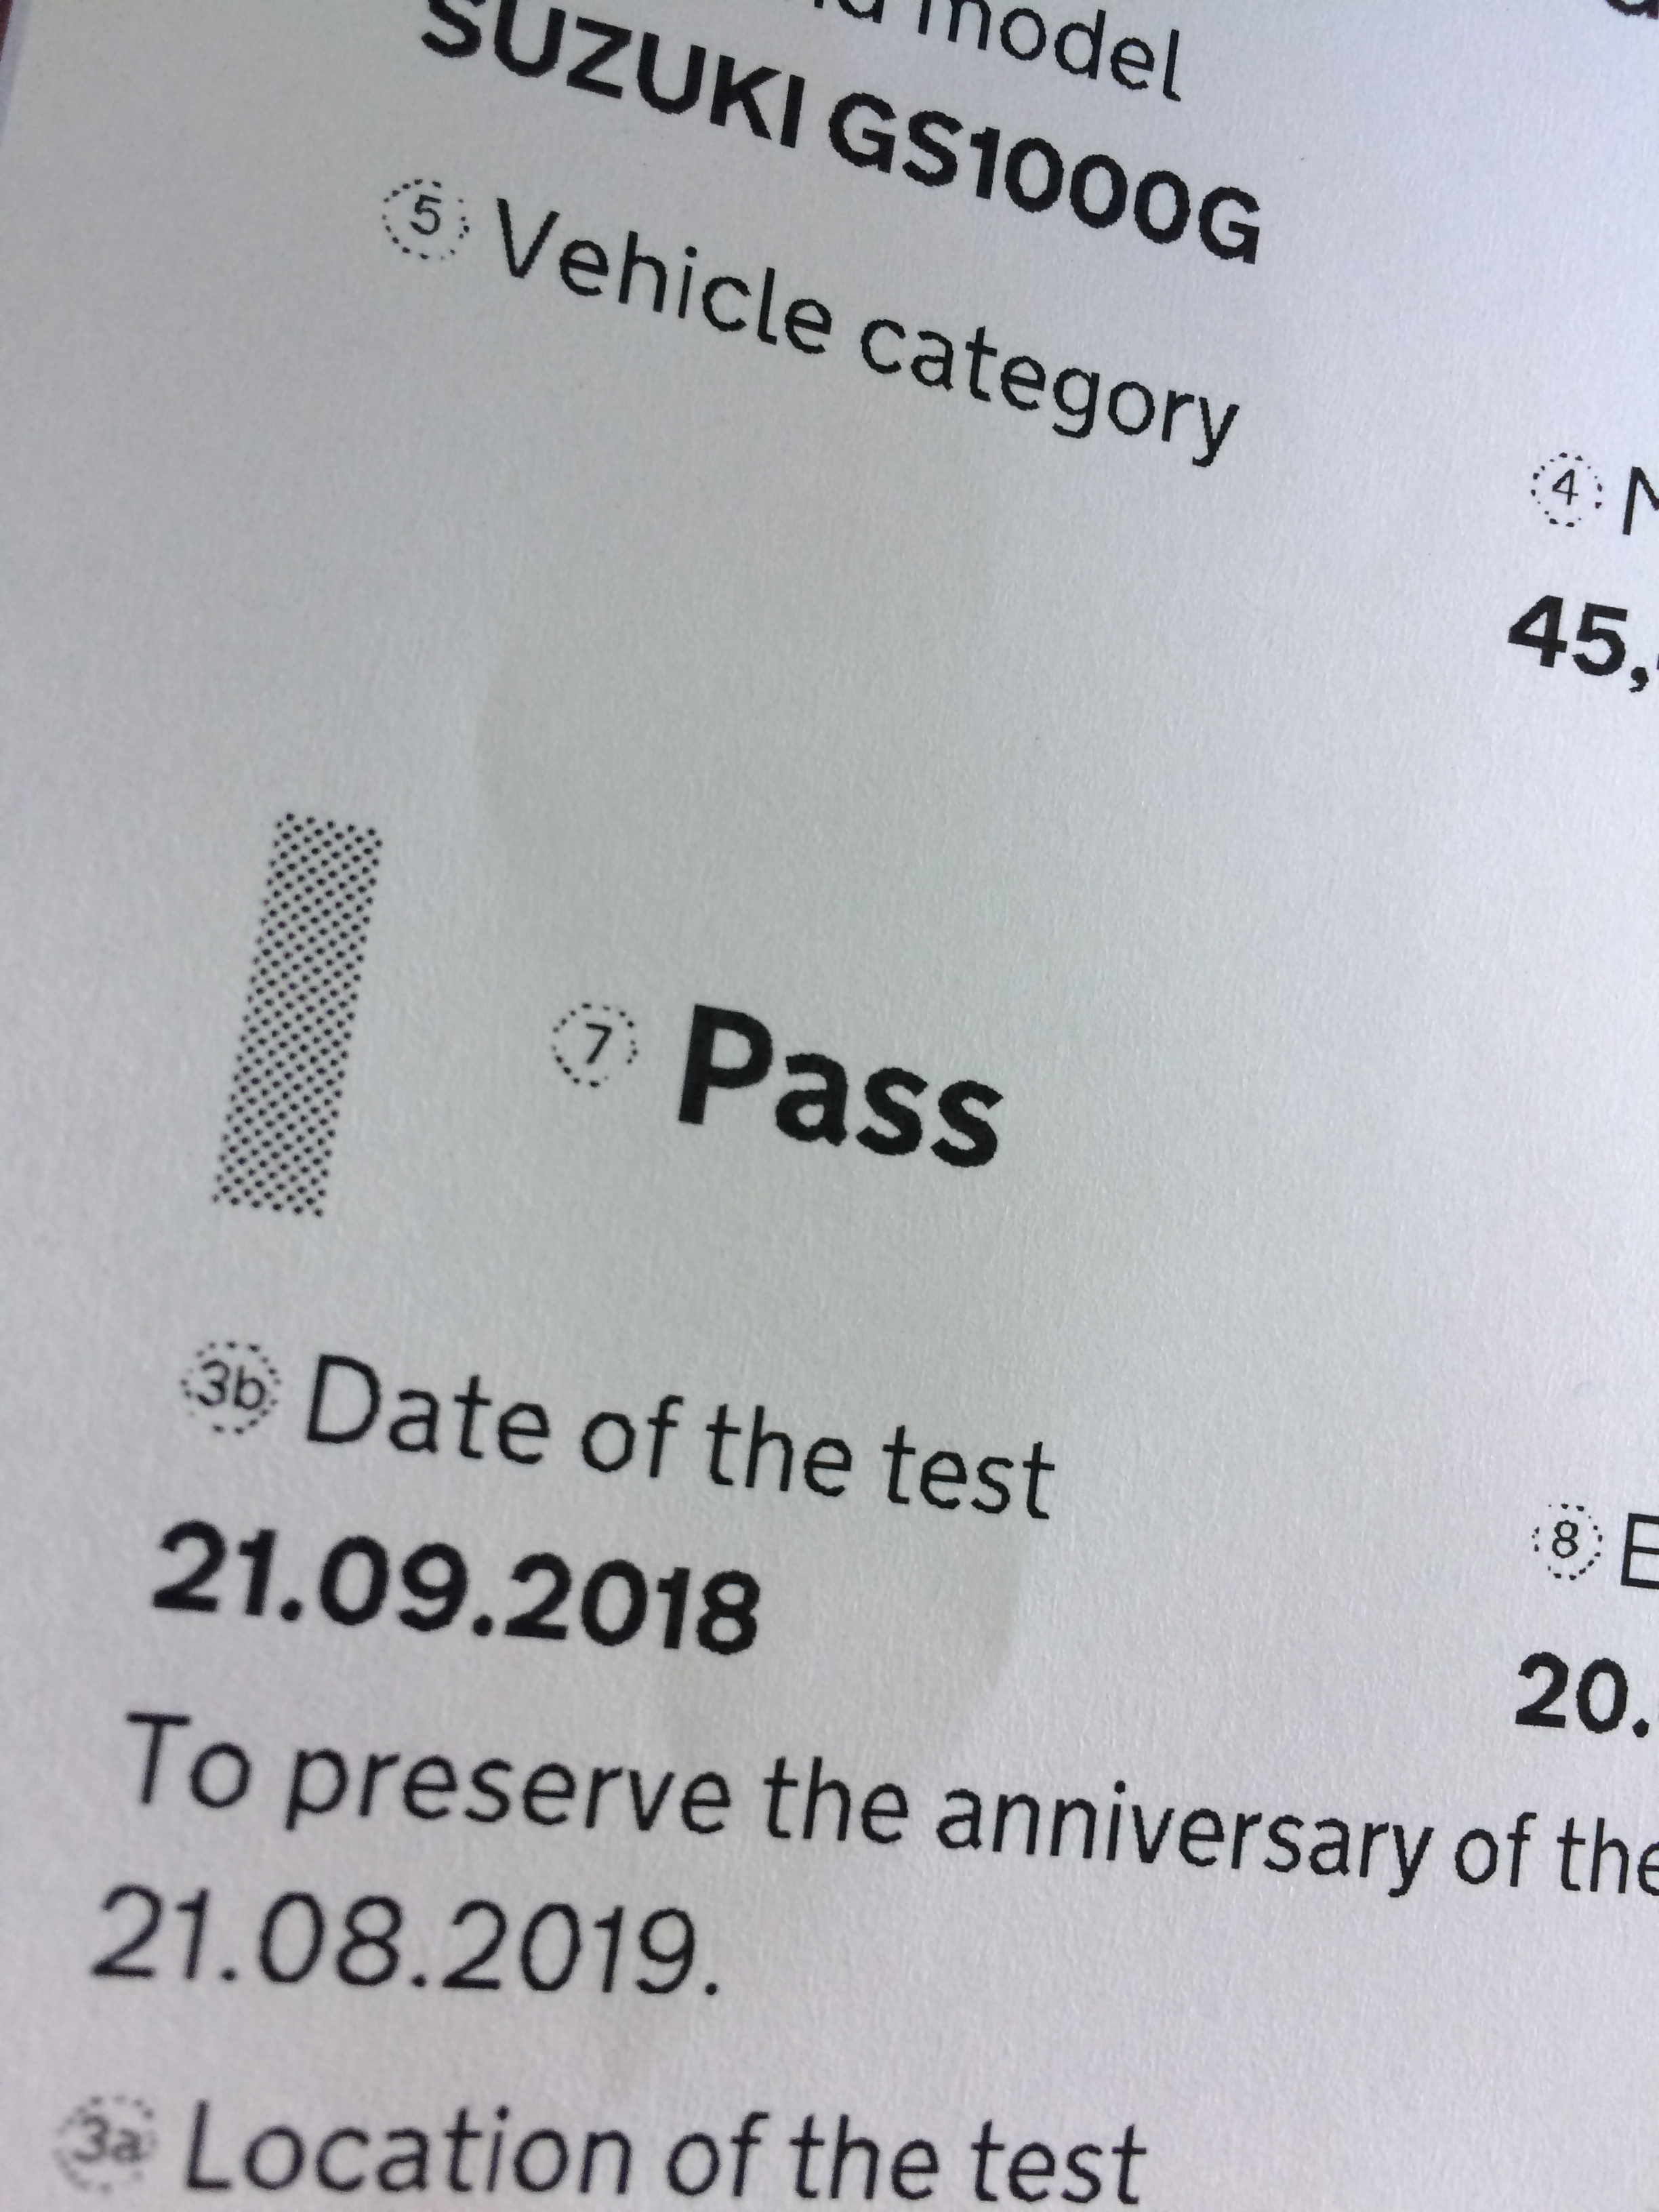
A year of ownership now! and just got it through it's first MOT of my ownership, as the place I bought it from put a new MOT on it before I bought it.
I've done a fair bit of work on it over recent months, after the top end rebuild I've then done the fork rebuild and now loads of rewiring.
And it would have been a clean pass although the fuse blew when the tester tried the horn. Knocking out indicators, horn and brake lights. Replace the fuse there and then and it went again.
So had to take the bike away with an DANGEROUS: FIX NOW note attached to it. Got it home fixed the problem and took it back for a same day retest. But an annoying blemish on the MOT history.
The issue, from when it had the fairing on the PO had extended the horn wires to re-position the horn I guess to allow the fairing bracket to fit, this extension was fitting badly ... so I unwound the cloth tape removed the crappy extension put the horn back in it's original position and connected up original spade terminals onto the horn.
Pleased to say the failure was not related to any of the work I had done, this was an area I had left untouched. I tested the horn and all the lights before I set off for the MOT station, just my luck that it must have dislodged on the 'long way round' ride I took to get to the test.
And took it to Bristol Bike show a few weeks back...
here's a pic FinalD snapped of it, next to my lads little 125.
that was short lived... I broke it
Quote from: Damien.wrl
Something simple ??
In a round about kind of way, in the end yes!
As mentioned in the MOT saga, when the dodgy wiring on the horn blew the fuse the garage gave me a handful of fuses....
Well at the road side when I looked all the fuses there were none that had blown ... as this was my initial diagnosis
What I didn't do at the roadside was actually take the fuses out and inspect them... this one had fallen apart
It was for the main ignition system so EVERYTHING failed.
Simple fix, back up and running, rode it round the block and picked up a nail in the tyre :twisted:
Quite likely from outside my Dad's garage as I popped round to see him. :sad:
To near to the side wall to be fixed, but needed new tyres anyway front was 2011, rear was 2007, both showing signs of cracking in the sidewalls due to age, but loads of tread still as very little use over the past few years.
However due to the unpopular size it took a week to get them ordered and fitted. I saved a bit of money on labour by removing the wheels myself. First time with a shaft drive - which was fun - but quite simple really.
FLYING...
With the wheels off I noticed there were three retaining tabs for the rear drive that were worn, but managed to find all three parts in stock (they had four) from the main dealer for under a tenner. That's the first time I haven't had to source parts from America or Japan for it!
I also took another crack at the fork seal, requiring me to buy the correct tool this time, as it was still weeping after my initial replacement.
Just need some time to put it back together, there's still going to be a few days left this year that I'll be wanting to use it but I've had so many frustrating days when it's been off the road for one reason or another.
November 2018
Well this one's earning it's keep today. Since selling the Audi we're down to one car and a bike (well since I haven't fixed the Polo yet anyway) and today Carole has to go to college to so gets the car.
So even though there's weather warnings for string winds and flooding I'm on two wheels! At least the rain means the temperature is up a bit, was -2 deg last week when I was on it :shock:
Not ideal conditions for a chrome clad classic, and I'm sure some people will be ... :eek: but at the end of the day, it's transport and I need to get to work.
Although, I have tentatively advertised it for sale in a few select locations. Just out of interest really but if I get any sensible bites I will most likely get something more modern again and more suited to my daily requirements.... and with less polishing!
I no longer own this, but wanted to keep the record.
September 19 2017
So for those that are Facebook friends with me you may have already seen this, but for those that haven't hears my new buy.
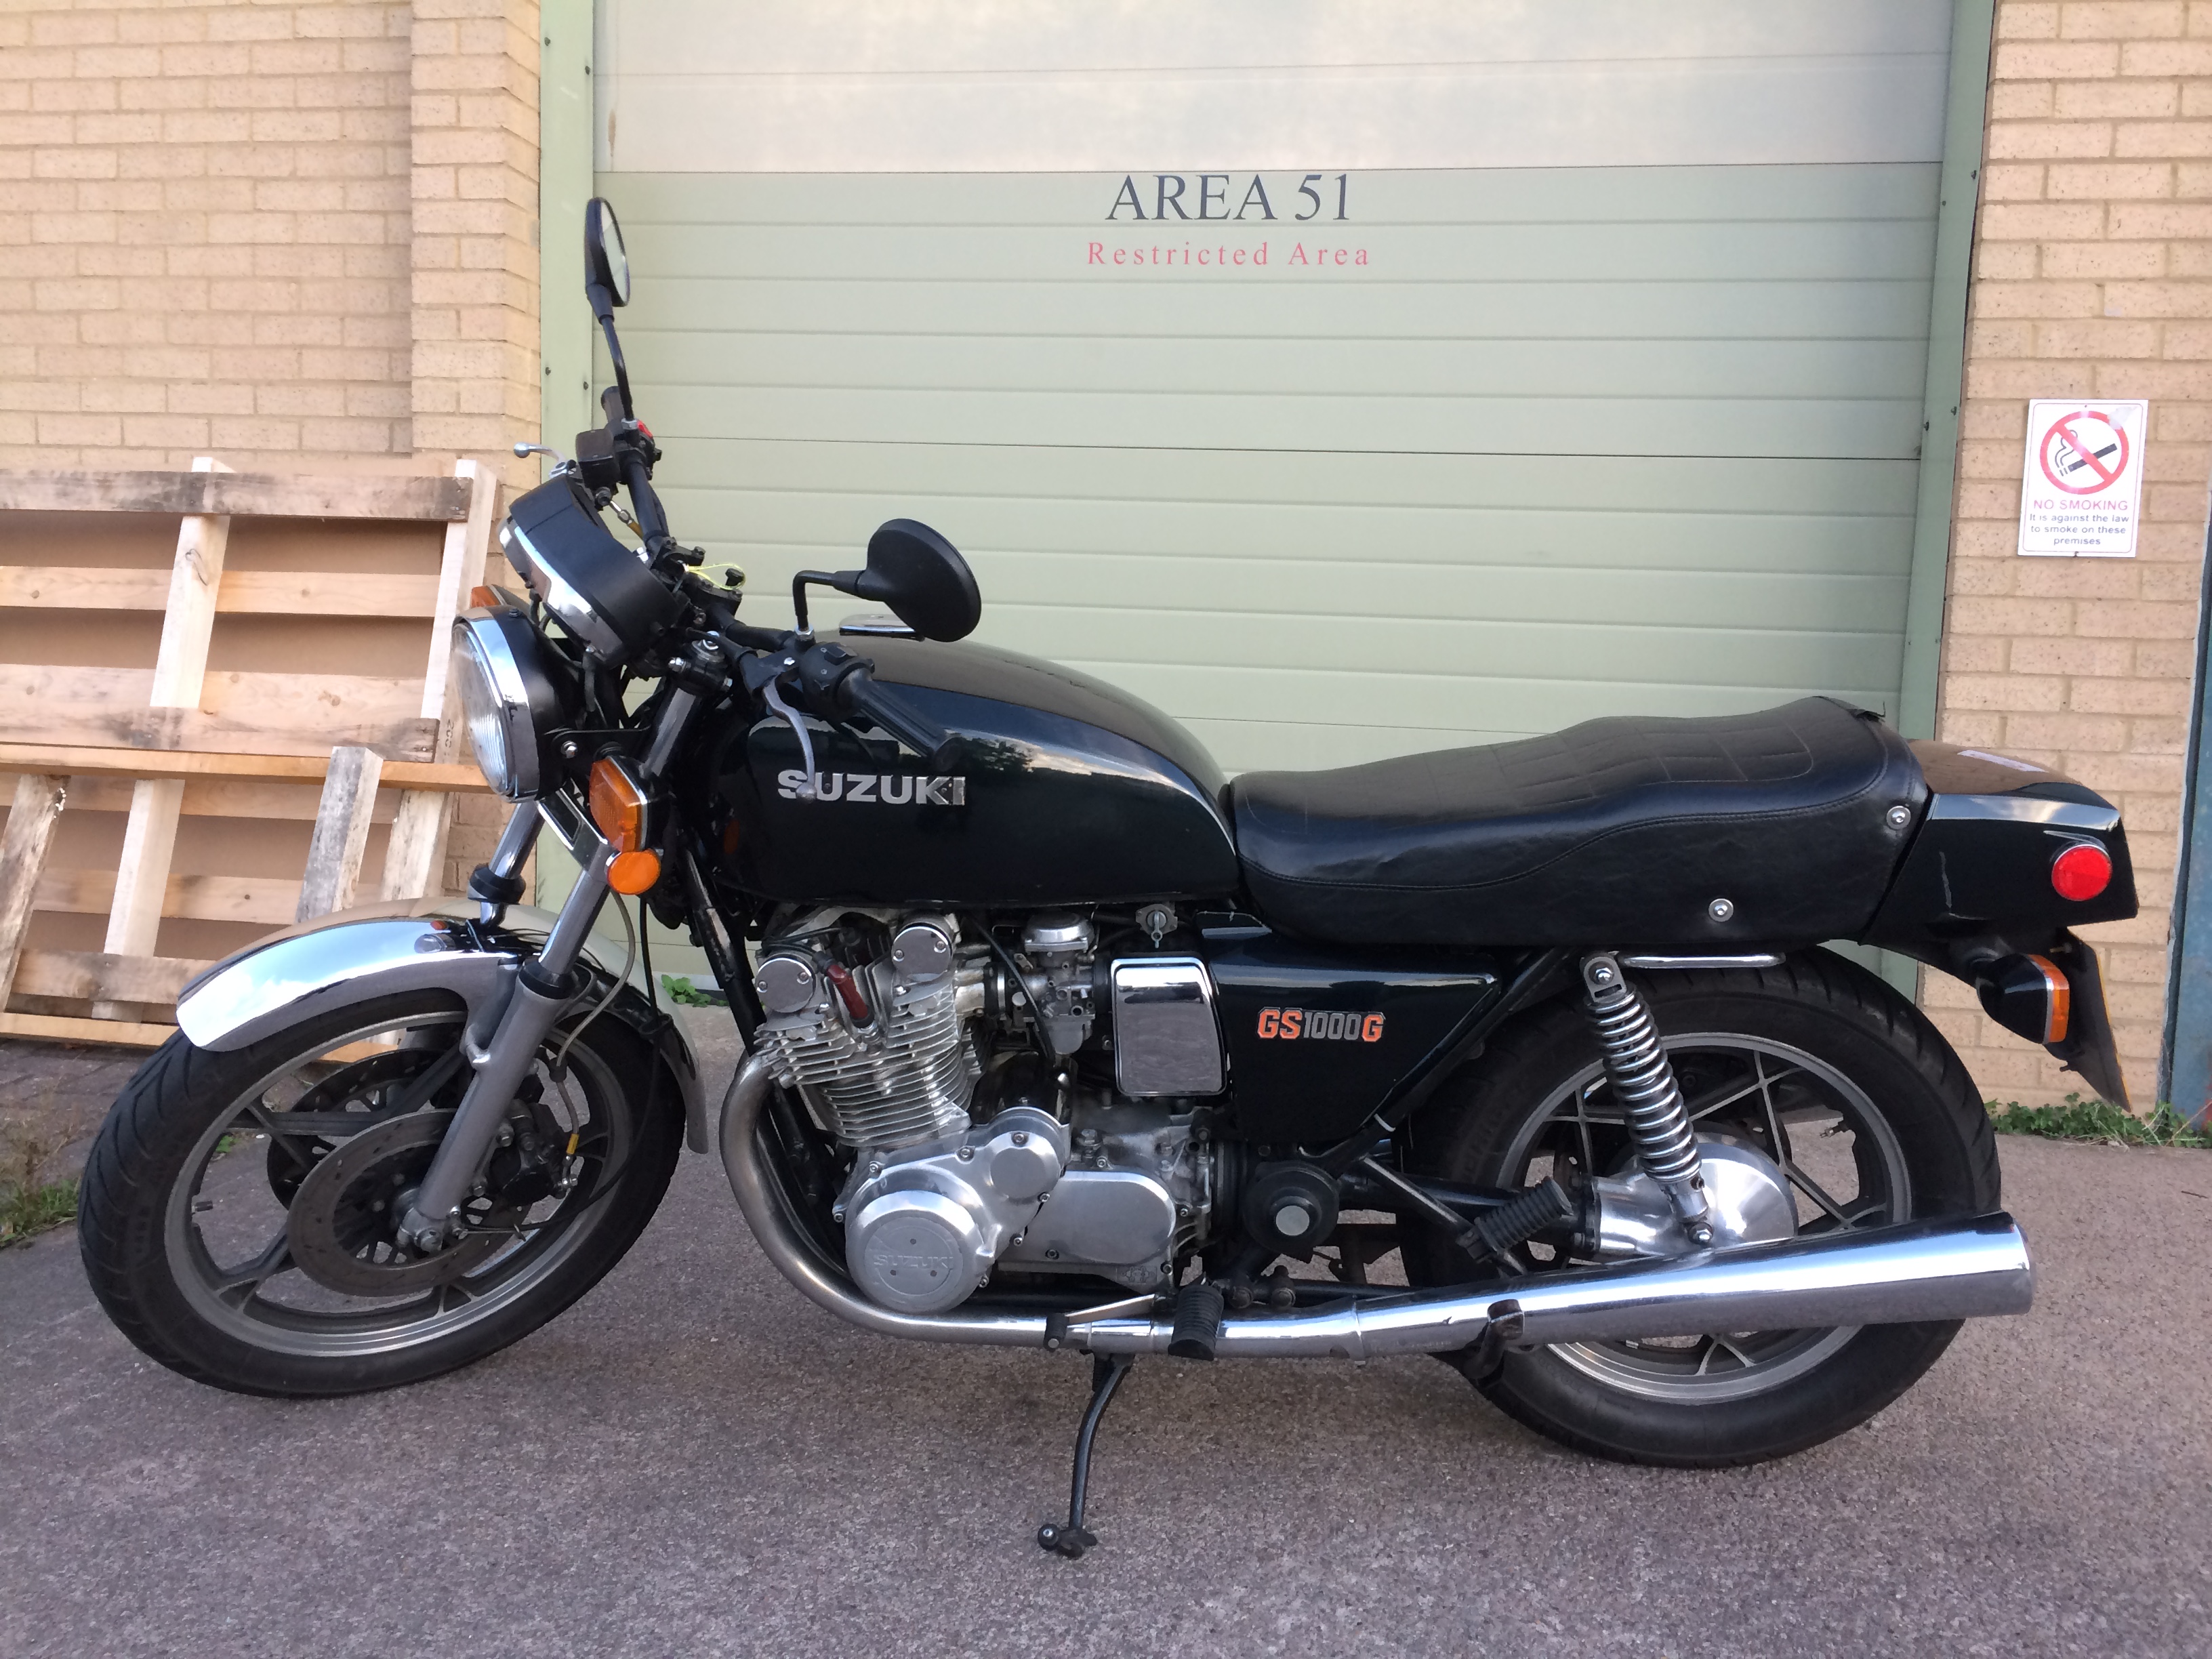
I know it won't appeal to many of you but hey-ho. It's a 1980 Suzuki GS1000G. The GS1000 was Suzuki's first 1000cc bike and aimed at the export market because at the time the biggest bikes aloud by law in Japan were 750's - the poor guys, making them couldn't even have them for themselves :shock:
Back in the 70s and early 80s the big four; Honda, Suzuki, Yamaha and Kawasaki were extremely competitive and as a result each new bike put out out did the last one. So for a while, this was the fasted production bike on the market ... till the next one was released :lol no:
Anyway, this one was destined to USA, the G model was shaft drive and had a larger fuel tank aimed at the tourer market. I gather it was available in the UK but not so popular so quite uncommon. The bars are also more upright as that's what the Americans prefered so I will be swapping those.
The panniers and fairing are aftermarket stuff designed by Craig Vetter http://craigvetter.com/ apparently popular at the time and very expensive:
I've been watching this bike for a while, and I suspect it's these add ons that were the reason it was unsold and why I managed to get it for such a great price.
Luckily it came with the standard headlight and indicators and all the fixings. So within a couple of hours of getting her home (even though I'd been to the chiropractor that morning, was aching like hell and had just ridden the behemoth home for an hour, so should have been resting...) she looked like this.
A little later like this, then I realised I didn't have the plug or the loom for the headlight bulb.
Here's where the old Mk2 Golf Breaker comes into play. Buried at the bottom of my parts pile in my shed I have a box containing the full wiring loom from an 8v. Although slightly reluctant as it was a complete loom I decided I could sacrifice a H4 connector and a few inches of wire.
So back in the lounge in front of a bad Dwayne Johnson film (San Andreas) I made up a little loom that would plug into the exisisting wire so I didn't have to cut any of the original plugs off. Leaving the film playing to an empty room - Ok, 2 sleeping dogs - I popped back out the garage and by 1:00 this, with front end all sorted and rear rack all removed and back indicators re-positioned to their original location:
Not the 180kg / 160bhp of my last bike. More like 230kg / 90bhp but it's still got a fair bit of grunt and is less likely to get me in trouble.
Managed to get a few more mile on it Monday, and stopped for some pics in the sunlight:
Then got home and gave it a wash and polish:
The black paint has actually got a green metallic in it which is pretty cool when the sun hits it:
And have rode it into work today :thumbs:
Now this does mean no Mk2 or a little while, but like all things 80's there's a reasonable market for these and they're few and far between. Odd that no one else had the foresight to buy it and take the touring kit off, end of selling season now really but I recon I could resell it now for more than I paid and if I wait till spring I could probably make a grand straight off the bat. That said planning to hang on to it for a little while but ultimately this is a fair chunk of my next Mk2 money so better to have invested it like this and get some enjoyment in the meanwhile rather than have it sitting in the bank.
Original thoughts were cafe racer, but the whole essence of cafe racer is lightweight speedster, when I saw it I knew that wouldn't work as there's nothing lightweight about this. It would just look too bulky for a cafe.
So thinking I'd use the weight and bulk as the focus on build more of a naked muscle bike.
But I'm also liking the classic look and wouldn't want to change it in any ways that can't be put back to original. So for now just flatter bars to make it nicer to ride while I work out what to do and scrape some cash together.
February 20 2018
So just for a bit of an update on this one for those that might be interested. The bike's been parked up since the end of October.
I put about 500 miles on it when I first got it, but oil was leaking from the head gasket. It had been rebuilt previously and I gather the follow up maintenance may not have been carried out to recheck the bolts afterwards. Everything was loose! So I've had to give it a thorough going over.
Even though the model was available in the UK support for it seems to be quite poor, it seems they were a lot more popular overseas. As a result I've had to order a full aftermarket gasket kit arrived from Japan, and I found a NOS head gasket from the states but was damaged when it arrived so I had to find another one, again from the states which arrived safe and sound - eBay refunded the first one.
I did manage to get some parts off eBay UK.
You might think it's a bit of a faff gathering all these parts from around the world, but I have to say it's saved me a small fortune compared to what a Suzuki dealer would have charged. Plus some of the parts have been superseded and reports say the new parts are not a good hence why I've tracked down NOS mostly.
I was off work over Christmas but didn't get chance to pop out to the garage as I had some decorating to do to keep the family happy. But I've just had a week off work, did some more decorating, but did manage a couple of sessions on the bike.
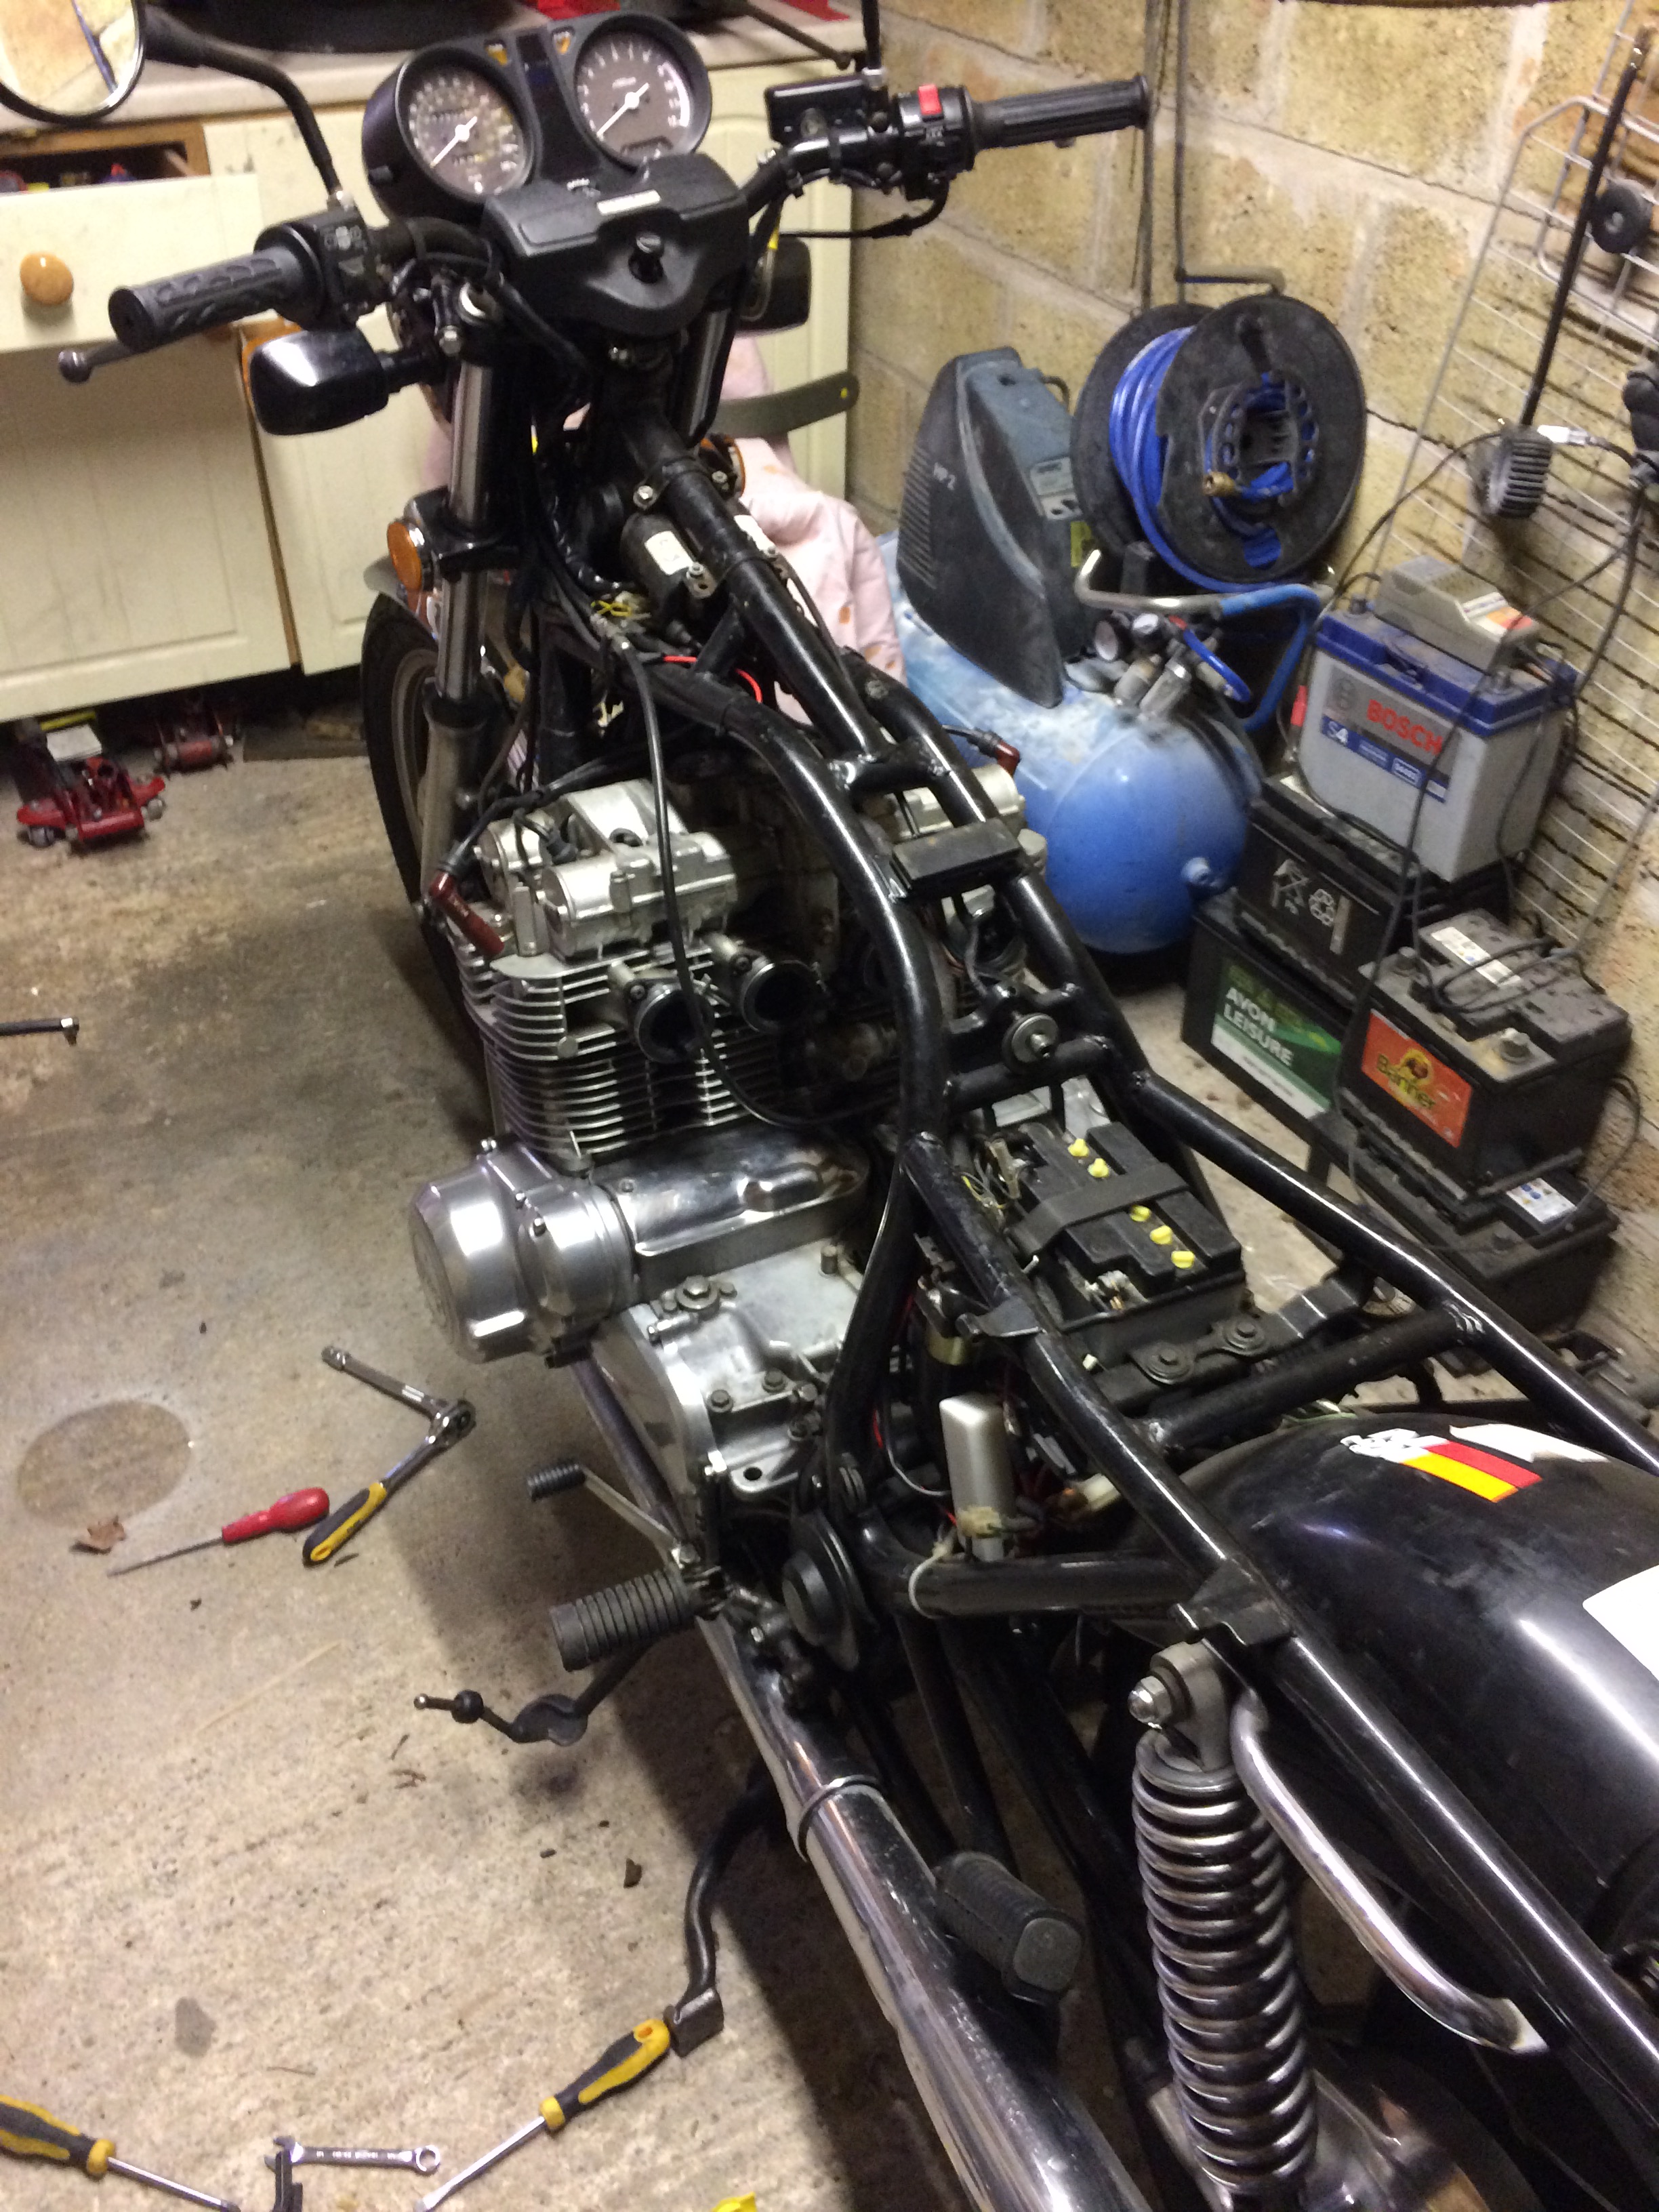
so it started:
and before long looked like this:
at which point I started getting very nervous having never gone this deep into an engine before, and then suddenly:
That was enough for one the first day.
So what did I find?
Well after market head and base gaskets for a start, which according to Suzuki owners forum is a big no no for these key gaskets (hence my worldwide search) and this:
There's a teardrop shaped O-ring which was there but had been sealed in with a little extra help. Is wasn't leaking obviously from this area but it could be seen to be damp on the edge of the gasket.
For day two I cracked out the over the top power tool:
To make these, as spec'ed in the Clymer manual (another US puchase, it's basically their version of Haynes). I had to work in inches!
After reading another thread where someone damaged the base gasket while fitting the cylinder I got a bit nervous again. But I wasn't convinced with fixing the gasket to the base of the cylinder and holding it in place with elastic bands as suggested. So I fitted it to the deck of the crank case, and cut out some cardboard to protect it, and with the wooden blocks and I have to say it was all very straight forward.
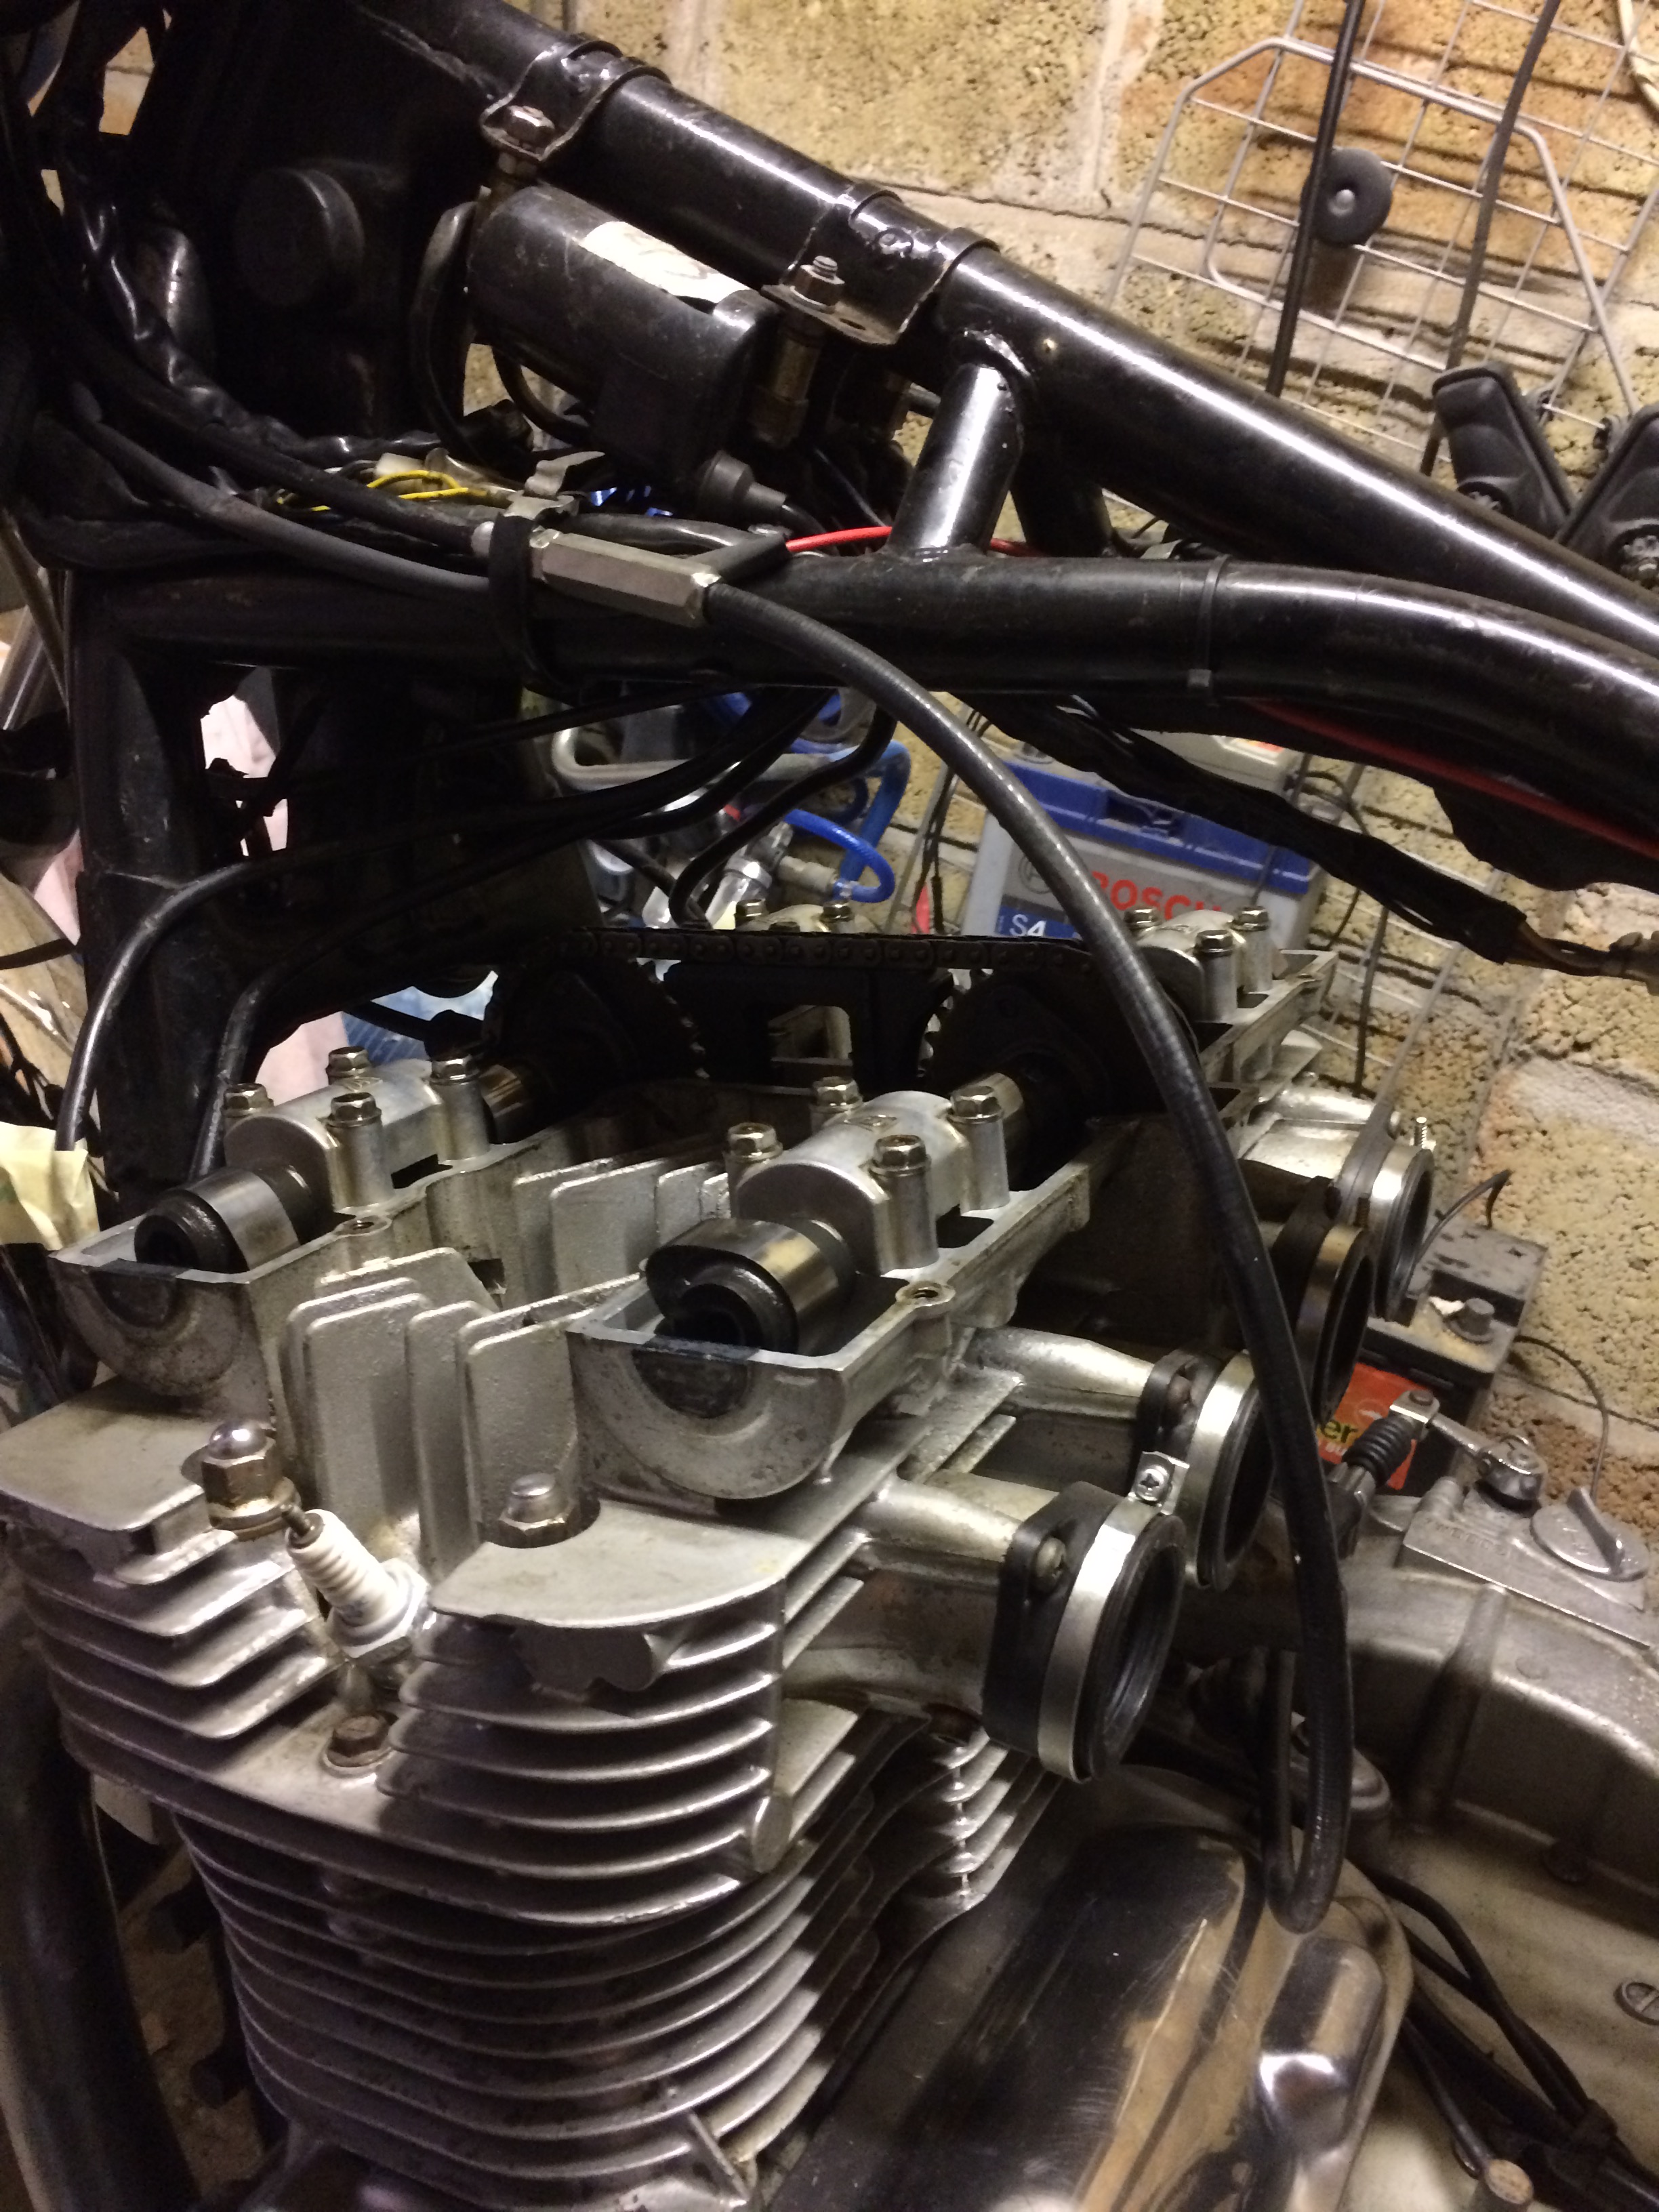
The valves looked like this after a bit of a clean up:
I then went ahead and fitted the head:
At this point the nuts are finger tight and the head is just sitting there.
And then had a change of heart....
I only have a large 1/2" torque wrench with a 30 to 210 nm range. The head bolts are supposed to be 36.6 or there about and I decided the range of mine was too wide to be that accurate. So I'm currently waiting for a 3/8" one with a 10-80 range to arrive.
I also thought, actually let's not cut corners, let's do this right. So I've ordered some lapping compound; course and fine, a valve spring compressor and some other bits and bobs. So when those arrive, hopefully in a few days I'll whip off the head, clean up the valves, pop them out, try and lap them in properly and fit the new oil seals since they came in the kit anyway.
Also ordered new plugs, a clean and recharge kit for the K&N filter and fresh oil and filter for when I'm done.
Can't wait to crack on, but also want to take my time do it right and hopefully do it once.
April 30 2018
Easter means for me 4 days off work. I also had a couple of days left out of my annual allowance that needed to be taken before April, so I tagged on last Wednesday and Thursday so I'm just back at work now after 6 days off.
So day one of my holiday I got up as usual, walked the dogs and by 9:00 am instead of being at work I went into the garage, I ignored the kids all day and apart from taking a pee I didn't go back it the house till 3:00 pm.
The end result, the bike is back together and running, all things checked and ready to roll.
New lower, wider handle bars fitted along with a new genuine Suzuki left hand grip to match the throttle side - you may notice in my other pics the odd grips.
On Thursday I took the kids out.... to the largest motorcycle showroom in town, and treated myself to a new crash helmet. An AGV K5-S in Guy Martin colours.
Friday and Saturday were family days and waiting, as Sunday was 1st of the month so I was able to pay my road tax and ride legally on the street.
So I went out for a test ride, only half hour but it was great after having the bike off road all winter.
And today, even though the weather is forecast to rain, extreme weather warnings in some parts. It was dry when I got up so I've ridden it the 30 miles to work. I'll worry about the journey home later - I'm not afraid of the rain, I just don't want to spoil all that shiny chrome!
Got a bit of vibration from the bars, they're ally not steel, but that could mean the carbs need to be set up better. Also exhaust is blowing as I had to leave out one of the header bolts as the thread was stripped. Wish I'd noticed while it was off, anyway helicoil kit on order.
But no oil leak from head or base gaskets. And nothing from the sump or oil filter too since having both of those off. So all in all successful I'd say. The starter has a bit of a clunk, I'm wondering if I've set the cam chain tensioner right? so not finished yet, but classic projects never are are they?
During the period of working on this, my MK2 failed and I bought a Mk4 GT TDI as an emergency daily. When my wife drove it she liked the mod cons, of heated seats, air con, a decent stereo etc. and decided she didn't want the e30 anymore.
I only drove it a very short distance after completing the work and driving experience was fantastic, it totally transformed the car having all the running gear refurbished.
The car was put up for sale, I ended up with a couple of guys fighting over it and one offering £500 over the asking price to secure it.
It was bought in the end by a film maker, than had been commissioned by BMW to take one of their old museum bikes to the Isle Of Man Classic TT to film a documentary. He was offered the loan of a brand new 5 series but he wanted to authenticate the documentary by having a period tow car, and he said he's struggled to find on is such good original condition that "hadn't been slammed, abused or on some stupid wheels" his words! :lol:
I heard it was put back up for sale once the film was complete but I lost track after that and I'm yet to see the film.
in addition to what I posted on e30zone, there was the breaker I bought, but mainly I left that out of my build thread as the guy I got it off was a member and I promised him I'd take good care of it. :oops:
but the almost bare shell at the end was bought from a lad down Devon way that was going to rebuild it back up to be a 325.
and finally, just some extra photos for good measure.
Oh and the final nut on the top mounts I did do the dreaded drop it down inside the car thing Eek but managed to retrieve it with one of those magnet tipped extending pen things, phew - that was close.
Slow progress... and not getting the time I'd like on it with other family commitments etc but...
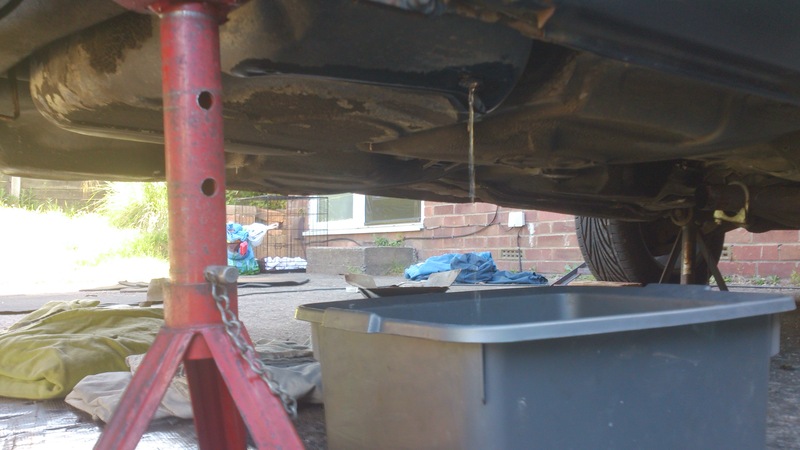
Got this lot dropped.
I remembered to undo the big not in the centre of the hubs and loosen all the bolts on the half-shafts to the cups before removing this time.
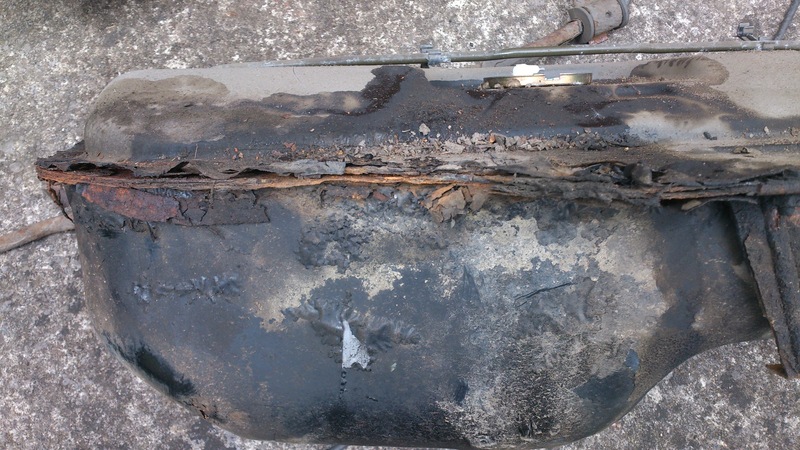
Also got the old tank out.... what a crusty old mess that was
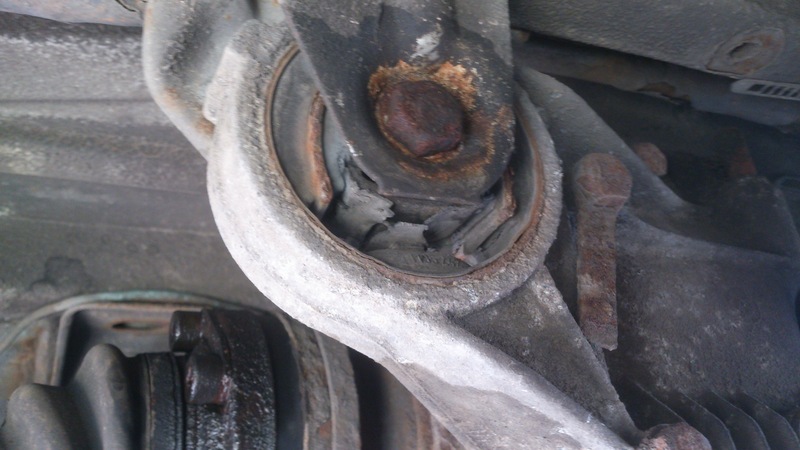
Ran into a couple of problems, on one side the centre metal section of the bush stayed attached, shows how knackered the bush was as it fell apart.
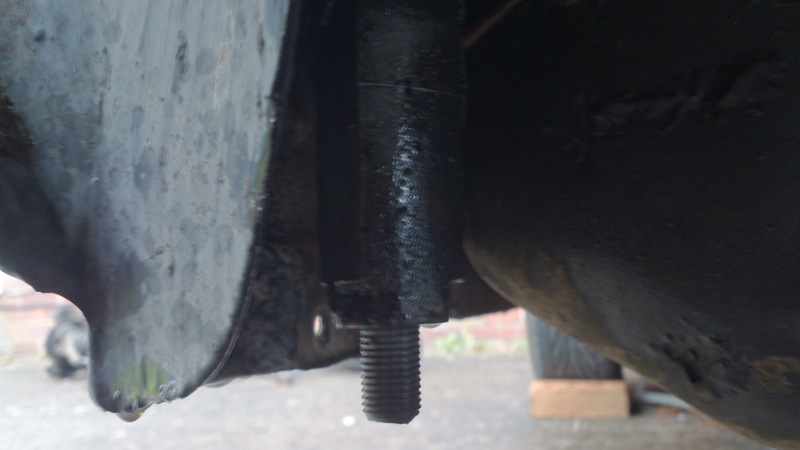
And one of the fuel tank bolts sheered off in the bracket, drilled it and tried to use an extraction tool, then the top of that sheered off in the remains of the bolt!
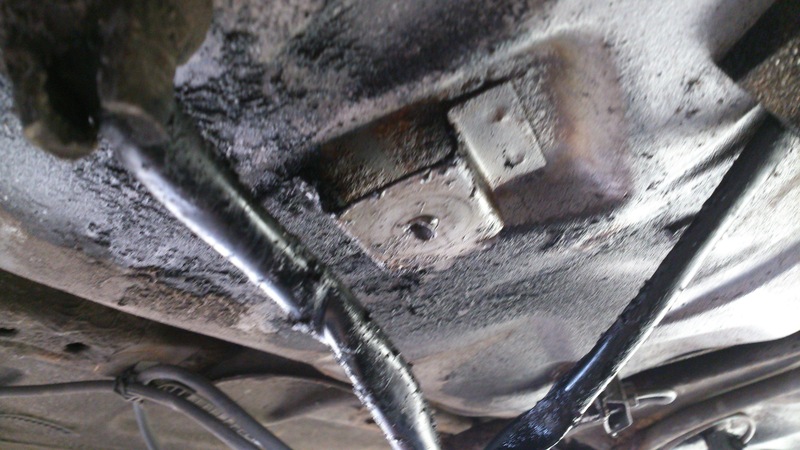
Not great, but pleased to see the general underside of the car is in great shape and no rust.
Getting there, just wish I could get more time dedicated to it. With just an hour or two here and there it's really dragging on.
New front bush
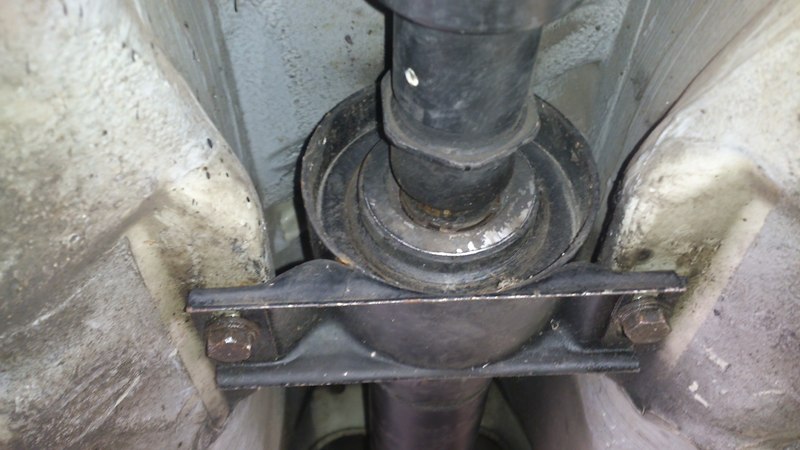
New prop bearing and mount
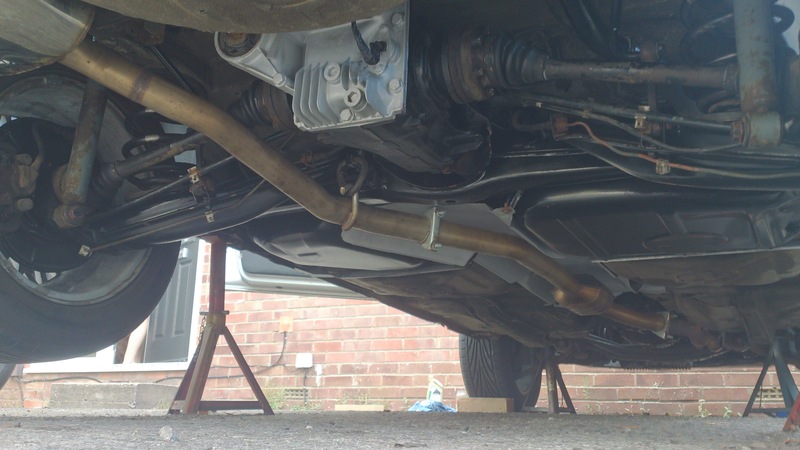
Prop, diff and half shafts are all back in situ but not fully bolted up yet, fresh oil in the diff. Suspension and brake lines all connected up ready for bleeding. Then fit the heat shields and finally the exhaust and should be ready for the MOT. Probably only a few hours left. But I'm away for a bit and with other commitments I might not get those few hours for another couple of weeks. It's so frustrating.
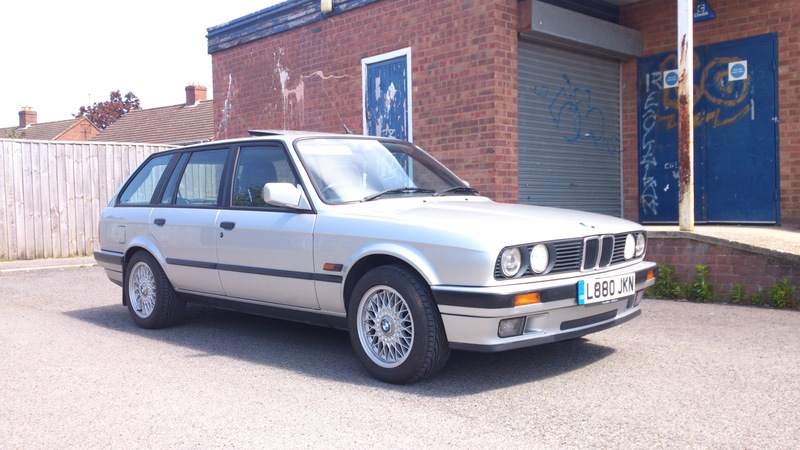
Finally all finished, back on the ground and took for a short test drive.
not forgetting new lock washers, which I know some people tend to not bother with
Nice and tight and exactly how I'd hoped it would be. Made a real difference.
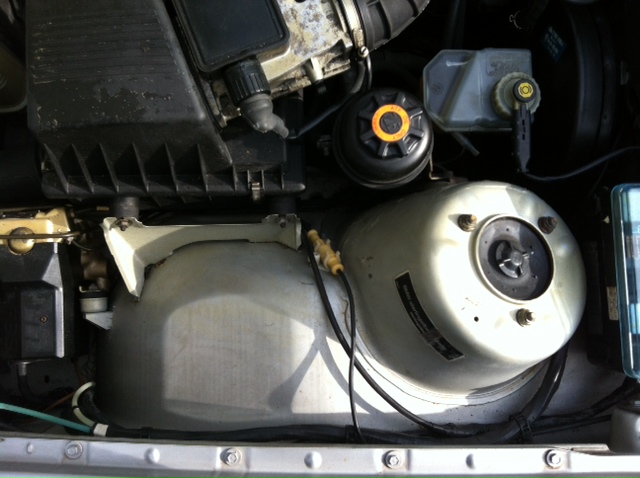
When I got back I left it to idle on the drive for a while....
then POP!
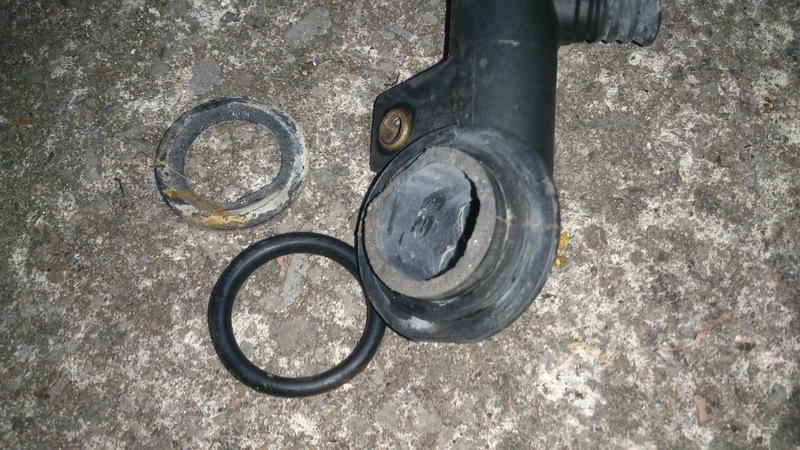
This coolant flange let go!
Gutted, and looks like a bugger to change :?
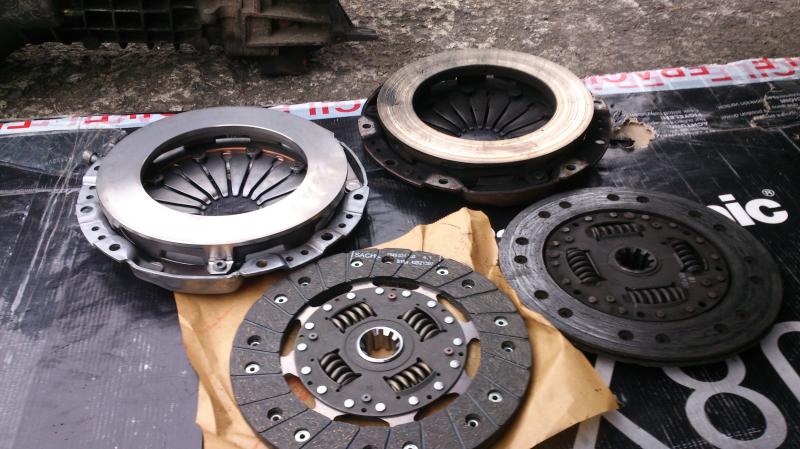
Well that was pretty knackered!
And I was told why it might have happened, when I did the clutch that would have put tilt on the engine and the pipe would have been under pressure from the end connected to the heater matrix.
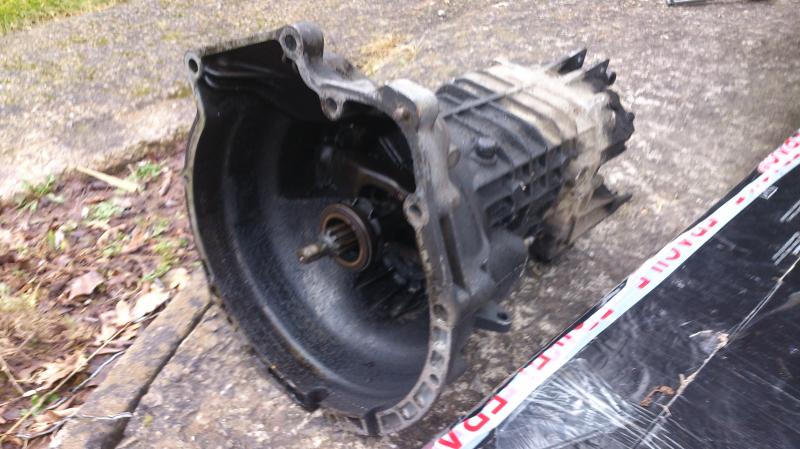
So lesson to anyone dropping the gearbox, disconnect the water pipes to the heater so no added stress is put on the plastic pipe.
I managed to get it out without removing too may items. I needed to do an oil change anyway and had the stuff so removing the oil filter gave an extra few mm
and I undid the bolts on the lower inlet support bracket and managed to leave the inlet manifold in place which I was very pleased about.
Forgot to add, when I dropped the oil I had to put a long breaker bar on to get the sump plug off. The crush washer had been crushed to a thin tinfoil disc. Unbelievable!
And in an ally sump I'm surprised it hadn't cracked.
the oil change had just been done when I got the car (backed up by clean golden oil on the dip stick, not just the word of the PO) so I'd not done it previously.
Glad to report a new crush washer was fitted and the plug tightened to the appropriate torque... and no leak.
Crunch time - MOT today.
The moment of truth after all my hard work and just got a call from the garage.
FAILED ... on emissions!
New Lambda Sensor due in for the morning. But if it turns out to be the CAT that's a new Stainless steel with lifetime warranty and the guys MOTing it are the ones that made and fitted it so the ball's in their court!
Just a bit annoying. I did all the stuff you can see. I didn't even think about emissions. As well as all the bushes, etc. New air filter, oil filter, oil and coolant. New plugs and leads not long ago. Fresh brake and pas fluid.... pretty much everything Cry
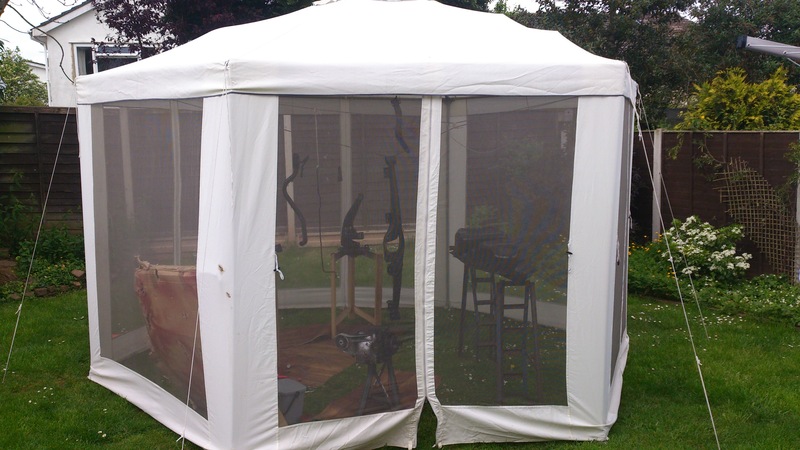
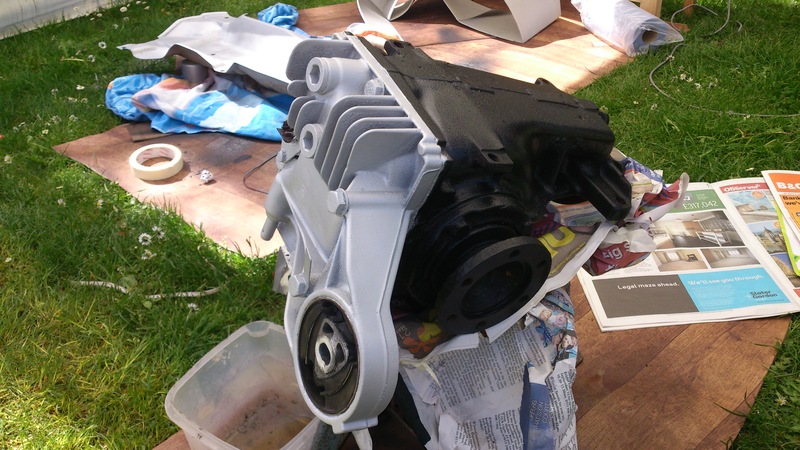
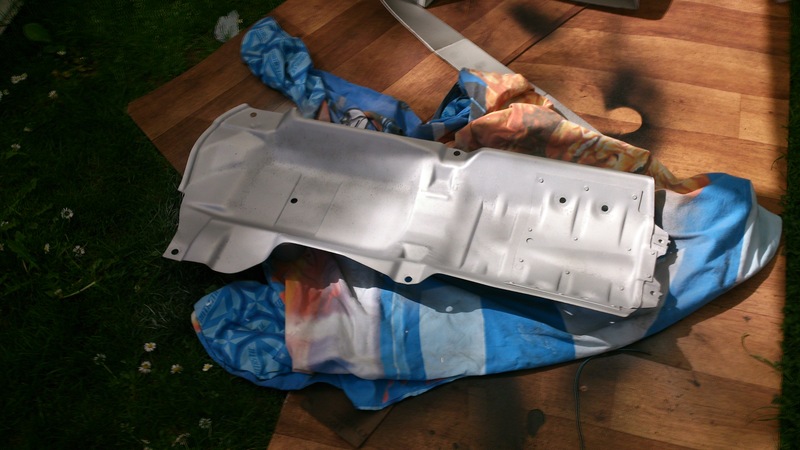
Stepped it up a gear with the refurb over the weekend using my makeshift spray booth.
Just need to flip the fuel tank and do the top, and get the bushes fitted then hopefully get all this new stuff fitted soon.
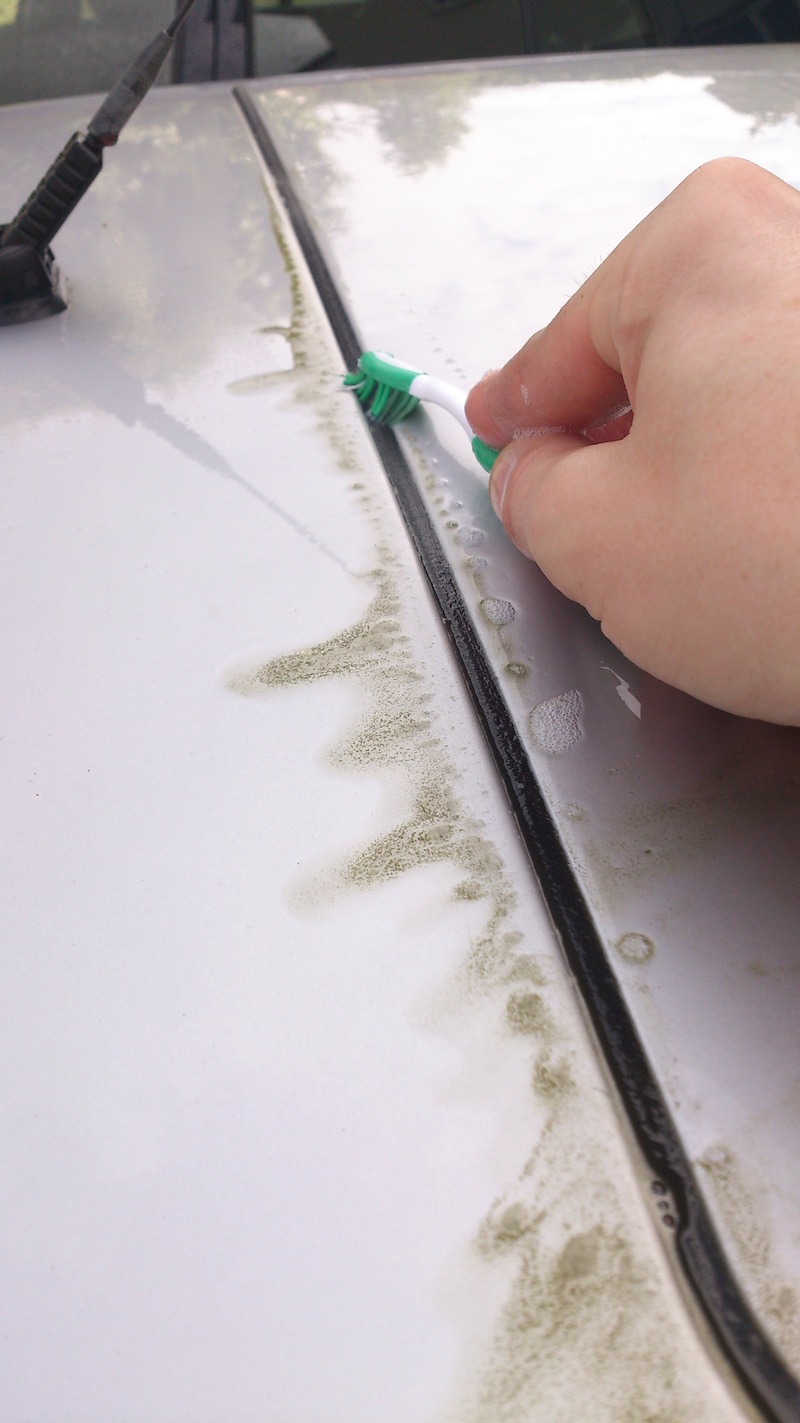
Meanwhile got handy with a toothbrush
And gave it a good wash If the weather holds out clay polish and wax is will happen over the next few days.
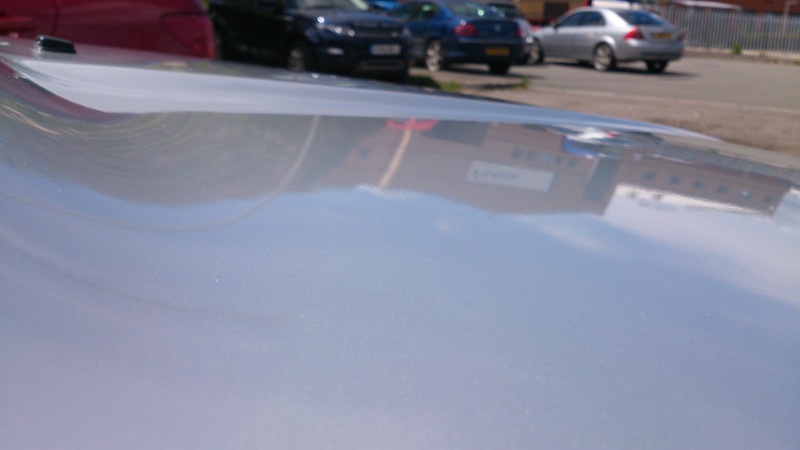
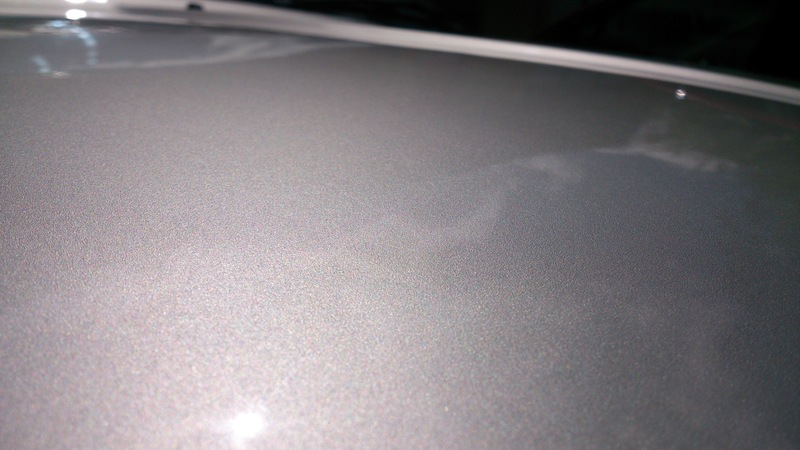
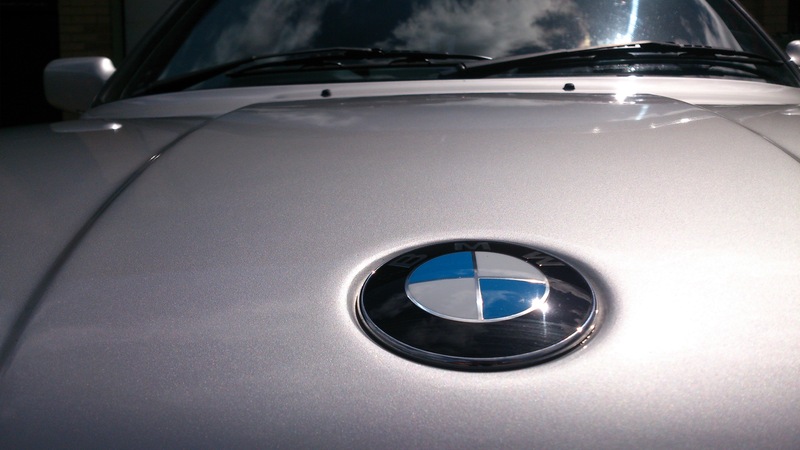
Grabbed half hour in my lunch break to clay and polish the bonnet.
If the weather holds out for the next week or so I'll work my way over the whole car
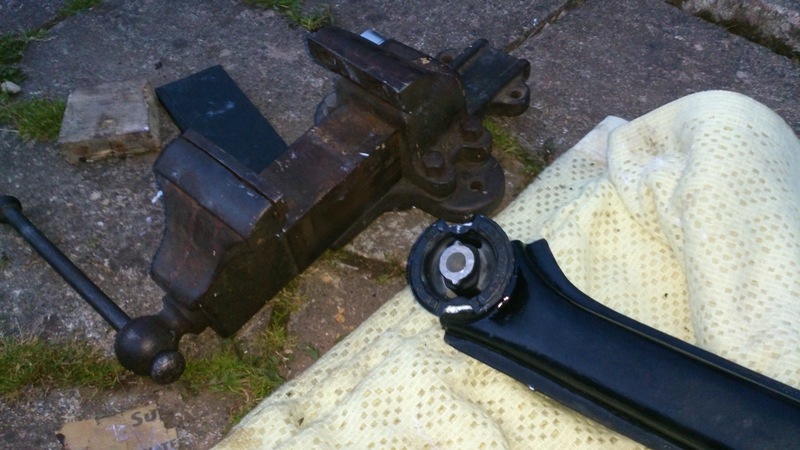
Trailing arm bushes were fine but beam bushes took some effort. all done with a bench vice... not on a bench.
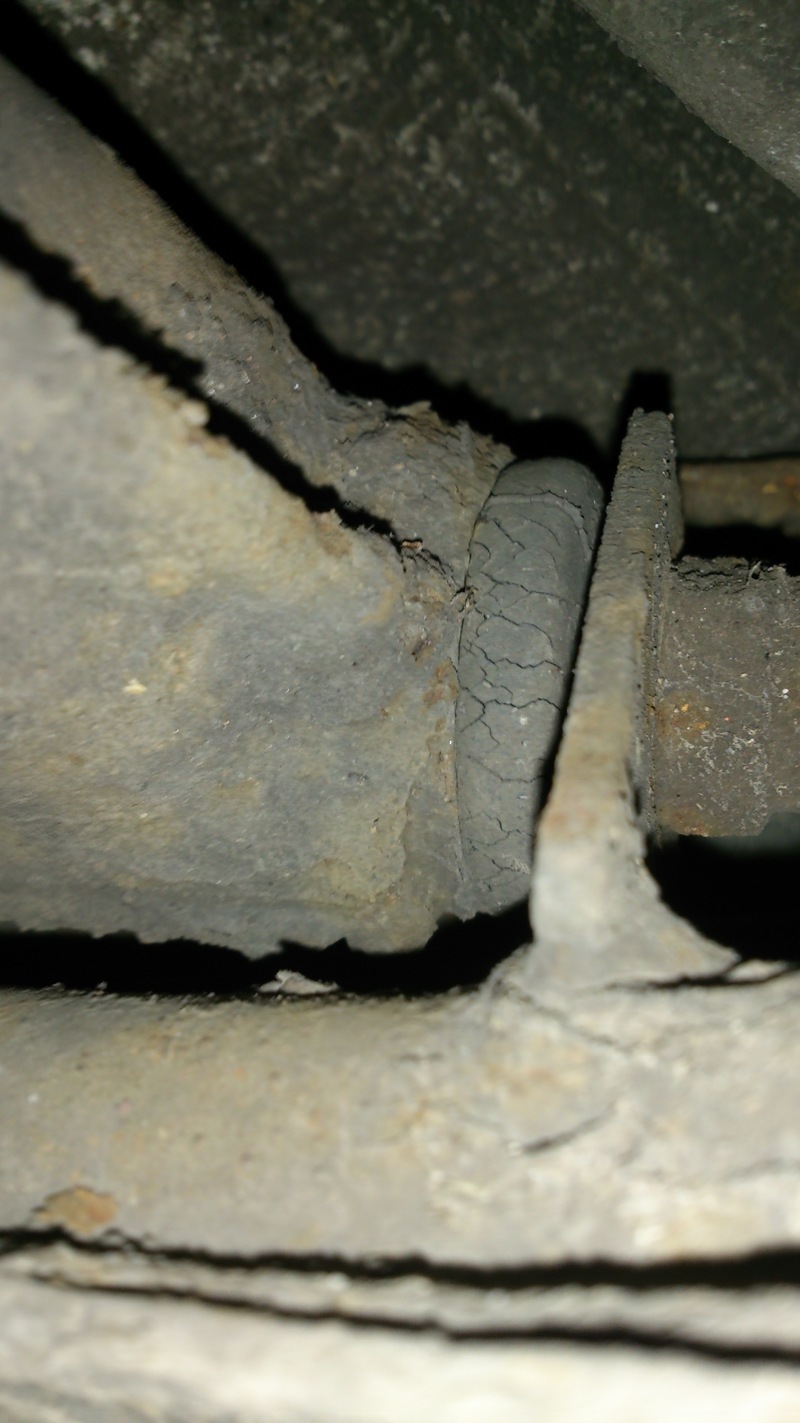
Looking forward to getting them in, this is the state of the current ones
I hate the way the rear end reluctantly follows round bends at the moment, it's really un-stable...
So with the beam bushed and nearly ready for fitting I concentrated on a few of the other bits. And I've scheduled in the rebuild for a couple of weeks.
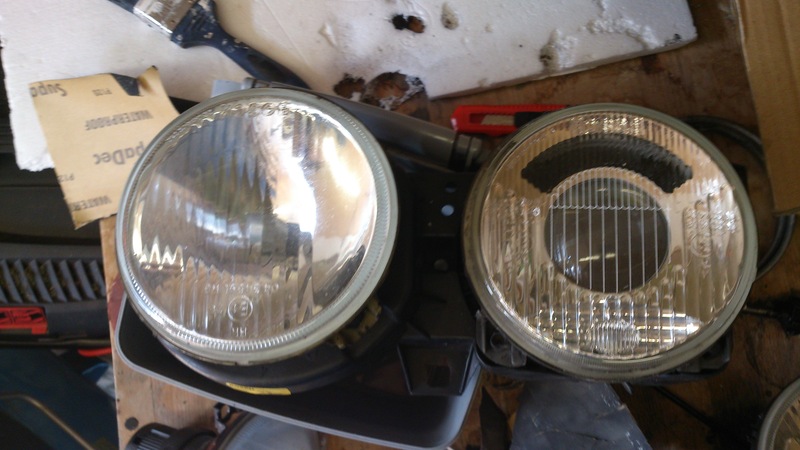
It also has a cracked inner lamp, so using the thinners I've tried to de-cloud my spare lamps,
I've also painted the metal rings but haven't got a pic of them.
The car was actually bought for my wife so I haven't driven it all that much, but while I've been doing little jobs on it we've swapped cars so I can take it into work and tinker in my lunch break and I'm really beginning to enjoy it
The fogging is inside the lamps, the thinner was poured in through the bulb aperture and sloshed around. Left the unit lens down for a while to let is soak then flipped it over and drained out the fluid.
Ahead of the pending MOT I thought it was high time I addressed the final remaining item on last years advisories.
Weak Washers!
Once I started fiddling around it became obvious. The not-return valve was knackered, no signs of a leak, but once I started handling it it fell apart.
So new one fitted and now the wash jets blast away nicely Very Happy Gotta love the easy fixes.
Made a start on the 'big job' at the weekend. Slow progress as I had to juggle wife, kids, dogs etc. so not as much time at it as I'd have liked but the car is up in the air with pretty much everything slackened off and disconnected ready for the beam and tank to be dropped.
Diff mount, arb drop links and trailing arm bushes all seen better days.
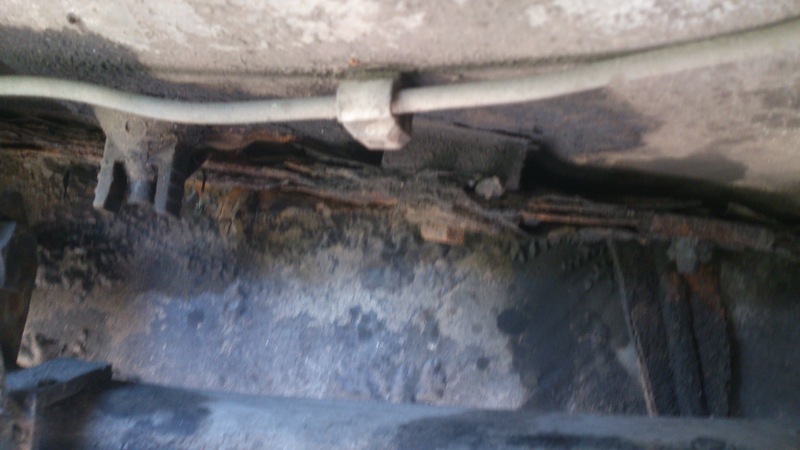
Here's where the fuel tank has been leaking from if filled right up
as a result we've had to limit it to only putting in £20 a time. Which hasn't been a real issue as the car is only used occasionally, but will be nice to get this resolved once and for all
Handy that it has a drain plug, I'd tried to use up as much as possible, needle was the wrong side of empty, but still managed to get about 5 or so litres out of it.
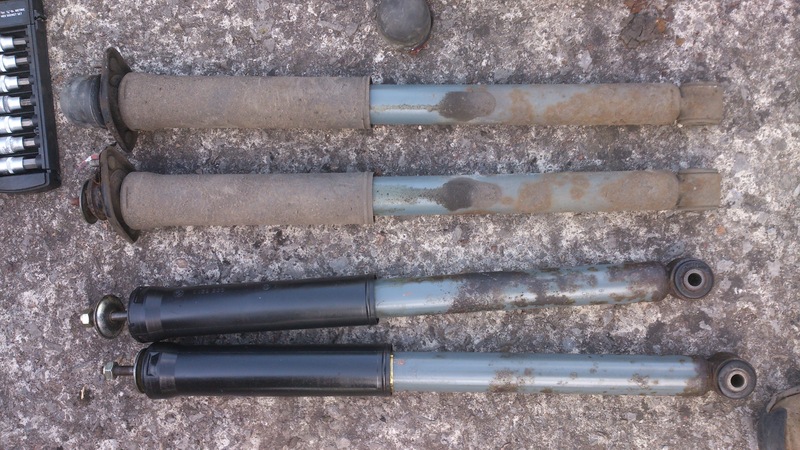
Discovered the rear shock had signs of leaking, which would explain some of the undesired handling characteristics
So I've got a spare set, not new but in better condition from a lower mileage donor. The top mounts weren't as bad as I was expecting but new ones are going in anyway.
Also even though I did the centre bearing I never got round to doing this last time I dropped the prop so I can finish this job properly now, just waiting on delivery.
And a few other rusty bits that are getting replaced
Very eager to get it all finished off now. This is possibly the toughest mechanical task I've ever taken on. I think I'd rather change an engine than have to do this again, but it will be so worth it.
I no longer have this car, but having a greater respect and continued support for this forum I wanted to copy my build thread on e30zone over here. One so you guys can hopefully enjoy the story, and two so I never have to hang out on that forum again and can delete the short cut.
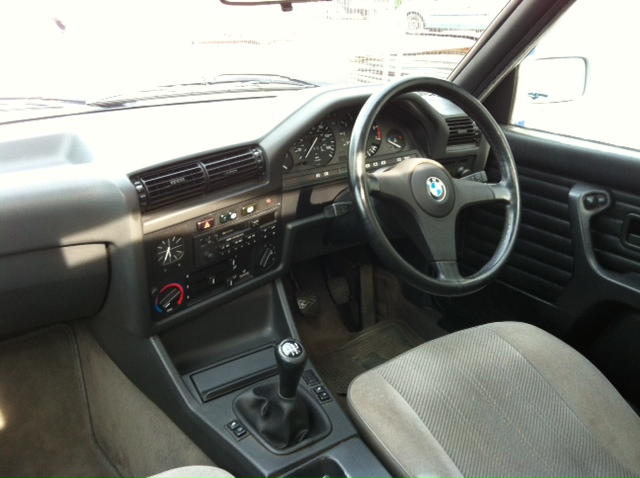
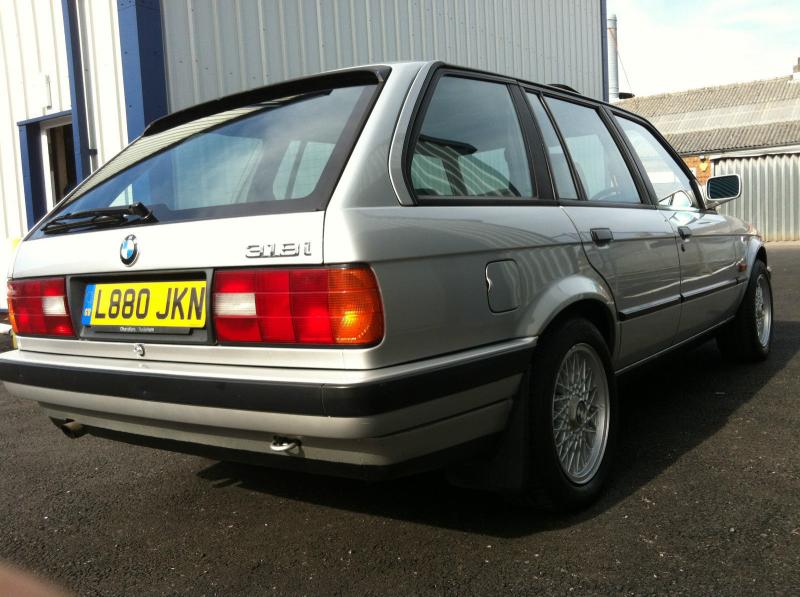
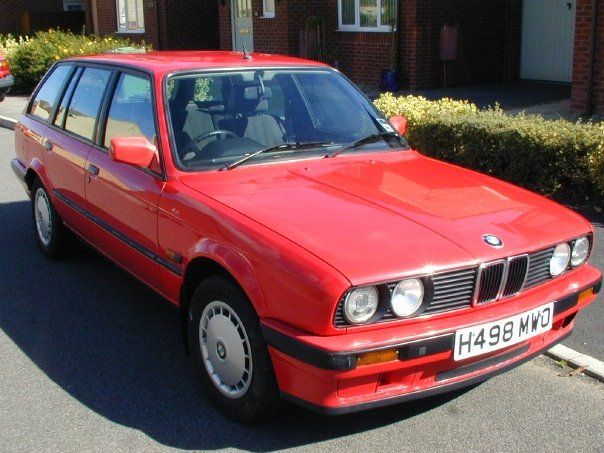
After my first Mk2 GTI back in the late 90's a bought this 1990 e30 touring 318i lux and to this day I still have very fond memories and it's the longest I've ever owned a car, I eventually sold it around after some 5 or 6 years, when at 14 years old and 114,000 miles on the clock it failed it's first MOT on me and I panicked. Can't remember what on, but I know it was trivial.
My old one from back in the day:
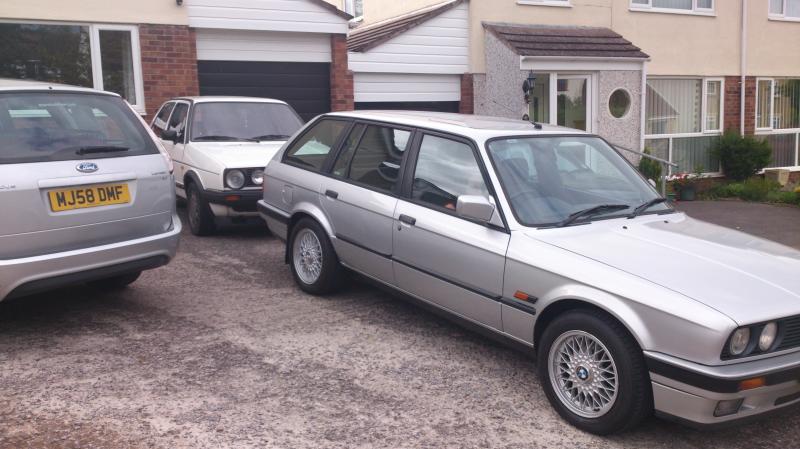
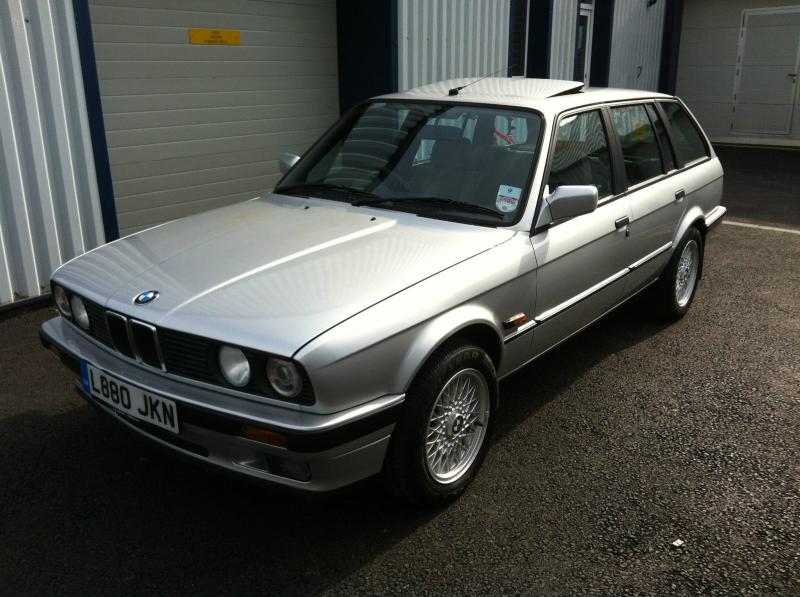
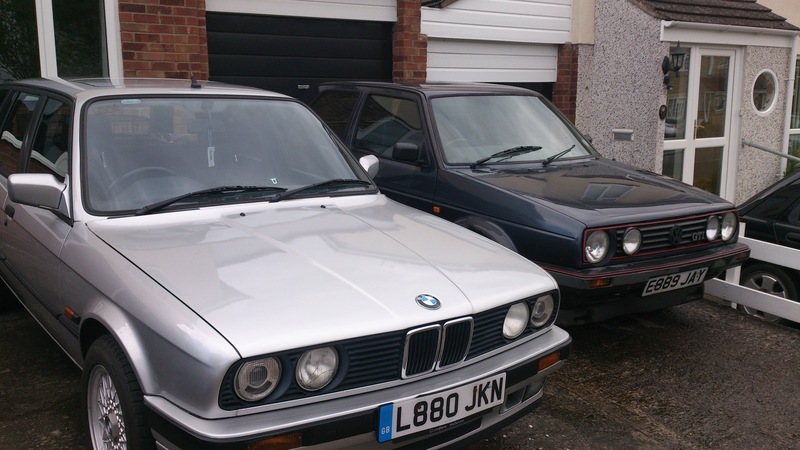
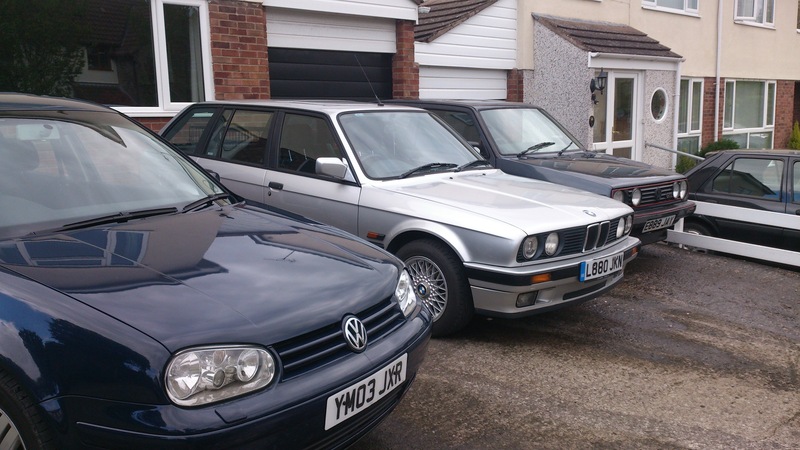
So anyway after getting my 2nd Mk2 back in 2013 to relive my youth and after bringing my wife to the National meet in 2014 she decided she wanted to have a car that she enjoyed too (and not the dull, boring and sensible Ford Focus estate we had at the time) so I bought her this:
I had my old one when we first got together, and she kind of took it over as as much hers as mine as I had a motorbike for everyday transport.
I've found out already this car was previously owned by an e30Zone member and was cover car on Total BMW a few years back. Although I'm yet to discover a copy.
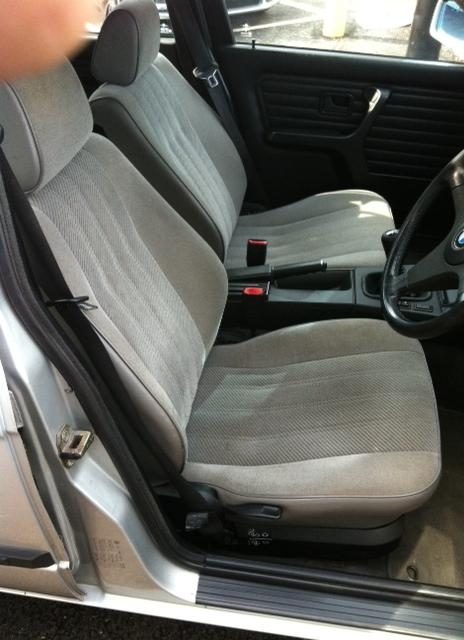
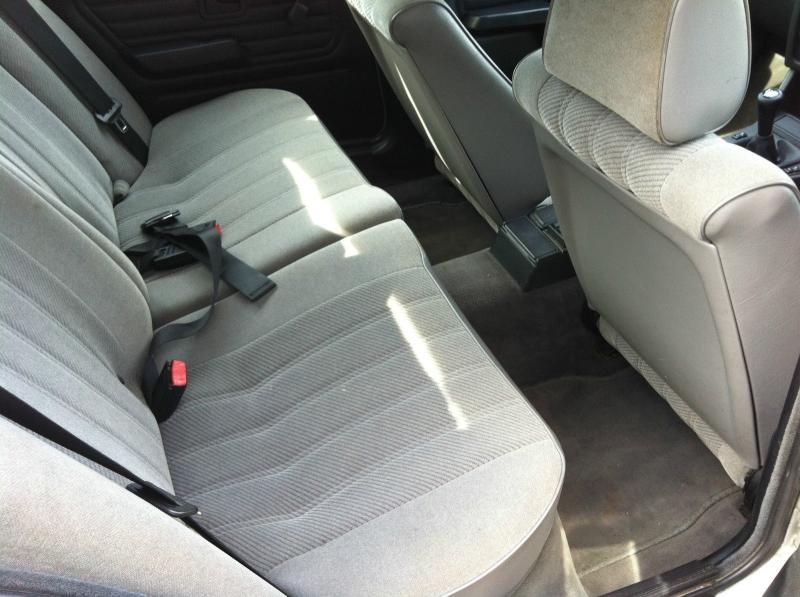
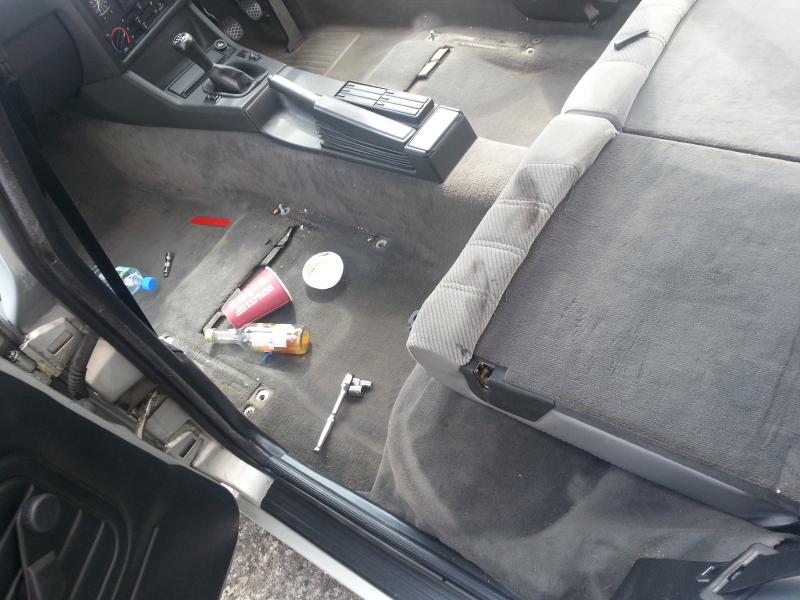
The guy I got it from used it for his Brighton to London commute and I gather everyday he must have had a coffee en route, and everyday he must have spilled it! as there's stains everywhere.
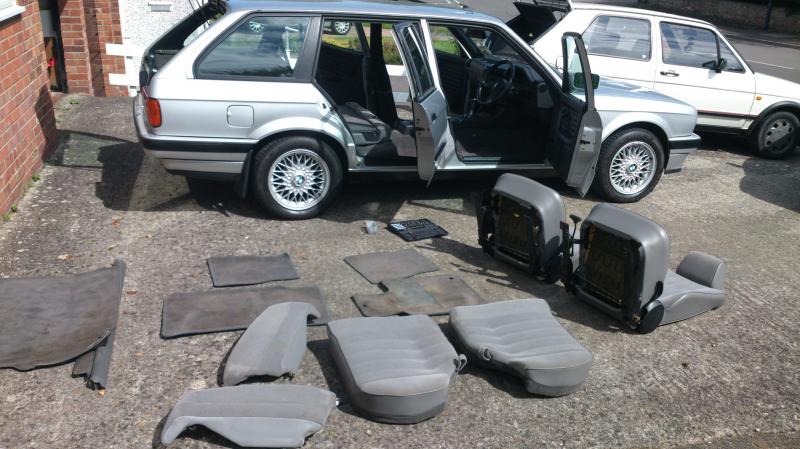
So after getting it home to Bristol on Saturday, Sunday the deep clean started.
This even smelt of coffee!
Proof of the coffee antics, as well as a half bottle of wine under the passenger seat
The outside, underneath and bay all seem respectable. A bit of bubbling on the front o/s arch so might have to look at paint in the near future.
And there's a few bit in need of attention. Some of which I've already started separate threads for
Some staining in the passenger well, so I need to investigate if the heater valve has been fixed and just not cleaned or if this is still an issue:
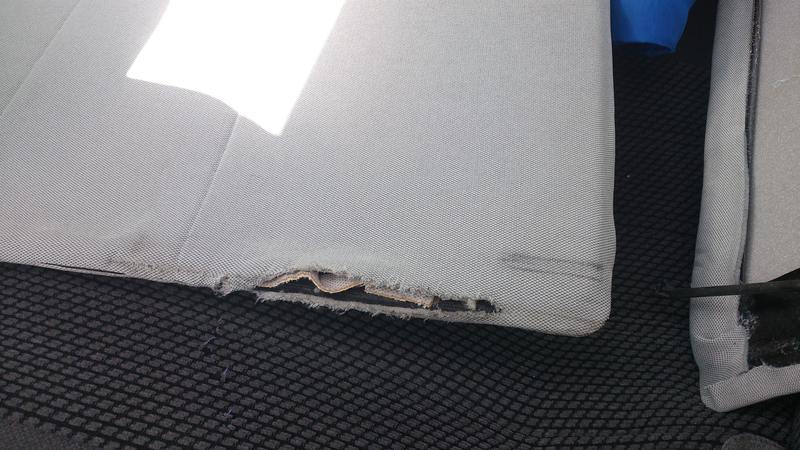
Some 'dog related?' carpet damage
Will replace at some point but not urgent.
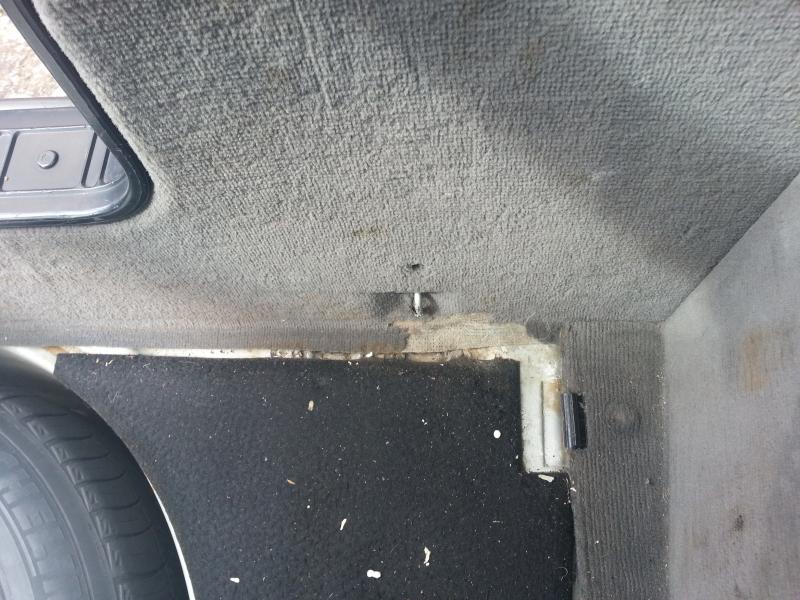
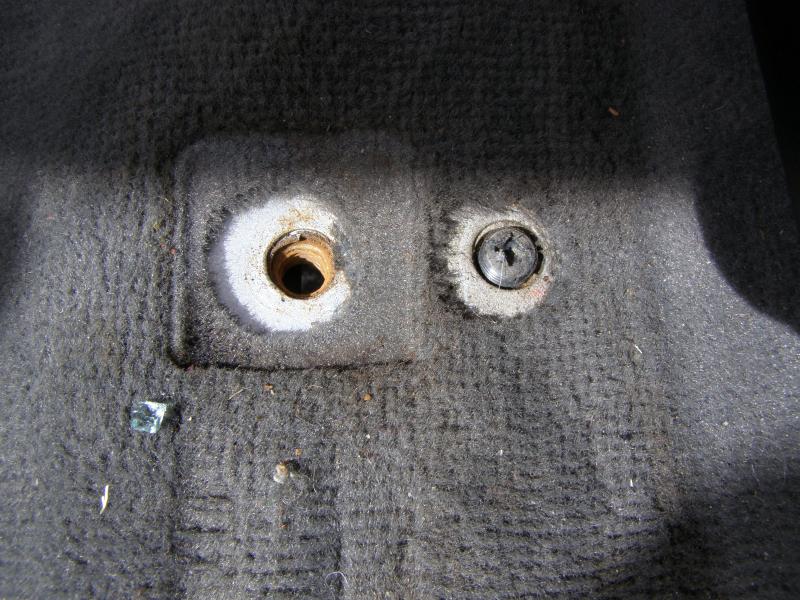
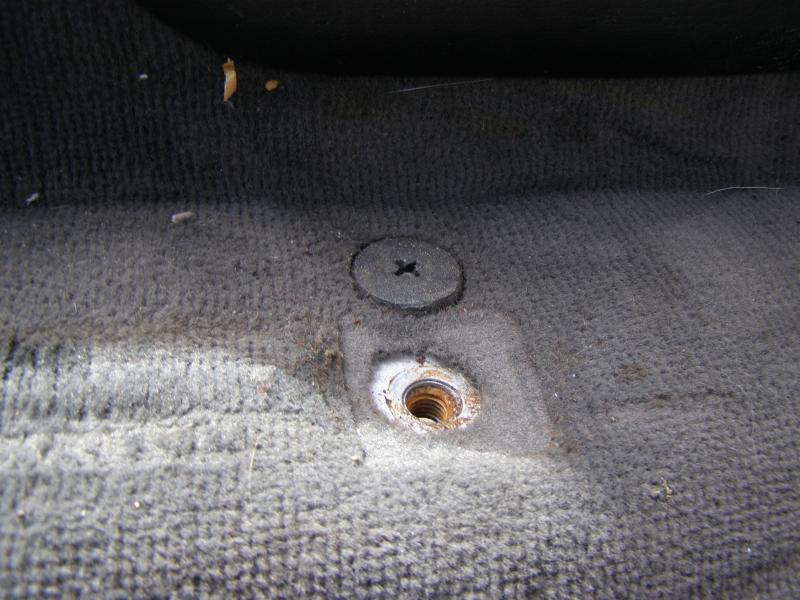
A broken carpet fixing,
Should be like this
From memory there should be a slot on the back of these to attach in position on the rear seat - possibly changed at some point??
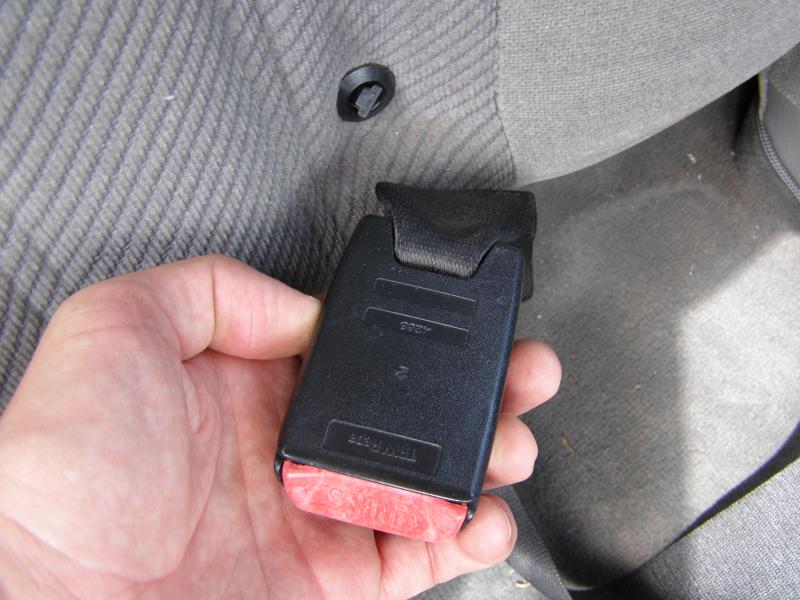
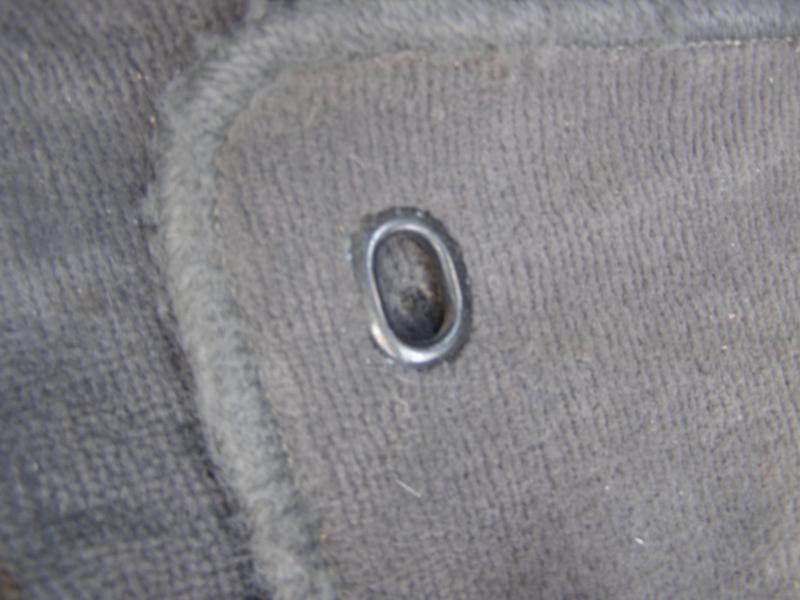
Missing fixings for the floor mats
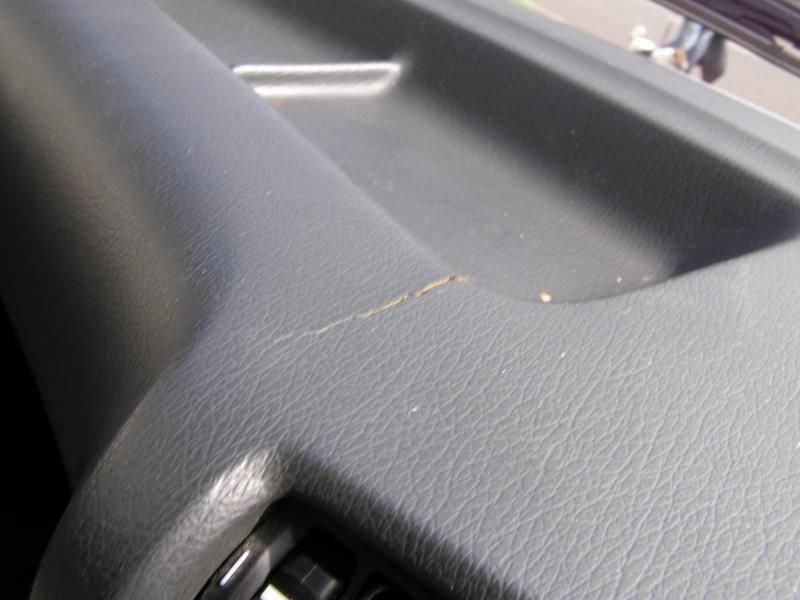
A small crack in the dash
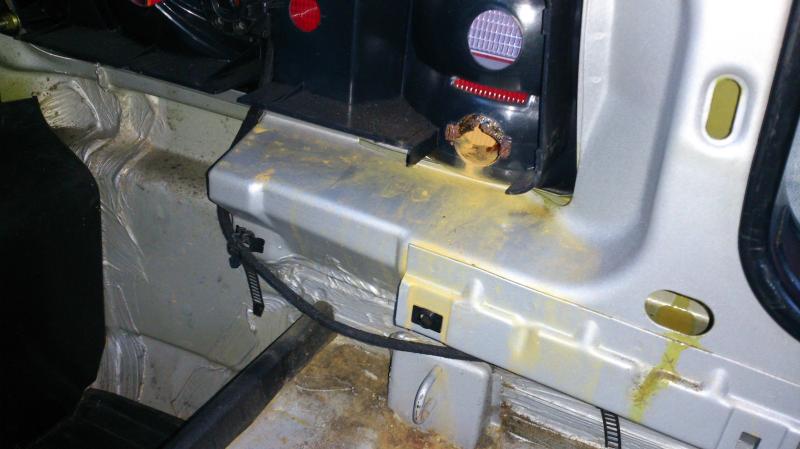
o/s rear light unit needs replacing as water has got in and the chrome reflector dish has disintegrated - I think on the fog light. Also, no pictures yet:
I've already picked up a period Sony CD player to replace the BMW Reverse RDS unit, so got this to fit.
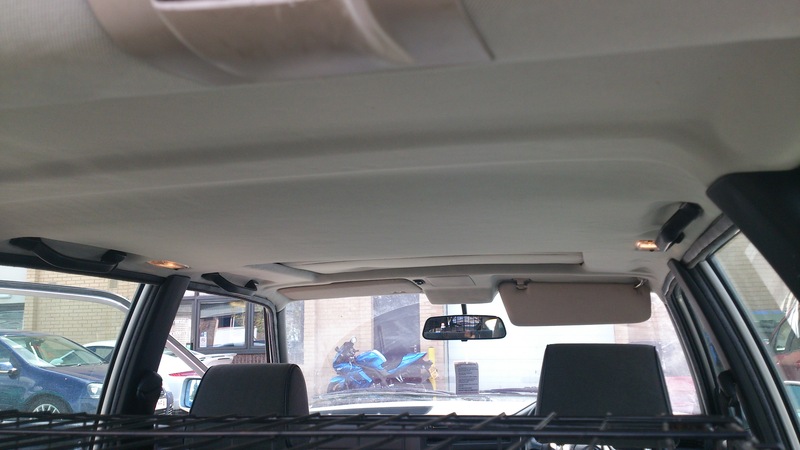
The headlining is sagging, not sure if this can be fixed or if I need to try and find another one. A common issue for the Golfs too and I know gluing pretty common actually works and people ask silly money for replacements.
One of the tailgate hinge surrounds is missing.
One of the inner headlamp lens's is smashed and one front indicator lens is cracked.
The headlight height adjust doesn't work - but didn't on my old one either!
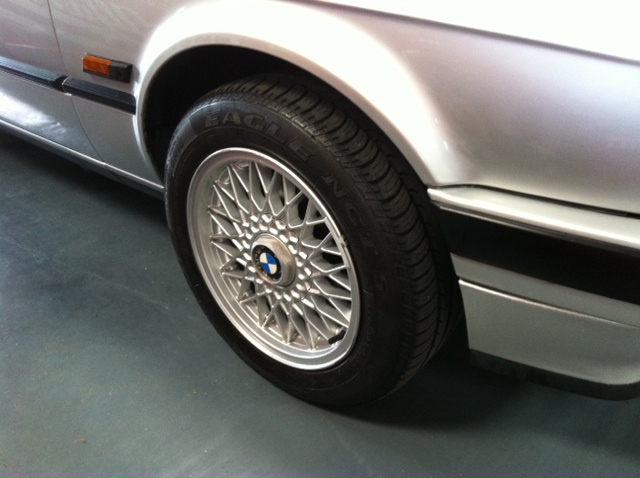
The BBS wheels could do with a refurb.
The storage flap in the boot (not the first aid kit one) the hinge is snapped so I'll be on the look out for new.
And the finish on the tailgate spolier is pretty poor. I think it's been painted at some point.
That takes care of the appearance, now the mechanics.
There's play in the steering, not sure if rack of the UJ coupling (steering guibo thing?) - or both! Need to check it out.
PAS fluid is yuk, so hopefully changing that will help too.
It's quite wallowy, so need to check all the bushes etc.
The central bearing/coupling on the prop needs replacing - I had to do this on my last one.
and the rear diff is a little whiny hopefully not a big deal?
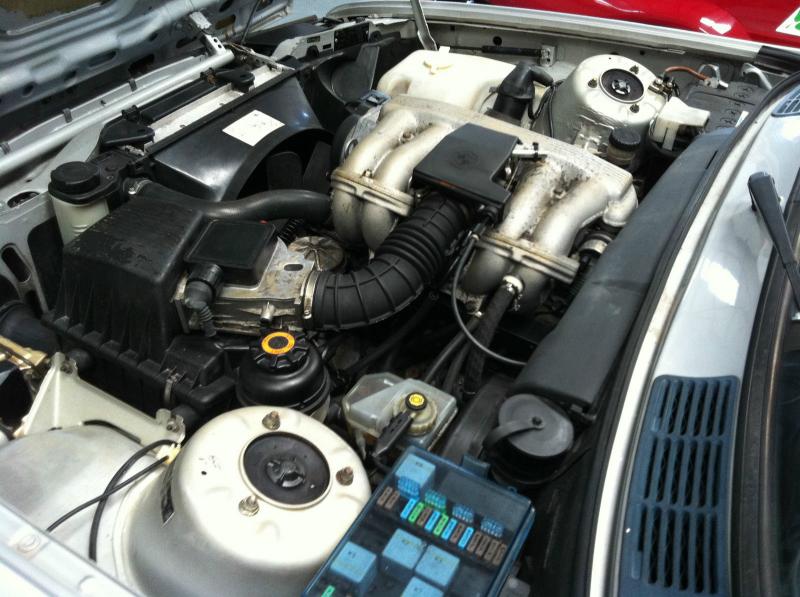
So a busy Saturday:
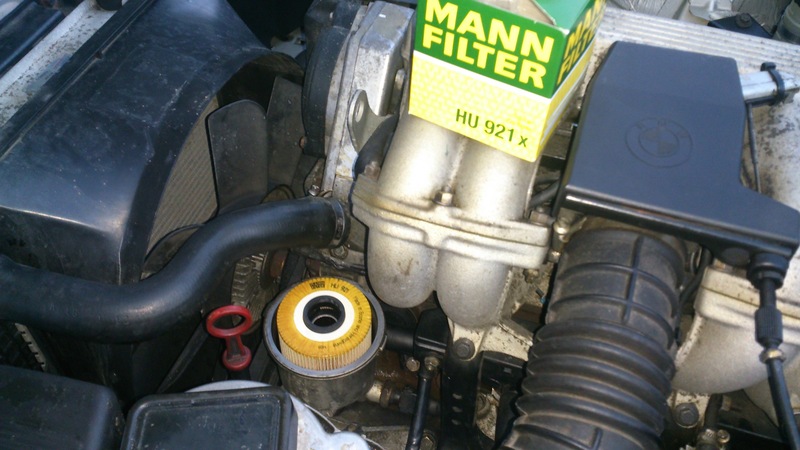
New NGK plugs New HT leads, I'd forgotten what a sod it was doing that sensor under the air intake. Got my son to help with his small teenage fingers! New air filter (old one was hideous)
Oil on the dipstick is still quite golden and all green service lights are on so I left that for now, although odd oil was done without checking air filter? Think I might do oil change soon and reset the lights anyway just in case the oil filter wasn't changed either.
Changed the PAS fluid, this definitely needed doing. I still want to fit a fast rack but at least for now this will help.
Also fitted new clutch slave cylinder, old one was leaking so gear change is better. Still room for improvement though. Haven't checked out how the linkage works on these but I'm wondering if there's a bush kit or anything that can be done to tighten it up. Quick-shift would be nice too.
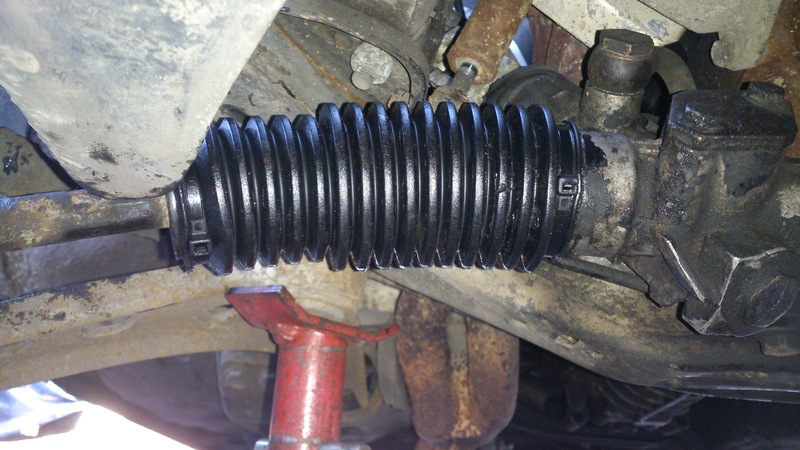
Had a good look underneath. There's evidence of some new brake lines and the front end, lower arms, ball joints and track rods etc. all look in order. One of the bellows on the rack is a bit perished but not split yet! I'll hold off on this if I'm going to swap the rack.
Back end on the other hand is a different story, rear ARB drop links are shot and from what I can see of the rear beam bushes they ain't too clever either, can't see the top mounts but while I'm at that end I may as well do them, am I right in thinking e46 mounts are a direct fit and good upgrade?
Can't see the prop bearing as it's covered with the exhaust heat shield but from the noise in the cabin and from what I remember when my old one went I suspect this is also on it's way out.
I'll also change the oil in the diff and replace the fuel filter.
Standard loom was complete and unmolested
Plug and play ISO kit off ebay and now updated with Sony Xplod CD player. Not quite period correct but RED illumination so doesn't look out of place.
ARGH! fuel tank is leaking, appears to be split at the seam :sad:
Not a lot of progress on the mechanical side of things. Solved the problem of an annoying rattle; after checking exhaust clamps, wheel bearings, ball joints and pretty much anything else under the car I could think of, my wife noticed one of the BBS centre caps wasn't looking very secure - hey presto! rattle fixed :
A bit box of bushes and rubbers has arrived from C3, so that's all on the horizon for the back end, as well as dropping the tank. At present we're just putting £20 in at a time which is keeping the level below the seam so no more fuel on the driveway. Not the best solution but the car's being used very little so it'll have to do in the short term.
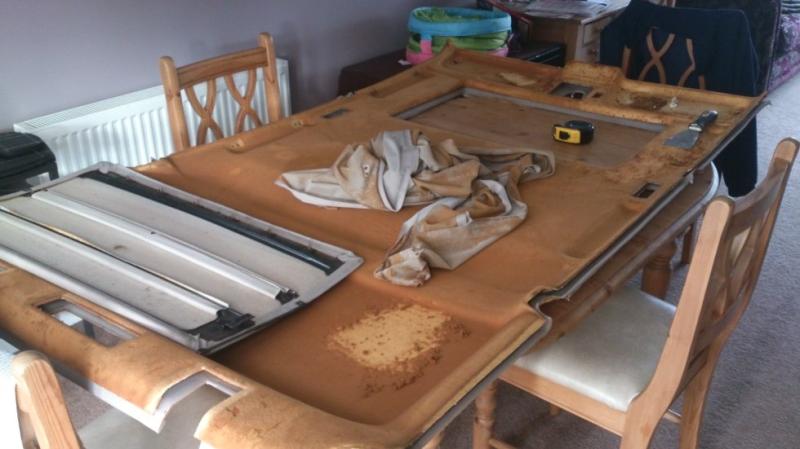
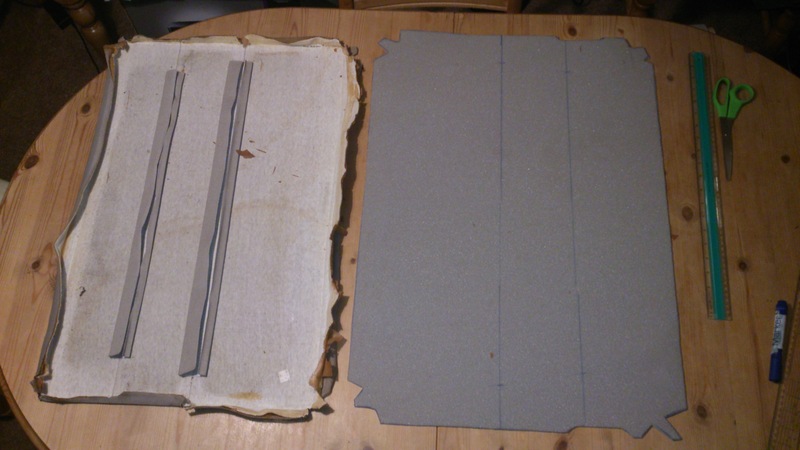
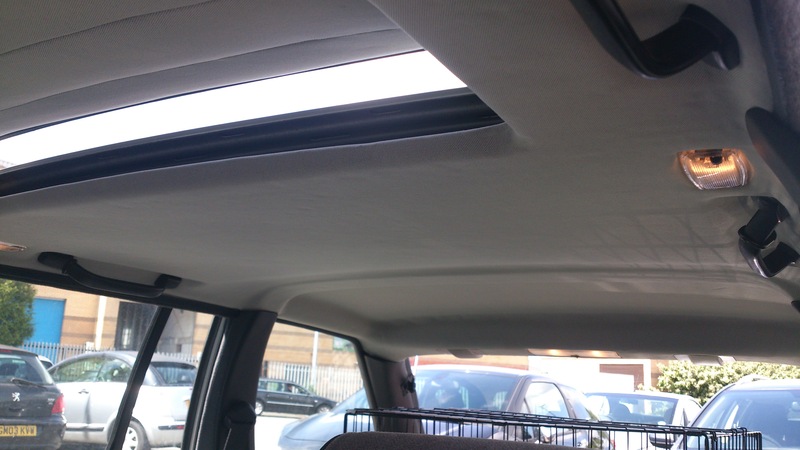
Current task however is the sagging headlining.
which is now out on the dining room table, with the material stripped off:
And now I understand how/why they sag. It's a foam back material and the foam if firmly stuck to the headling, just as it's perished the fabric has separated from the foam.
So lots more scraping and rubbing later...
very nervous about this next bit, but bought some new material and spray adhesive so fingers crossed for my next update being a good one.
A few shots from today, didn't all go to plan and thing the box has to come out again tomorrow
The car went in for a new Longlife Stainless Steel back box today. Only to discover the Cat was split and rattling so going for a full system now.... Ouch! Mad but one less thing I'll need to worry about.
Got to play with fire last weekend...
Made a start on refurbishing the rear end with spare parts removed from a breaker. All bushes now removed with the help of some small bonfires, luckily it was a bit drizzly so none of the neighbours would have had any washing on the line, ready to start rubbing down all the metal work now.
Hopefully I spend a bit more time on it this weekend although I now need to swap the radiator from the breaker too as it's leaking.
Yey, New boots have arrived. I love it when the postman brings fun stuff
A couple of updates from the weekend. Took the wheels from the one I'm breaking, as they were all in better condition than the ones fitted and got the new tyres fitted, then gave them a bit of a deep clean before fitting...
I hate cleaning BBS :mad:
Also swapped a front caliper, as it was binding a bit and got round to fitting the new steering boot, noticed it was split the other week when I was doing the clutch.
I got the proper clips with it, then realised I didn't have the tool to tighten it and wasn't sure I'd manage it with just pliers, so bog standard Cowboy ties will do after all, that's what I took off.
I managed to do it by splitting the track rod end (without damaging the boot) and pulled the boot over the ball joint so I didn't need to interfere with the tracking, which was just as well as I don't think the TRE was looking like it wanted to move anyway :eek:
And just for good measure, a pic of the S/S system I had fitted a few weeks back
Still need to go back and get the downpipe done, you can see it in the picture of the boot. They didn't have time to finish the full system.
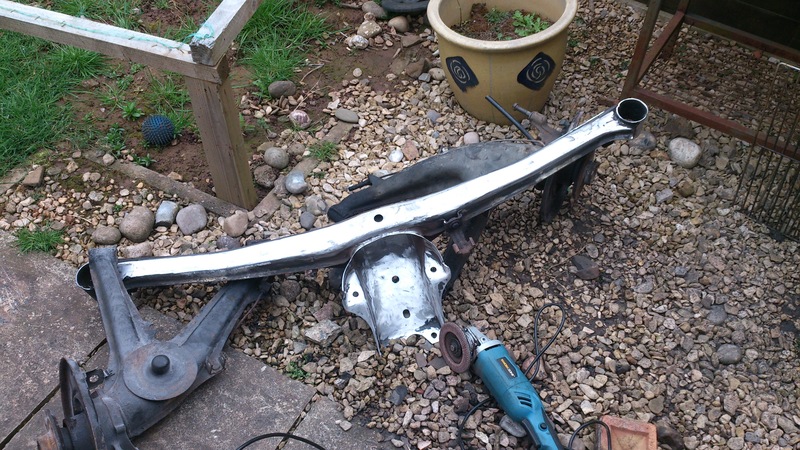
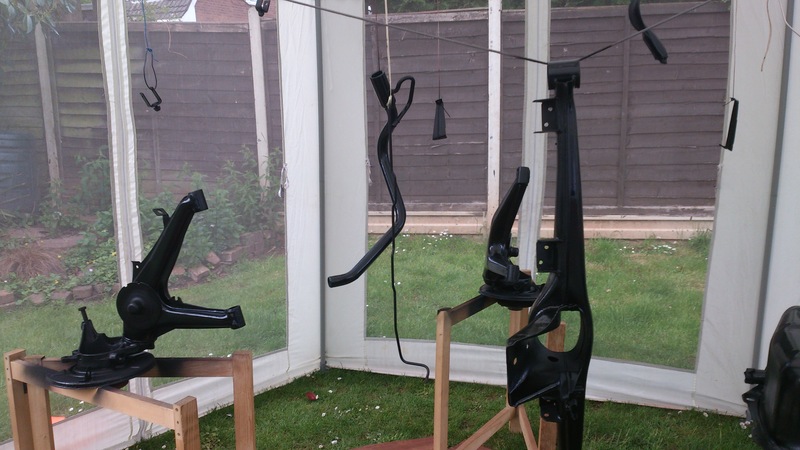
Made a start on the rear beam over the weekend.
Stripped back to metal with a flap wheel and various size wire brushes on a grinder. And my DIY soda balster for the small nooks and grannies.
I know it would have been easier to send it off for blasting but there's something very satisfying about doing a job yourself, and doing it well.
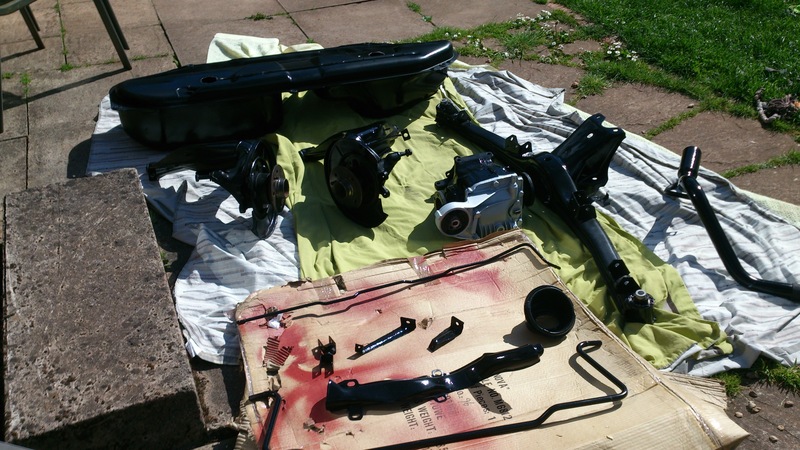
Bit more of an update, all rust removed and chemically treated. Then etch primer and a few coats of red oxide. Ready for gloss black next week.
I also tested the fuel sender with a spare out of the car I'm breaking. That seemed to work so swapped it over.
And since I had to remove the rear seats front hinge to get at the sender, I replaced the bar with the one from the breaker as mine had a broken clip.
Also swapped out the front indicator lens that was cracked with a good one. So slowly working through the whole car improving it where I can
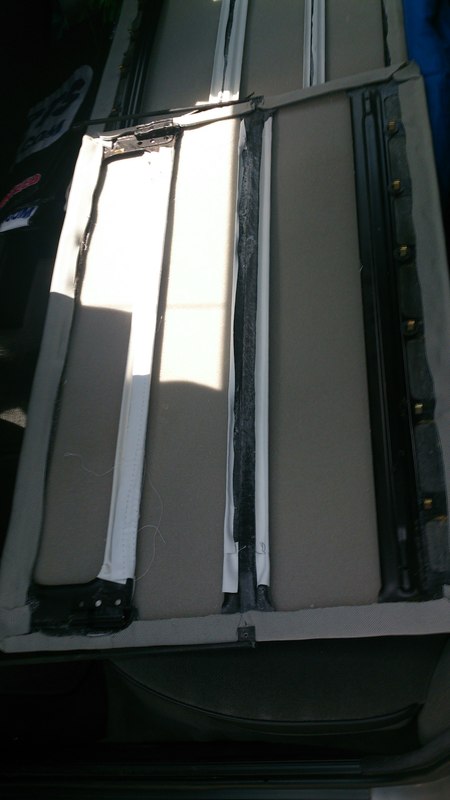
Started my second attempt on the sunroof panel last night. I wasn't happy with the first attempt and the material was catching on the guides when slid back.
More updates to follow. Sewing in the central flaps was more of a pain than I remember it being the first time.
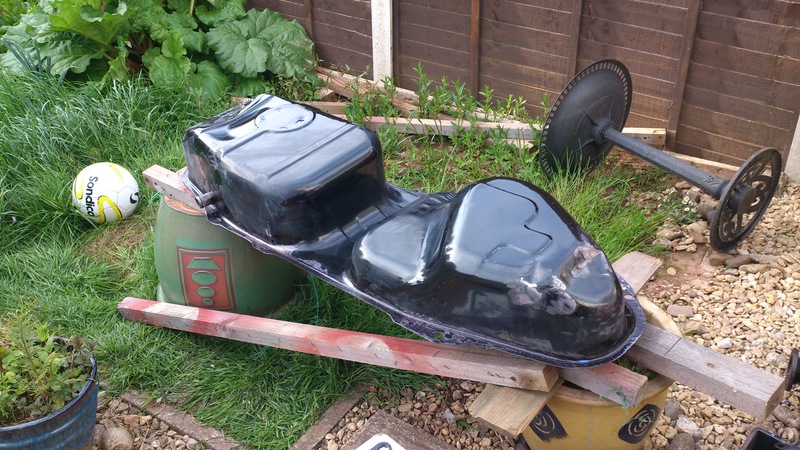
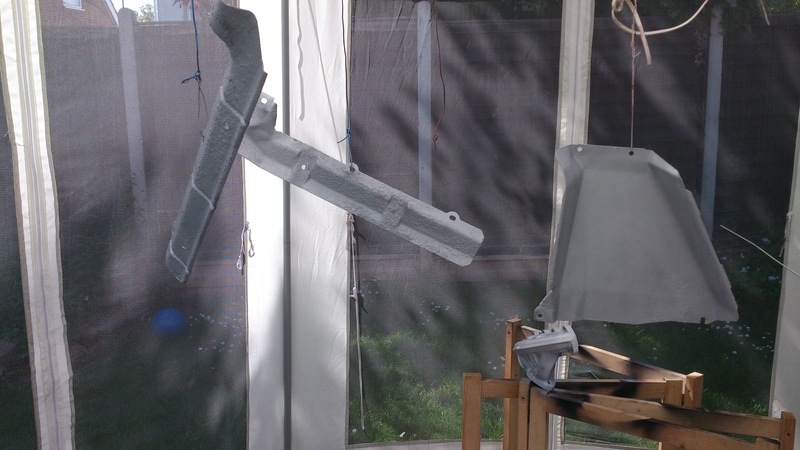
A bit of progress from the weekend. The spare fuel tank had every bit of rust, tiny blemish or blister (to be fair, not many) ground back to clean metal, and rust treated:
As did the filler neck, rear arb, link pipe for the fuel tank and the diff got cleaned up too:
So the plan this week is to finish the prep ready for paint on all of this and the already prepared rear beam hopefully next weekend.
Another small update today. I've started bringing it to work to take advantage of my 'free' time over lunch to finish off a few of those smaller outstanding niggly jobs.
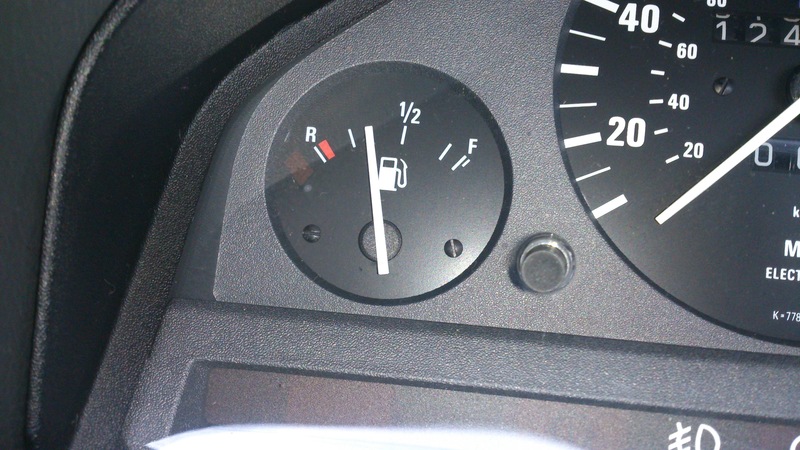
Job #1 faulty fuel gauge So yesterday I swapped the instrument cluster, without joy so today I changed the fuel tank sender
Which seemed to do the job
Other eligible lunchtime tasks.... swap a headlight and replace the sunroof panel, and a good detail.
Right, I wasn't happy with my first attempt at the sunroof panel and it never fitted right so was catching on the runner and tore.
and as mentioned above I trimmed a spare frame
So, that got fitted today and as I never added any finished shots of the re-trimmed headliner here goes:


 hopefully not a big deal?
 :
: