The new daily. 2006 MK5 GTI 2.0 TFSI 2 owners, the 1st owner is the 2nd owners father-in-law so a family owner car with full VW service history. And a great sepc.
Finger crossed this one works out well. Wasn't convinced on DSG, but it was the compormise I decdied to make to get a good example that had all of the other spec I wanted.
And I know you lot love pictures, so here's some from the ad. Haven't had chance to take many of my own yet:
Now with the daily sorted, I can focus on getting the "toy/project", will hopefully be the owner of another mk2 before the end of the year
..............................
Update May 14 2020. I did manage to do that. Picking up a new mk2 October 2019.
I need to sort my photos and do a build-thread update... but stripped seats and repaired bolsters, and fitted Heated seat pads, removed carpets, cleaned and repaired some holes. And refitted, wired up seats and fitted dash switch.
Retumbled book lock so all doors match a single key.
And not directly mk2 related although it will benefit from it - in the process of laying a concrete base for a new 16x10 ft shed/workshop I’m having custom made for.
Was working from home, but have been furloughed last 2 weeks, back to work next Monday I think.
There’s probably a lot of people not selling right now, I’ve got things I need to eBay but stashing in the garage but I’m not currently inviting strangers to my home, or making unnecessary trips to the post office.
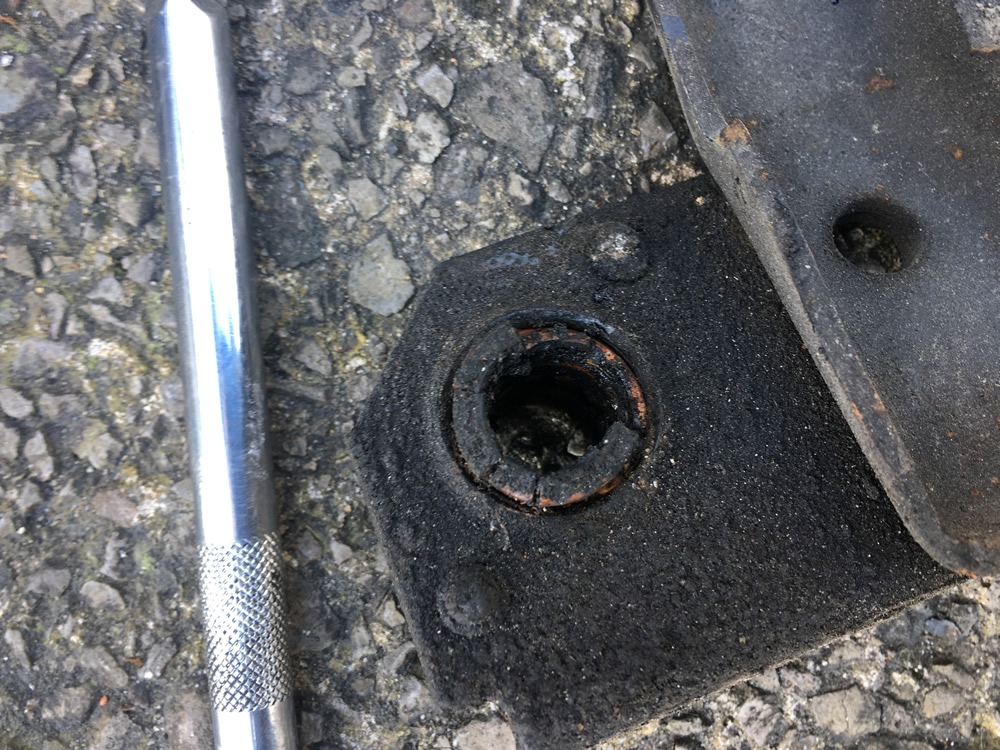
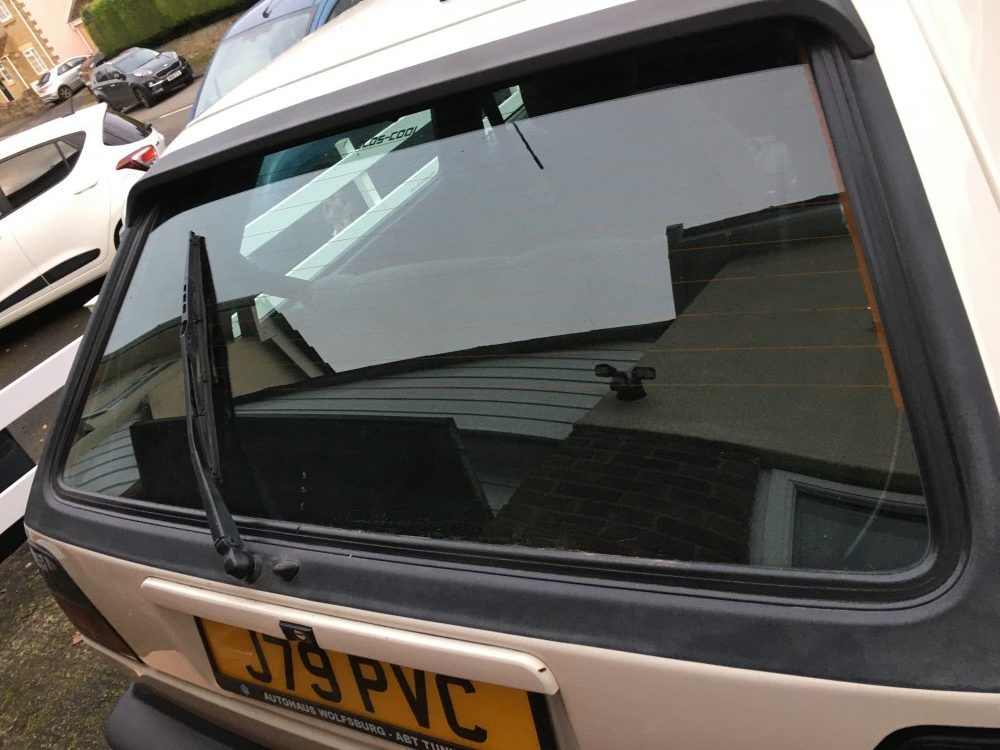
6 months of ownership and I finally have a boot that locks. It wasn’t anything I’ve publicised before as I didn’t want to advertise the fact.
I had mentioned the CL wasn’t working on the boot. But they key also wouldn’t turn.
I removed and dismantled the lock, but the aluminium barrel was so badly corroded it was fixed solids. Over 2 hours in the ultrasonic bath and things started to look hopeful but still jammed.
I pumped it full of maintenance spray then add heat. I thought I might be able to boil the oil out and clear out some of the crud but the barrel was so badly corroded it basically crumbled.
Thankfully I picked up a spare a while back, and had already managed to retumble the lock to match my key. It’s just not a CL one.
So now at least I can lock the boot with a key.
I tested the CL, the actuator is fine so there must be a break in the tube. No rush to resolve as I’d need to find a new CL boot lock but at least I’ve diagnosed and glad I didn’t rush into buying a new actuator when I thought it was that.
It's Friday, it's sunny, it's lunchtime and today I'm in the mk2 not on the bike so thought I'd pop down the road to the local scrap yard - like the good old days.
They don't tend to have much that is that old anymore, or if they get in a 'classic' they leave it out front to sell as a project car - I guess they know the value now. Still a few Mk3s though.
I already have a weighted shift rod so no use for those and it seems everyone knows the usefulness of a 99 relay so those are always gone first. However I spotted a MK3.5 (a Mk3 Cabby in a Mk4 frock) obviously the vultures weren't away of the similarity so the fusebox hadn't been raided yet - managed to bag myself a 99 relay at last. Funny to think how many I'd lifted and passed on over the years to eventually find myself needing one again.
Also grabbed the springs off the seat mech as some of mine were missing.
While I was at it I also picked up a temp sensor, along with the plug and a length of wire as I was reading elsewhere the mk3 sensor can be used as a single unit to replace the separate gauge and ecu sensors on the mk2 - thought it might be handy to have.
Not a great deal more to report at the moment. Looking forward to better weather.
January 15 2020
Quick fix today.
After overhauling the coolant system I knew everything was fine but the temp gauge has continued to read low.
So if fitted a mk3 4 pin temp sender and patched in the plug. At a later date if I need to I can patch I the other 2 wires for the ECU but with no current issues I decided not to do that now.
January 16 2020
Quote from: Monkey
That reminds me, I must get a 99 relay myself!
Unfortunately the 99 relay I picked up was toast, so still on the to find/do list.
Meanwhile another little job ticked off...
Also took a look at the sticky throttle, the rubber bung which sly suggested may had been the issue looked good.
But then I noticed the alignment was a bit off for the lever arm, it looked to be too close to the heater splash guard and the cable was coming out at an angled, preventing a clean return. A quick bend and adjust and the cable lines up with the opening ... I’ll pop out later for a test drive, hopefully that’s sorted it.
I wanted to give it a clean today but the weather has other ideas.
Yep. Sticky throttle now sorted
Quote from: big F
Might be changing my job soon and theres a scrap metal yard at the end of the road. They deal with cars and builders scrap mostly.
Worked near there before and that yard has no idea of classics. In the past (3 years ago) they crushed a 5 door cl that was better nick than mine, it was in there because it wouldn't start. The excuse, its not a GTI so not worth anything.............
I did offer a few hundred but the preferred to cube it they cubed a bay bus also that was far from a basket case.
There are a few scrap metal merchants that are just about crushed metal and the weight for £. I think the place that Shelly works at might be like that. I guess if they don't have the land hoarding cars isn't as cost effective. There are some other 'new' style yards that strip the cars so you don't go past the front counter and just buy off the shelf. Where I go is just down the road form where I work so easy to pop out on a lunch time - although I'm not always suitability dresses and have brought in oil on my shoes across the work carpet occasionally :oops:
This one has been there 85 years - so the sign outside says - and is a proper old school scrappy, like they used to be. It's great.
Quote from: big F
Some where i have a box of 99 relays, i went through a “stage” of going to the scrappies every weekend and made a point of pulling 99 relays.
Same, 99 relays and weighted shift rods, and any cross vehicle bits and bobs - they haven't had a mk2 in for years, but the door handles, boot lock and number plate lamps etc are the same for Polos and other variants. Even the occasional old Audi. I used to have a good stash of these which could be sold off for a few quid profit to top up the build costs.
Anyway, I was excited for my drive into work this morning, with my drivers seat that didn't rock and my throttle pedal that didn't stick - I'm really loving this car.
I think gear linkage might be a job to tackle soon. I found receipts for it done in 2003 so it's not original, but could benefit from being done again. I need to try and find some solid bars again and maybe have a go at making a short shifter link. If anyone has one I'd be happy to know the measurements. Otherwise it'll just be trial and error I guess - but it's more fun than buying one.
Quote from: tabbie
Reading your updates makes me want to start tinkering with my mk2 Eddy but it's definitely to cold. Great to see you back in a mk2 mate.
Great to be back in one mate.
The thing is filthy as it's on daily duty - but it was made to be used not stored in a museum is how I see it, and it's just too wet to use the bike right now
January 18 2020
Bit of cleaning done today.
February 10 2020
Latest job done, the old classic - gear linkage!
The stack of bills that came with the car show it was done in 2003, and putting that in perceptive it's still 17 years since it was done.
So some of the bits were still ok, the ball was still very much in place however the top and bottom bushes were nowhere to be found giving this effect:
[youtube]https://youtu.be/6BTRoL1Msrk[/youtube]
I wonder if they were fitted the wrong way round in the first place and dropped out the bottom?
Needless to say I bought the full kit from good old B&B components and also got myself another set of the solid bars that I put on the old one.
The usual suspect the orange bush was quite knackered:
Easy to push in place with my 6 tonne press, a bit overkill maybe but did the job in seconds :confused:
The end result:
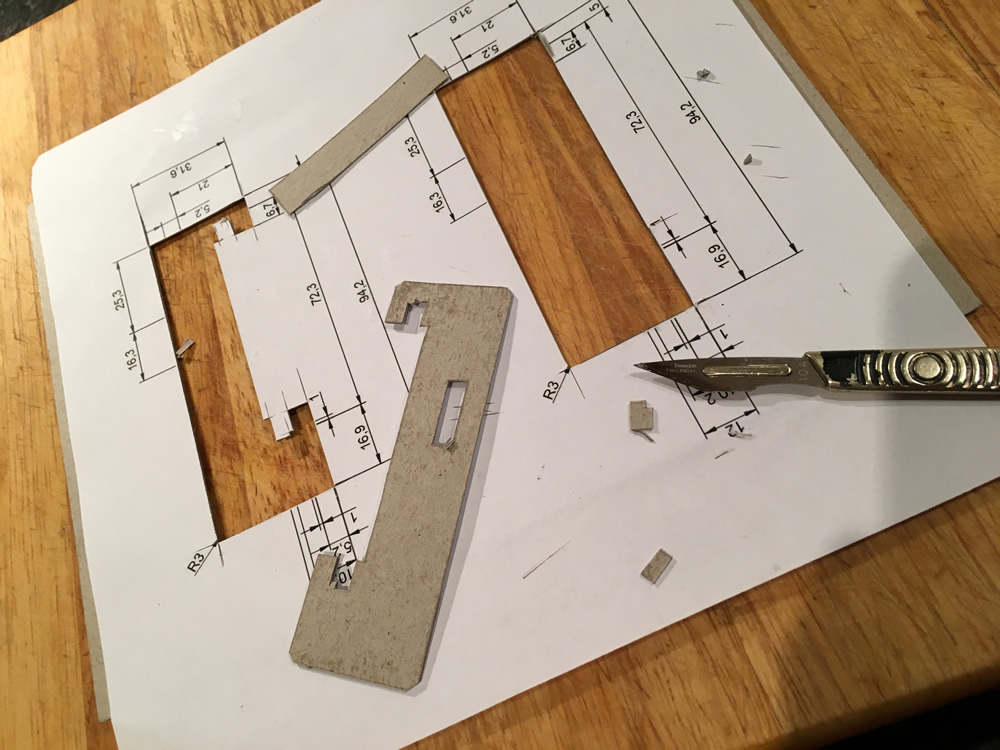
And for the alignment, because I'm tight... I would have 3D printed if I had one, but I don't so I made an alignment tool from cardboard
I did a test run with paper to check the fit:
Then layered up some card:
And it just about held up to get everything tightened up in the right place:
Gear selection is very slick now.
March 09 2020
Not a massive update and a month since the last one. Over 4000 miles now clocked, with an average MPG in the mid 30s.
Everything behaving as it should.
Washed it quite intensely last week and afterwards spotted this
Haven't had any issues with damp from the rain but I know it's not 100% dry as I get a little bit of internal condensation. This was obviously a result of rigorous pressure washing, but first look will be the bonnet release cable grommet.
Also did the world a favor and finally got rid of the unnecessary marketing
after:
and this cliche
but forgot the after photo.
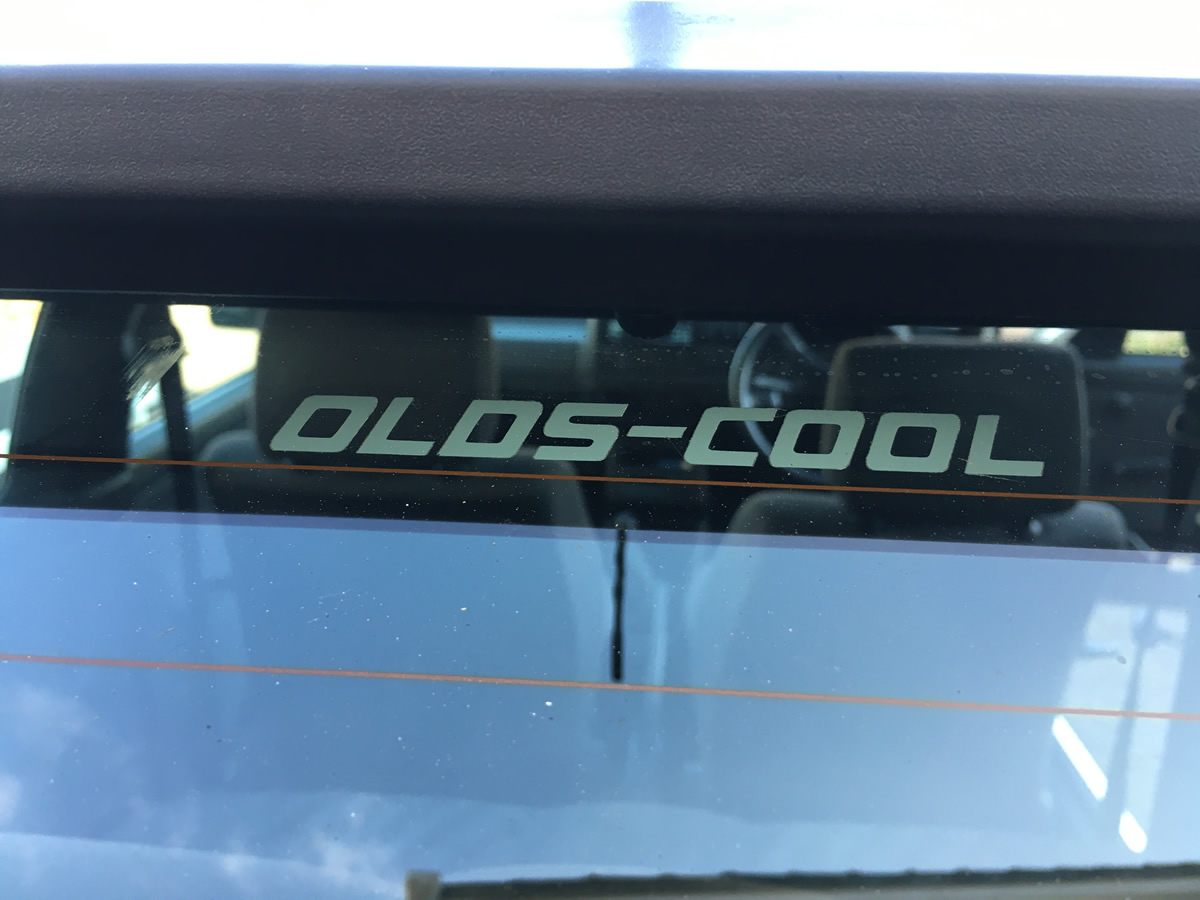
I did however add this little fellow
My daughter bought me the sticker along with some other bits and pieces from Bristol Volksfest about 4 or 5 years ago, never got round to (didn't really want to :roll: ) put it on the old car but it feels like it's a little step towards making the car mine (and my family's).
C L E A N . . .
And for the first time in history I was first to arrive at the Bristol Meet, was also the only VW
But with the clock changing this month hope April onwards might pick up again.
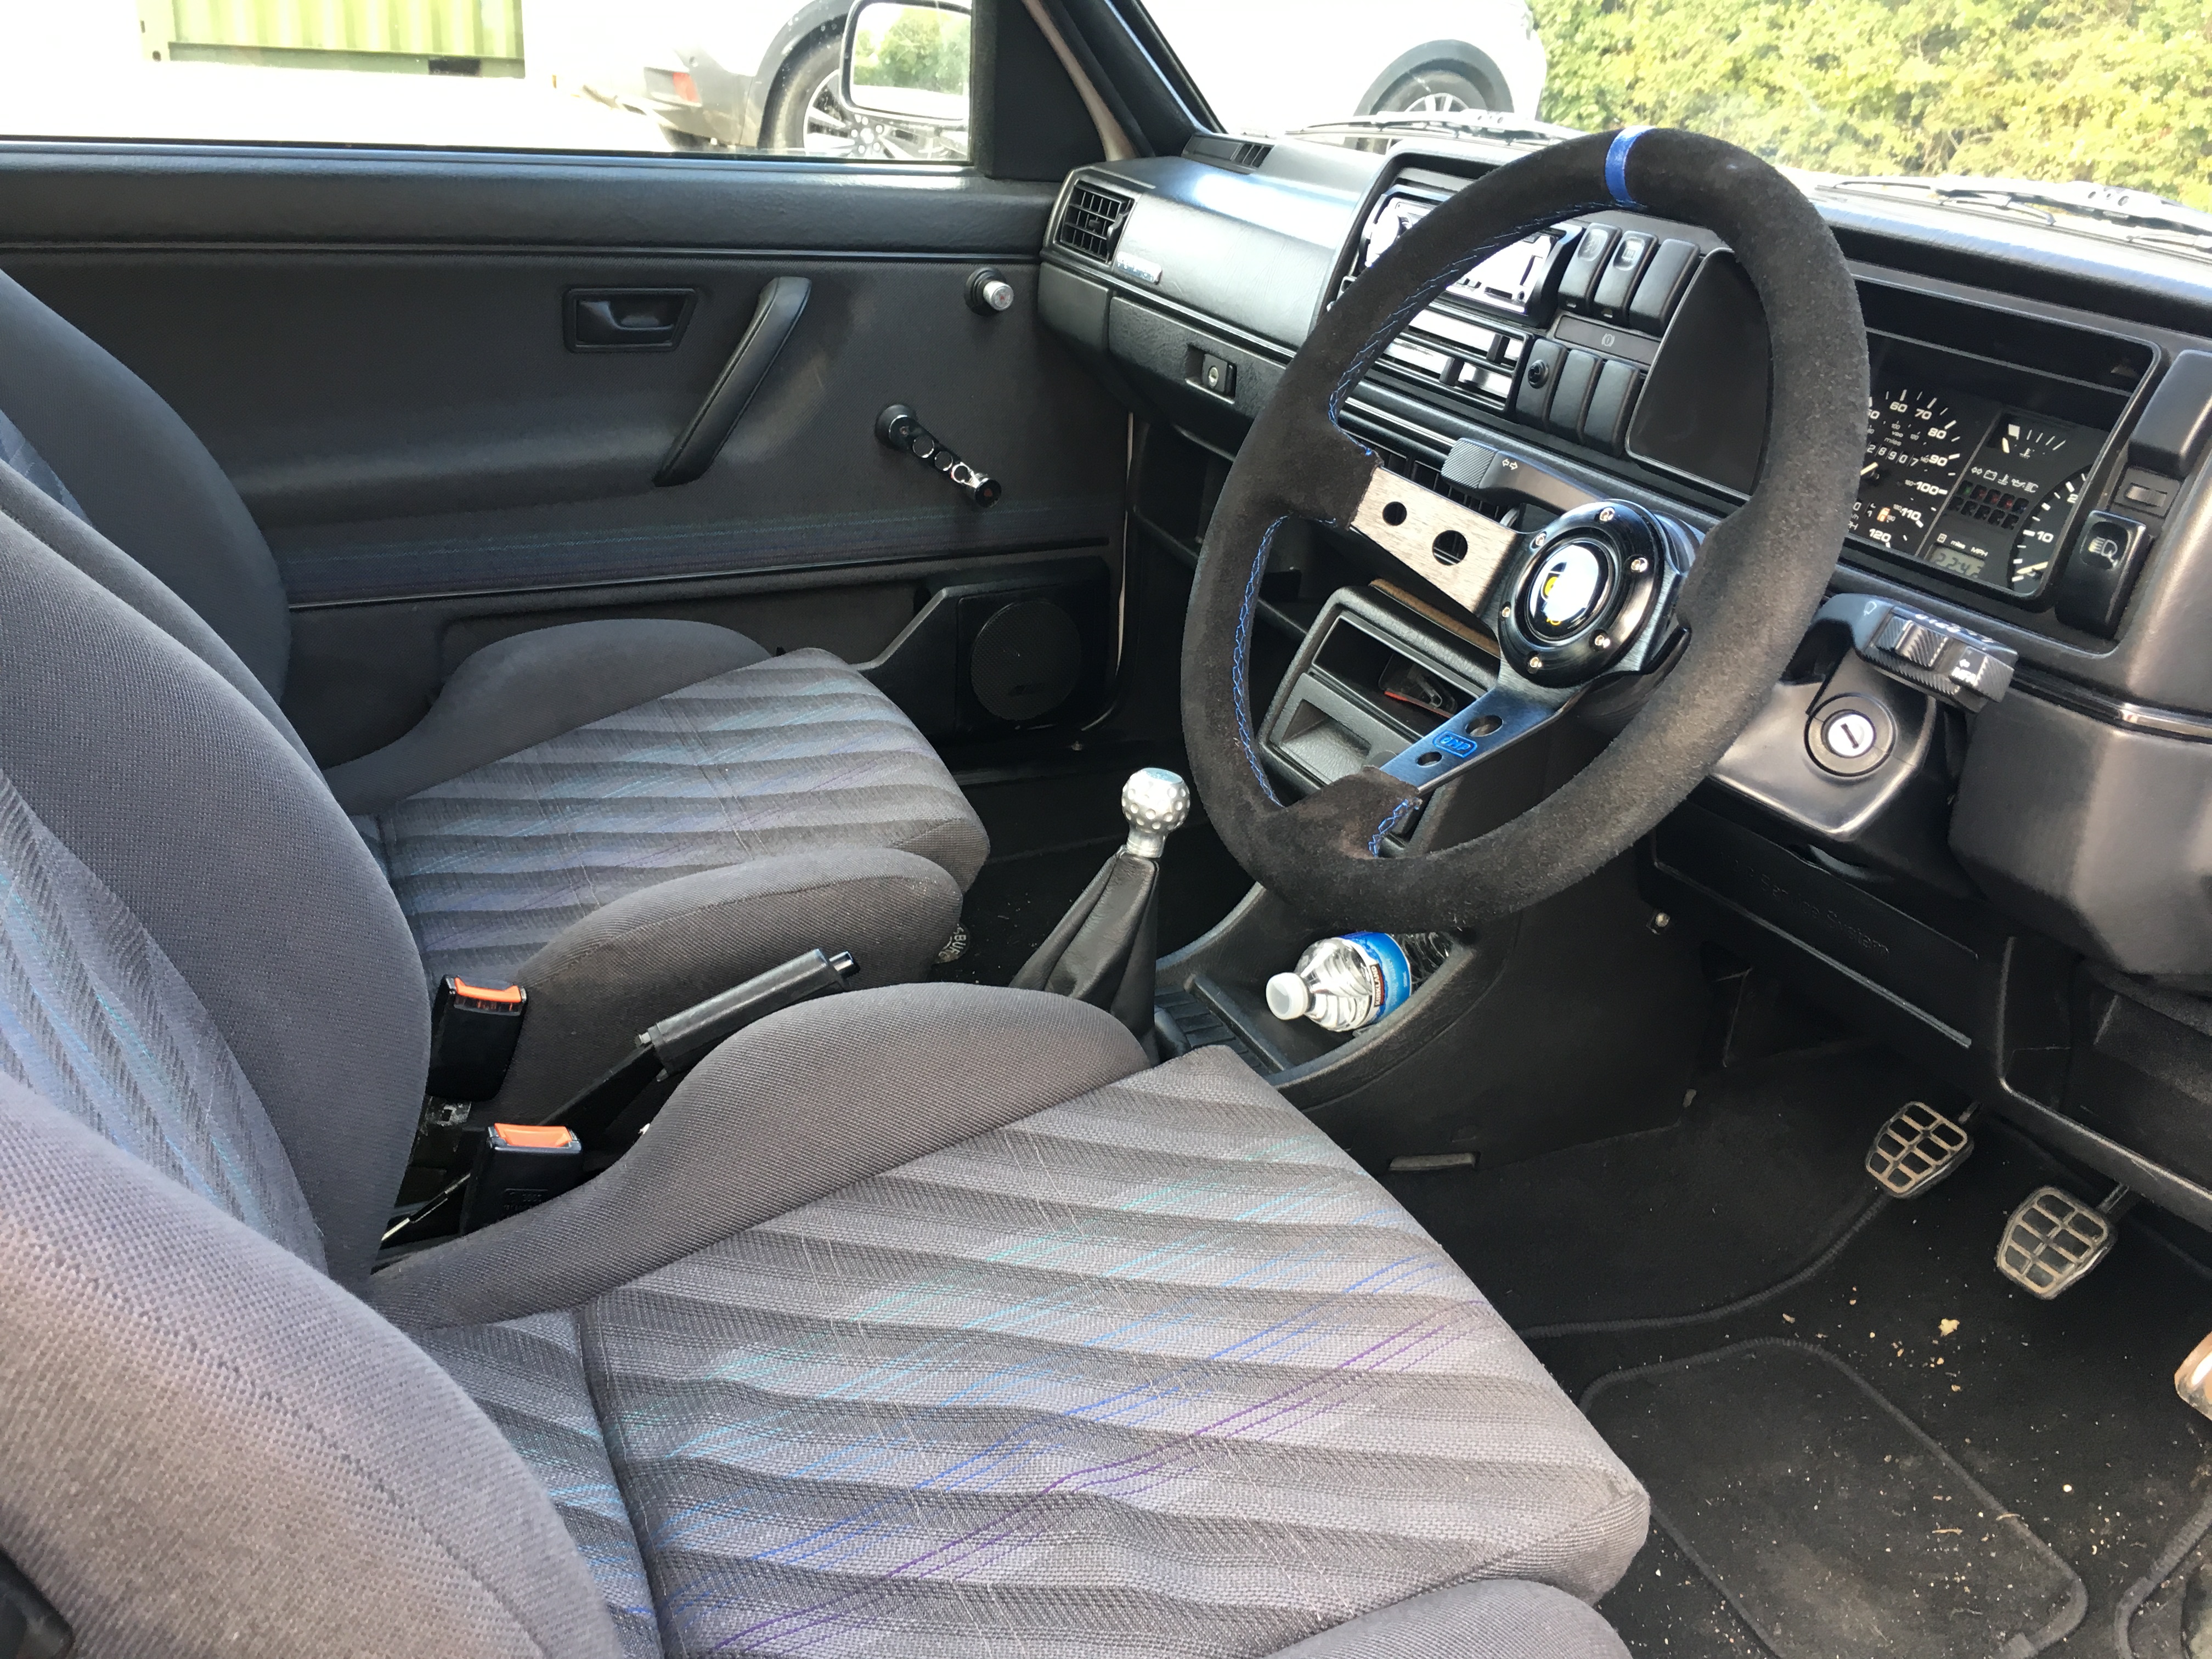
The aftermarket boss has its own horn ring but it’s very poor quality. It’s very short since it was fitted with a deep dish wheel. so with a flat wheel and even with the adapter ring it’s still short and too close to the stalks. the mfa switch on the stalk could do with a bit more clearance.
I had one of these adaptor rings before to convert a momo boss when I bought a nardi wheel, that did bring it forward. Most difficult thing is it put the stalks at a further reach.
Anyway, Turned out the spare boss I have is for a bmw e30. I guess I should get that on eBay.
A decent momo boss should sort me when I get round to getting one.
I did a few other jobs this weekend that were on the list.
Previous owner had a set of Recaro seats fitted. He refitted ‘badly’ the originals before the sale. Unfortunately they we’re bolted straight through the floor. Meaning 4 holes on each side. At some point in the future I’ll weld the floor properly but for now I’ve put in some stainless coach bolts with large washers and coated in waxoil. The bolts were from some I bought to fit the beetle bumpers.
Also hooked up the seat mech and got the seats sliding back and forward as I said, fitted badly, so they weren’t previously free running. Need to get new plastic sliders and gummy bears to sort it fully though.
Undid the rear wiper lay flat mod, and put that back in it’s appropriate place.
Much better :thumbs:
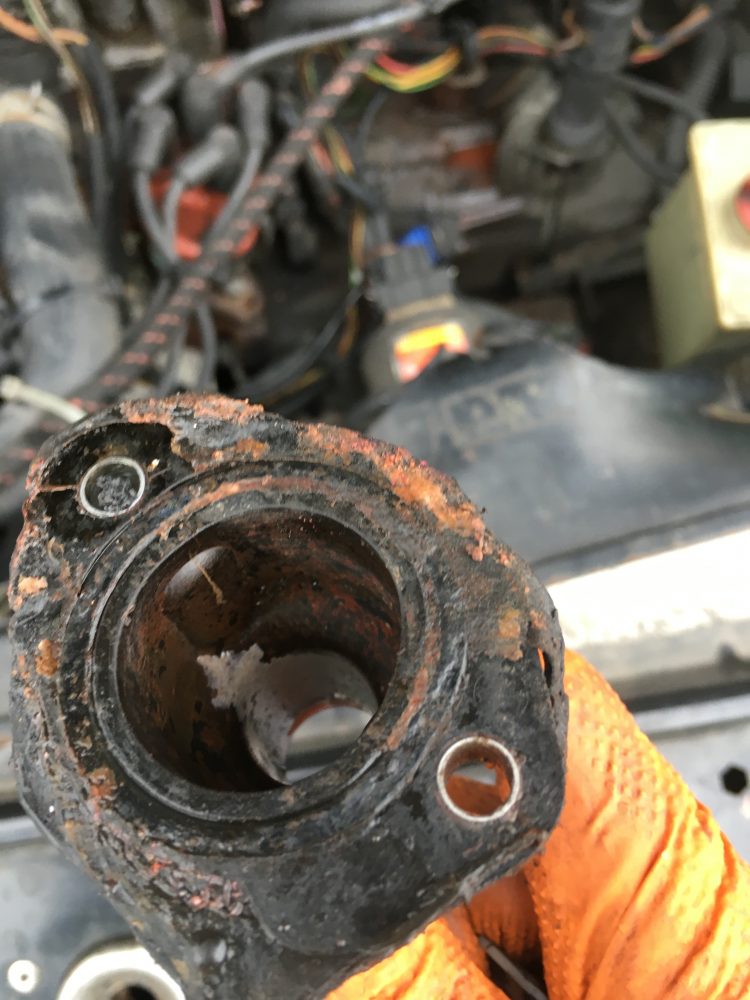
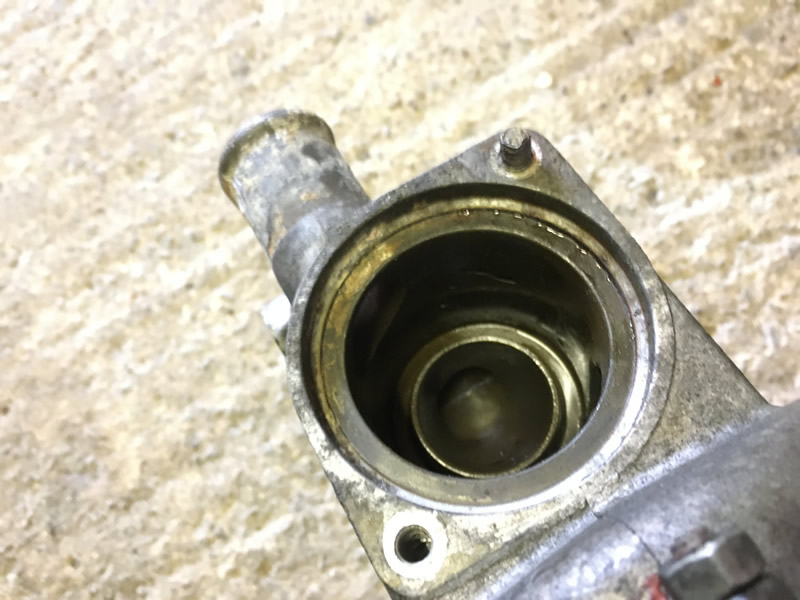
And replaced the coolant flange on the side of the head. It started leaking after I did the heater matrix and stuff, presumably I upset it swapping the pipe work. The one I took off had been gunged up sealant.
Washer jets work now as well.
Had a look at the boot lock. As It doesn’t lock with the central locking. Wasn’t sure why, but with my son as a second pair of eyes at the back we were able to determine that the boot actuator isn’t functioning. So that’ll need further investigation.
Quote from: sly_gti
I expect the vacuum line has come disconnected somewhere. Pull the boots at the top of the tail gate for a quick inspection of the wires / air line.
My thoughts exactly but I checked the fitting onto the actuator, the end where it joins the pump and pulled back the rubber conduits at the tailgate hinges and no sign of damage.
I would have thought if there was a leak in the system then it would affect the whole lot???
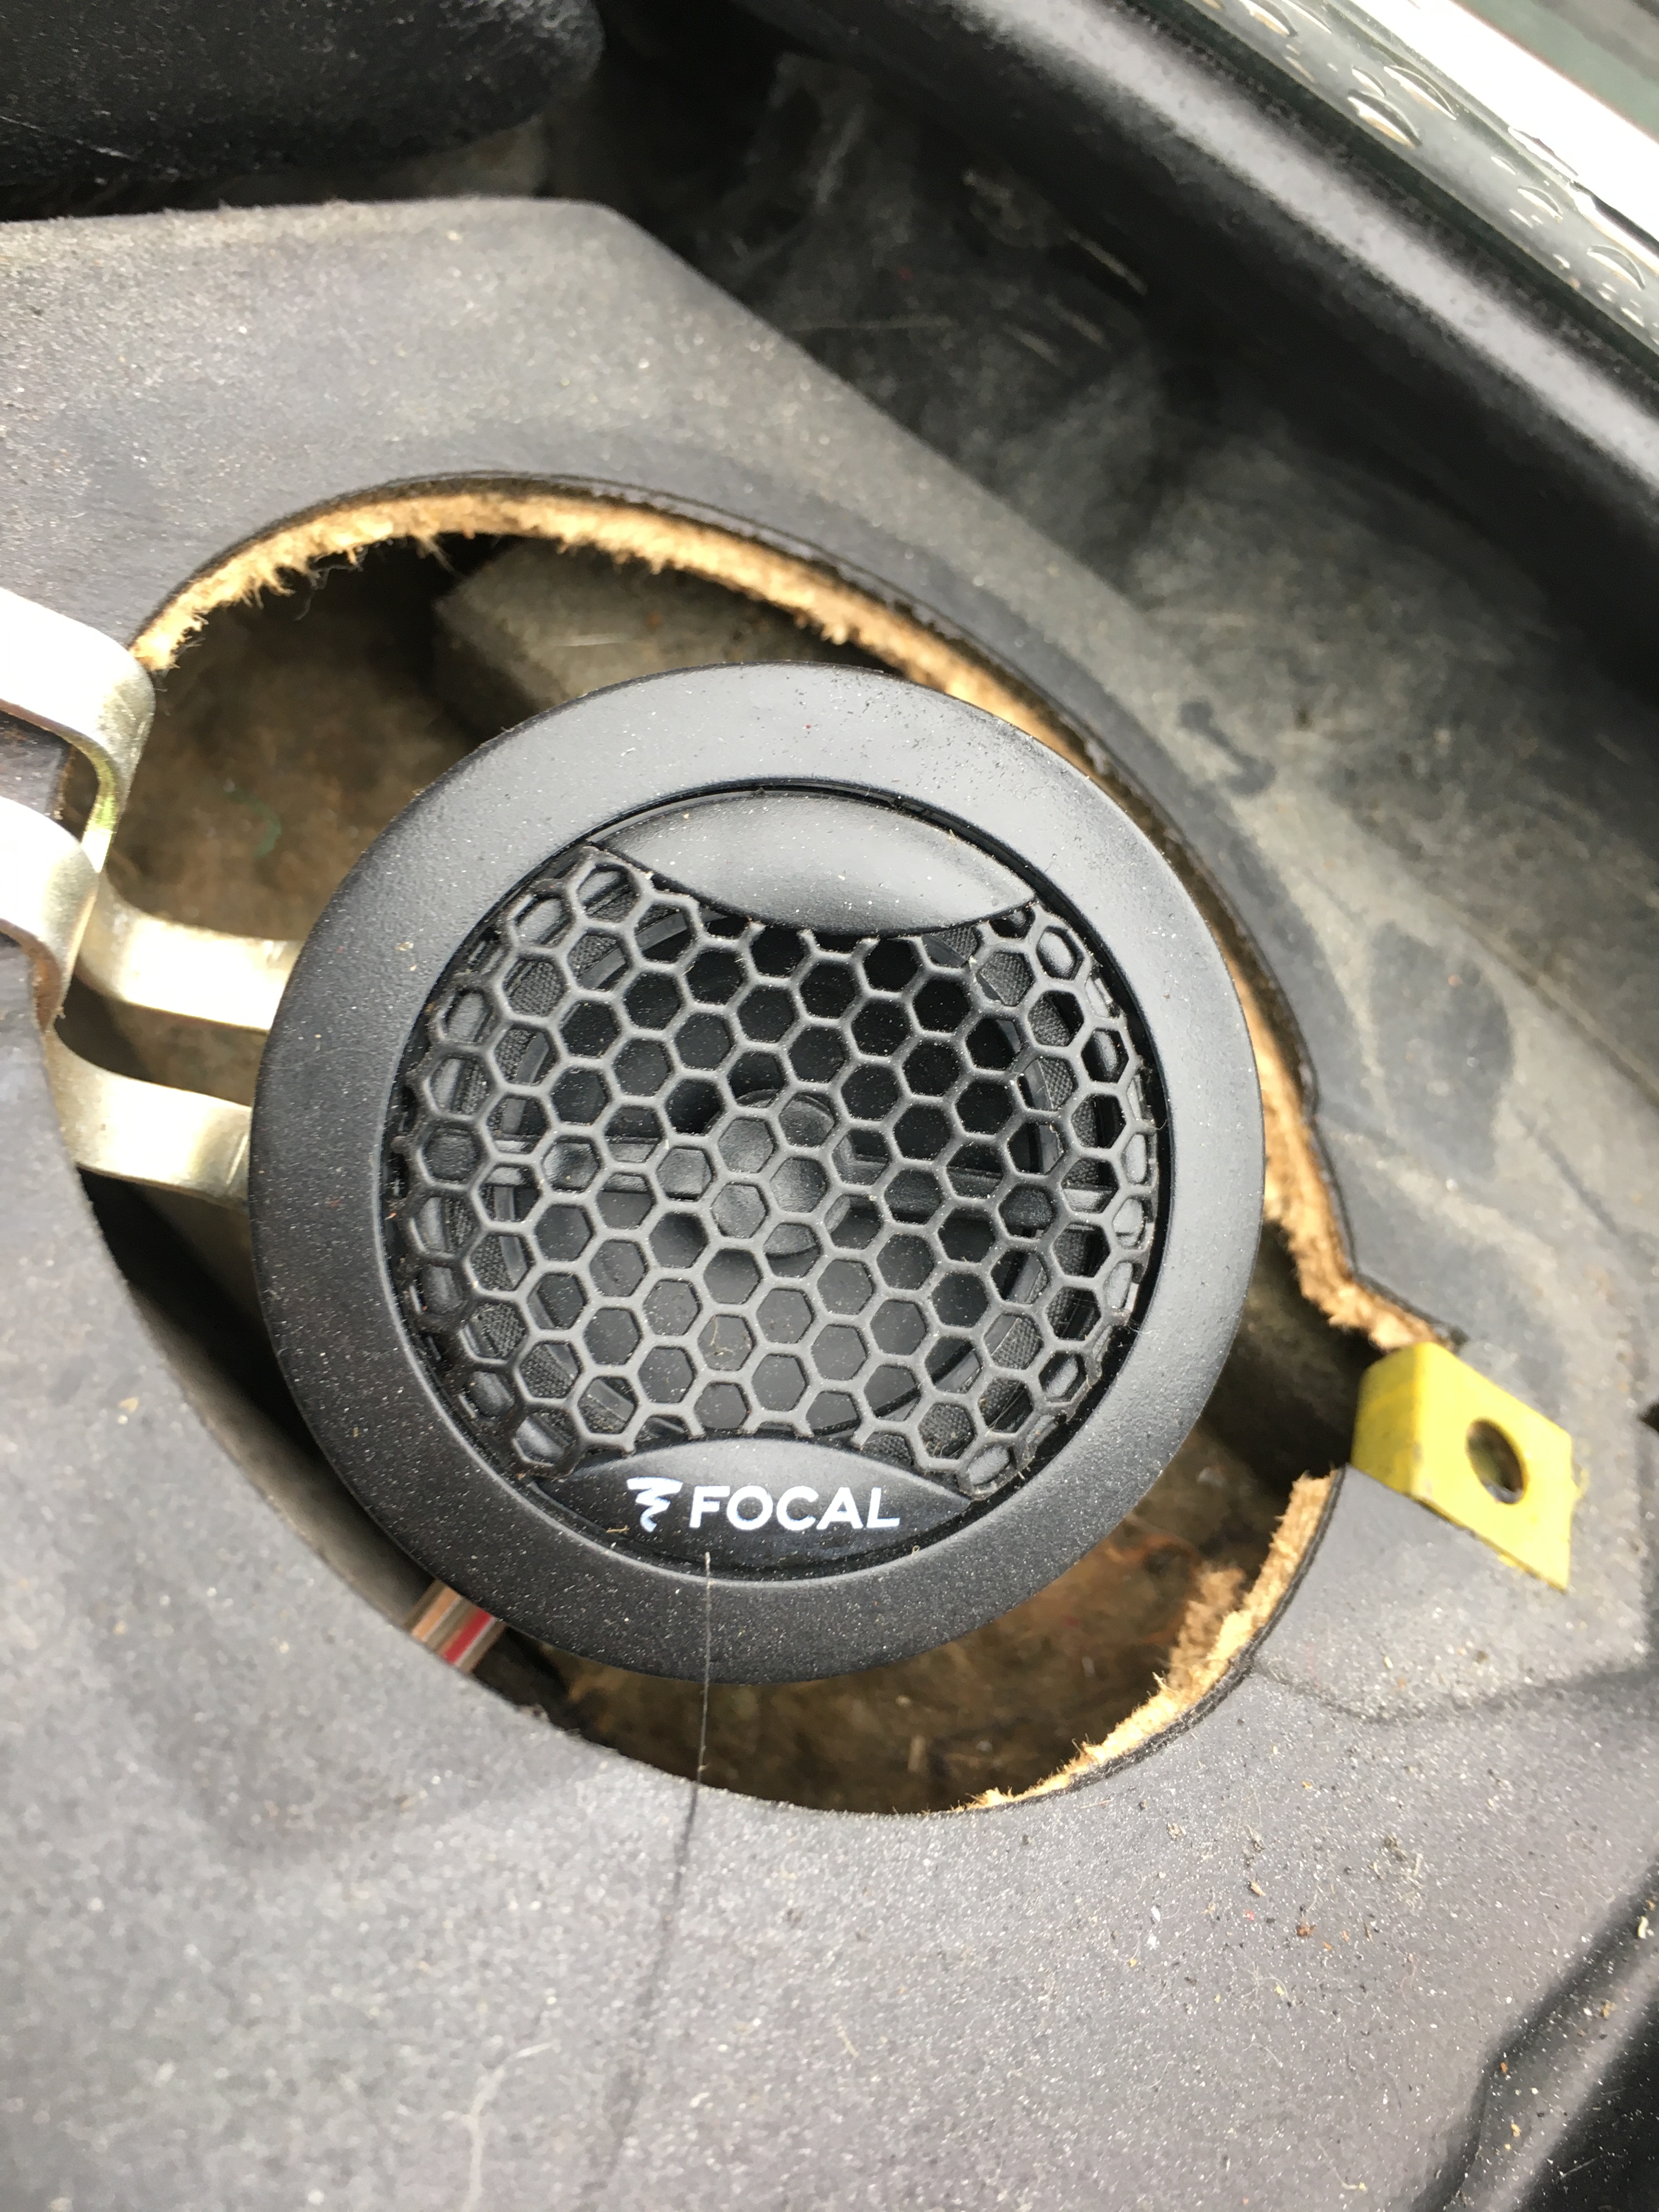
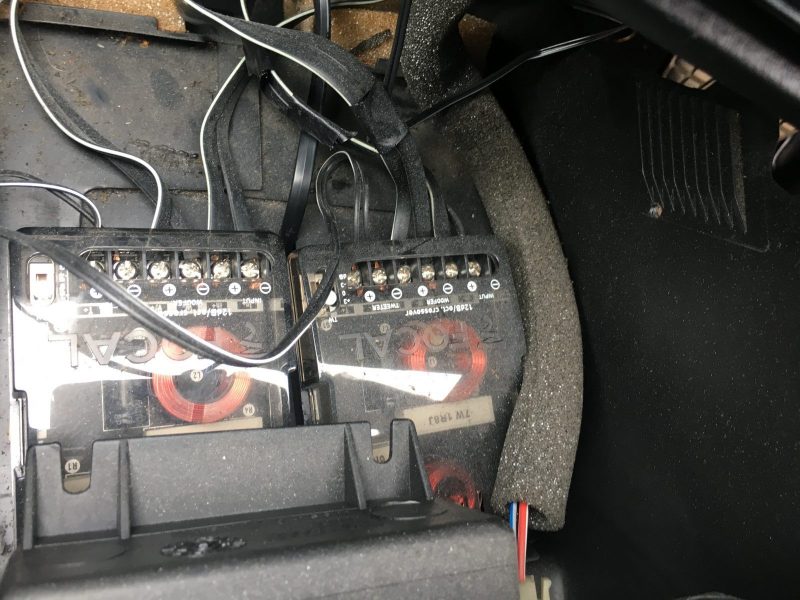
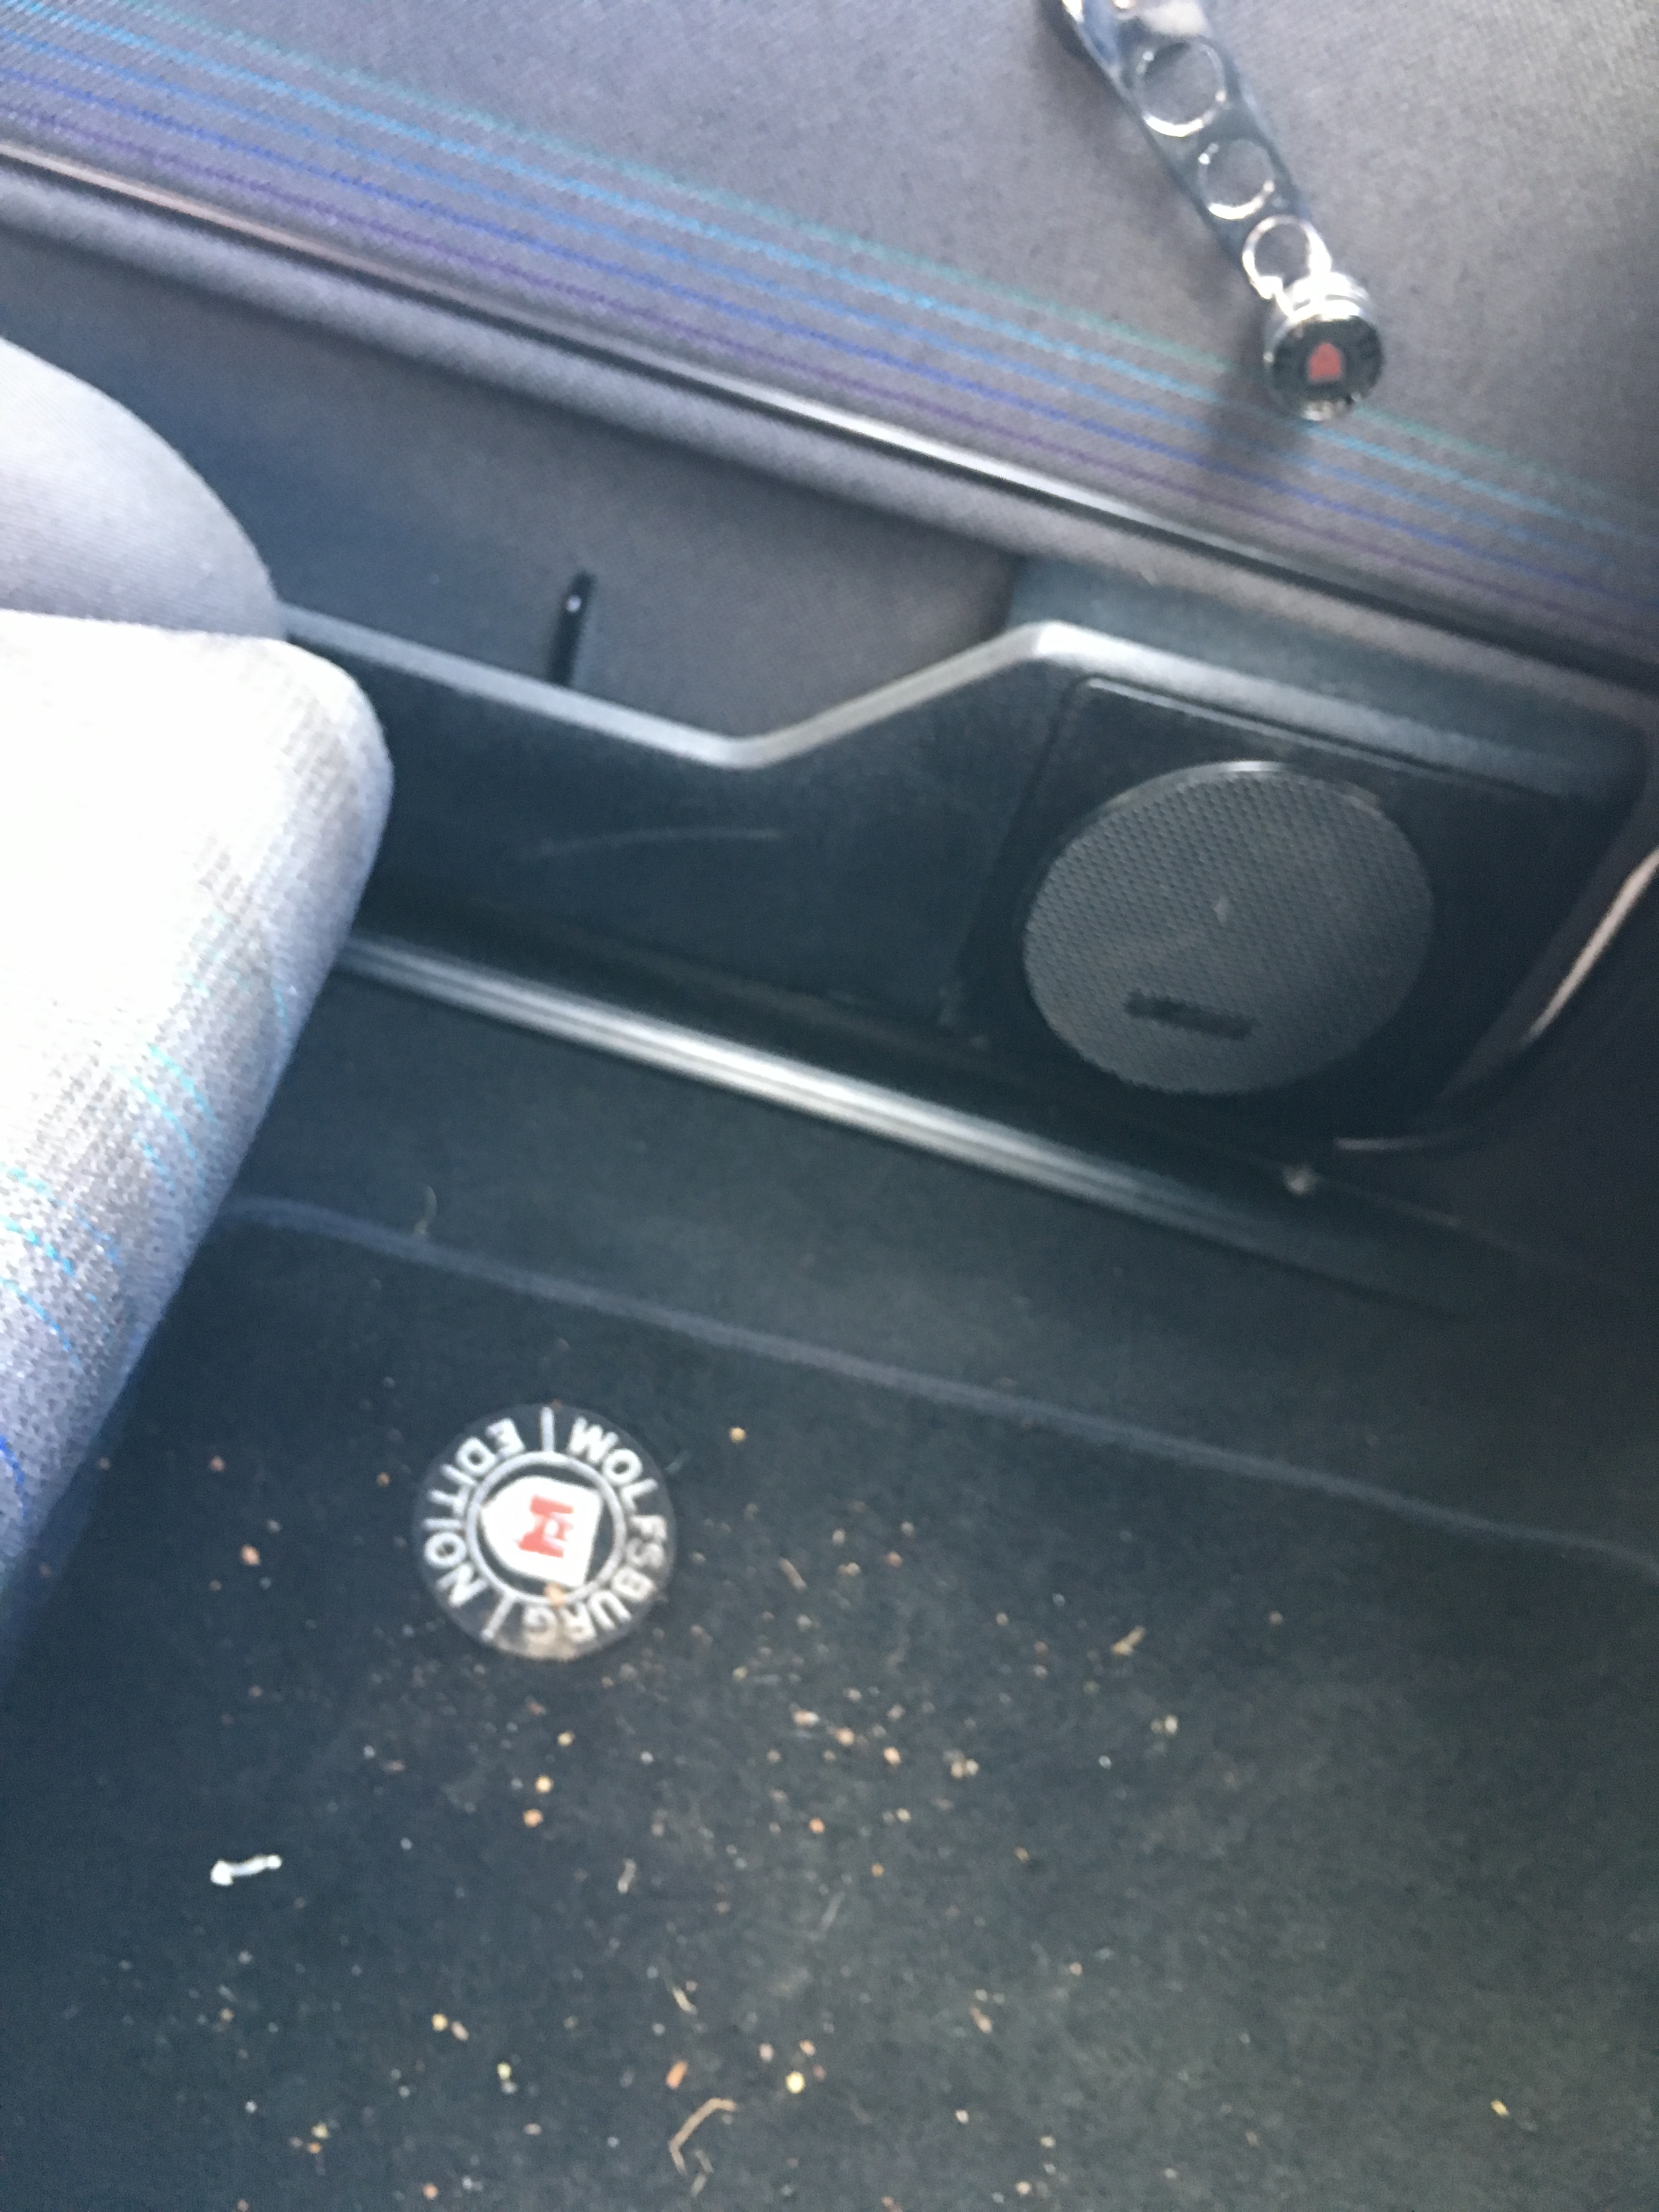
I almost forgot to add, I also checked on the door speakers and can confirm they are also Focal components and the doors are lined with Dynomat. So looks like someone put some effort into the audio. I just need to sort out the rear end.
December 09 2019
Well as luck would have it a large spline Momo boss popped up on Facebook selling page today for not too much money so I should have the steering wheel sitting nicely soon, as I said in it's current stat the stalks are too close and managed to turn the wipers on going round a bend today :lol:
Thanks both, yes I followed the CL vac line down to the T-piece near the n/s rear light cluster. The hose was firmly seated, to the extend I couldn't easily disconnect it so I decided not to disturb it. I was thinking if I disconnected I could suck and blow and see what happens ??
There's nothing obvious so like I said one for further investigation. It's a shame the house move never went ahead as I missed out on the much coveted double garage/workshop that I was due to be getting. Would be handy this time of year to get some of these jobs done rather than just be restricted to a couple hours on the weekend .... providing it's not raining.
Quote from: big F
Could it be the actuator that has failed.
That’s my guess, but need time to look into it. My plan is to pop off the hose and blow/suck, that should hopefully identify either a leak or as I expect a failed diaphragm inside the actual unit. I’m just sure if there was a leak in the system it would effect the rest of the locking but that all seems really responsive.
I’ve also been wondering if I can get a remote module to hook I to the toad alarm and trigger the master on the drivers door.
Plenty of things to tinker with and thankfully (dare I tempt fate) nothing too heavy duty so far.
December 13 2019
Genuine Momo, large spline boss has arrived. Will be a bit deeper by the time I've added the ATWIE/Italvolanti adapter on it but should be better than the eBay Scheiße on there now.
December 14 2019
After a couple of starting failures I bought a new starter motor from Mark Carter of Classic-VW.
Cheaper than ECP and no surcharge so didn’t need to fuss about returning the old one.
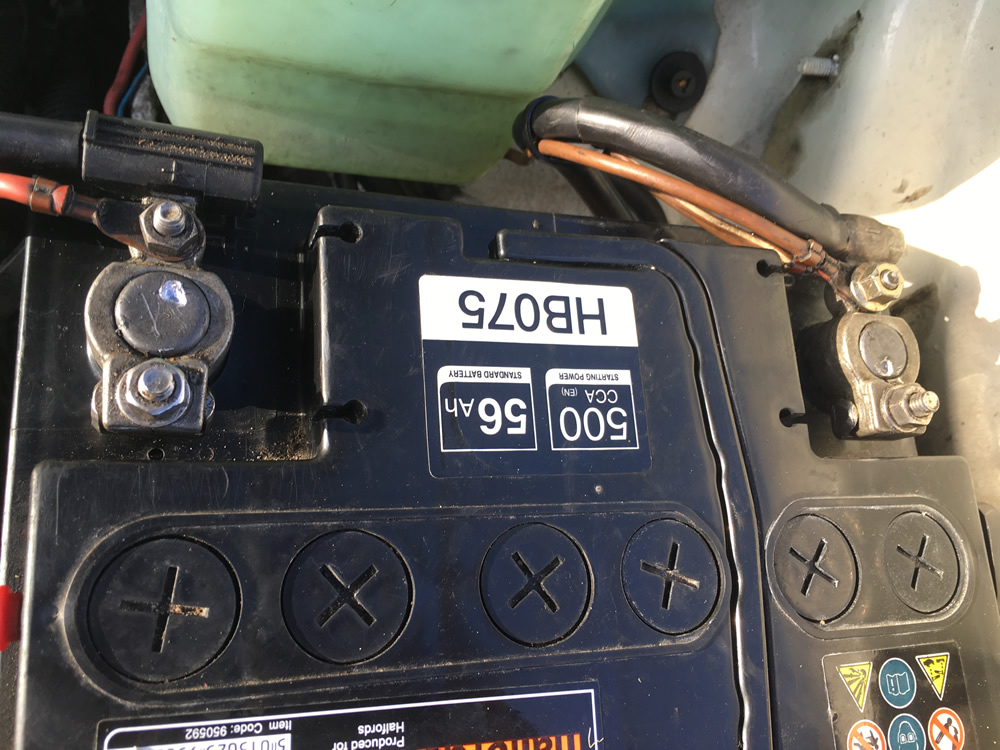
Nice easy job but while I was at it messing with battery cables etc I thought it was ideal opportunity to fit the mk3* battery cables I picked up years ago for the old car but never got round to it.
Another easy job and they look so much better. Cable is beefier and clamps are very neat.
*its been so long they may be mk4 ones, either way good upgrade.
December 18 2019
So, genuine MOMO boss now fitted, complete with ATWIE adapter ring:
You can see it's a fair bit deeper than the old one, more so with the extra ring on the back. So stalks are now at finger tips but not too far away and I won't keep clipping the MFA switch. The boss also seats better and the brass ring now reaches the horn - didn't test it, I was in the works car park and there were a few people going back and forward to the sandwich van.
Also looks like I'll be sticking with the 17" wheels for a while. Just ordered 4 new tyres. Tried to get some on the weekend and found out that 195/40 17 is a non stock size nearly everywhere and got quoted high prices to get some in.
So started looking for alternative wheels, thinking it would just be easier to replace the wheels and would make future tyre purchases a bit easier/cheaper. But needs must and need to be legal/safe so ordered 17s online - Went for Hankooks, not a premium tyre but general reviews seemed to be OK and they we're too expensive so that'll have to do... it's not like I track it, it's mostly a straight run along the M5.
For now I’m quite happy to keep the crystal clear headlights, spotlights and front and side indicators. They don’t offend me too much and the work. Although I do have a set of mint OE orange side repeaters I recently found in the garage. Happy that the car is generally tidy I’m not too fussed about it being OEM, but I know it wouldn’t take much to make it so further along.
Styling isn’t really a concern, priority it making it as good as I can So fixing little niggly bits and making sure everything works as it should.
December 20 2019
Getting close to 3 months of ownership now so thought I'd do a quick summary of what I've done so far:
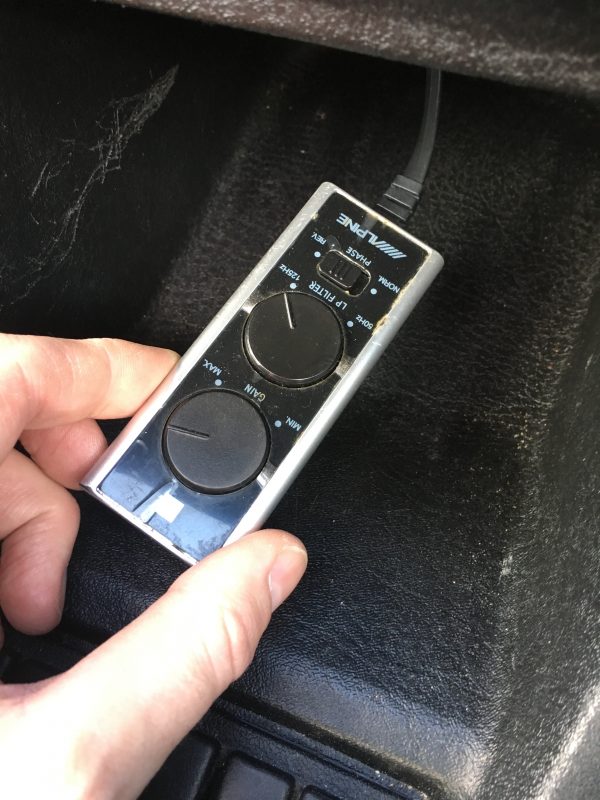
Removed 'bling': - Hella spotlight cover stickers - Fake towing strap Replaced Wolfsburg accessories for stock: - door pins, - window winders - mirror adjusters Replaced Trimpsorts VWMS gear knob with proper GTI golf ball Replaced Wolfsburg rear emblem with genuine VW badge (painted satin black) Replaced ash tray due to large stick on phone magnet Cleaned and fitted OE steering wheel - see later item * Swapped fixed grad handles with fold up ones Fitted smoked interior delay light Fitted missing handbrake cover Replaced switch blank with old LED hole for good one Plugged 8x bolt holes in floor from PO's aftermarket seats Rebuilt bodged up seat controls for forward/back motion Fitted retro Alpine head unit with mutli-changer Added FM aerial booster (with little effect) Removed unnecessary wiring and old sub controller from PO's old I.C.E set up Reconditioned heater box with new foam and new Matrix Cleaned and refurbished full heating pipework, new foam joints and seals on blower vent flaps Replaced matrix hoses and removed bypass valve New water pump Thermostat and housing Side coolant flange New expansion bottle and late type cap Fresh pre-mixed G12 coolant New Starter motor Fitted Mk3 battery cables Reversed the lay-flat wiper mod to put rear wiper back in correct place * Swapped OE steering wheel with my old VWMS Italvolanti, using new large spline Momo boss and ATWIE adapter ring Fixed horn by doing the above as the PO's boss was rubbish Fixed front washer jets
Jobs for Christmas break: New tyres have been ordered online 195/40 17s are a non-stock item, will have these fitted and balanced when the arrive Will continue to investigate central locking issue on tailgate Maybe some cleaning and general tinkering
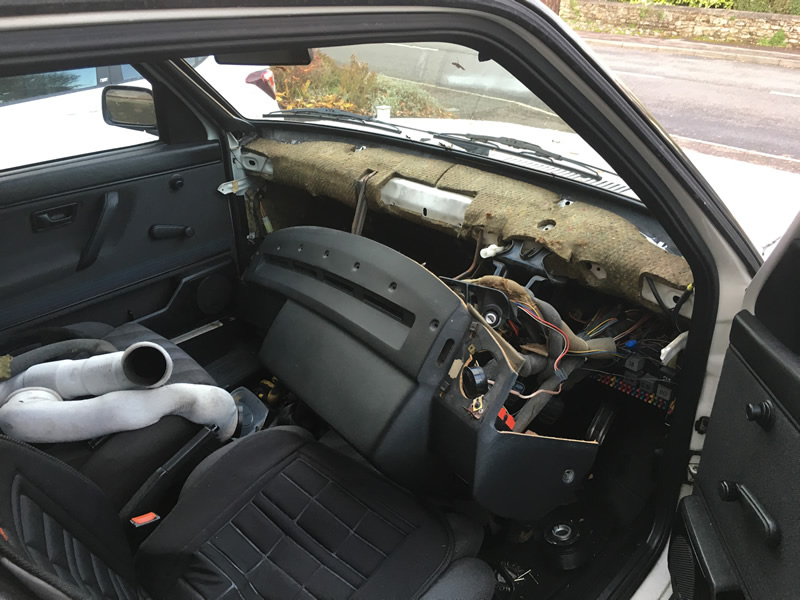
So, after doing some preliminary work during the previous weeks, removing the lower dash panels and vents etc on the weekend I went in deep and turned the car into a bomb site:
To liberate this:
And as expected:
The matrix was a Valeo one, date stamped 1991, the age of the car so fair to say it's the original so I'll be glad to get the new Hella one in there.
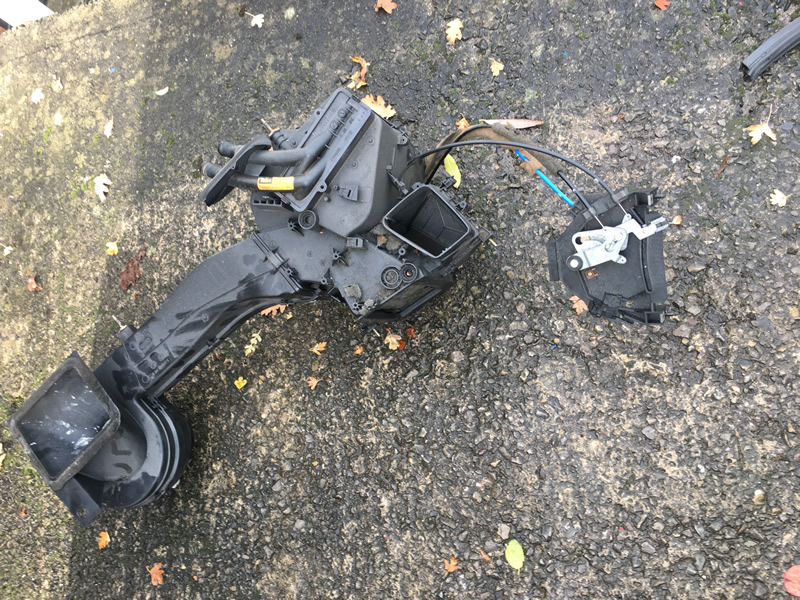
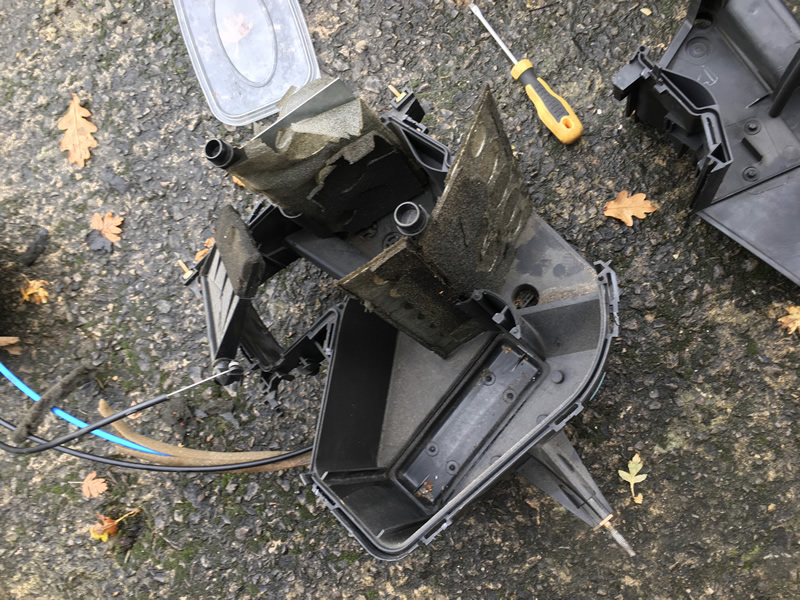
So all components hosed down to get rid of the worst parts of 28 years of dirt and debris before being taken inside for some attention:
Some arts and crafts time later, and making use of the currently empty conservatory, flaps and foam all sorted:
Meanwhile -
drain off this:
bin off this:
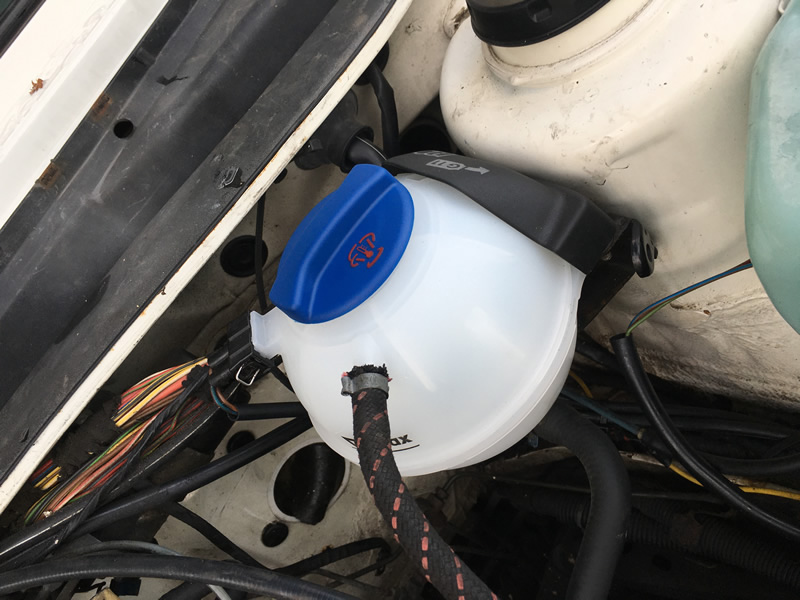
fit this and this:
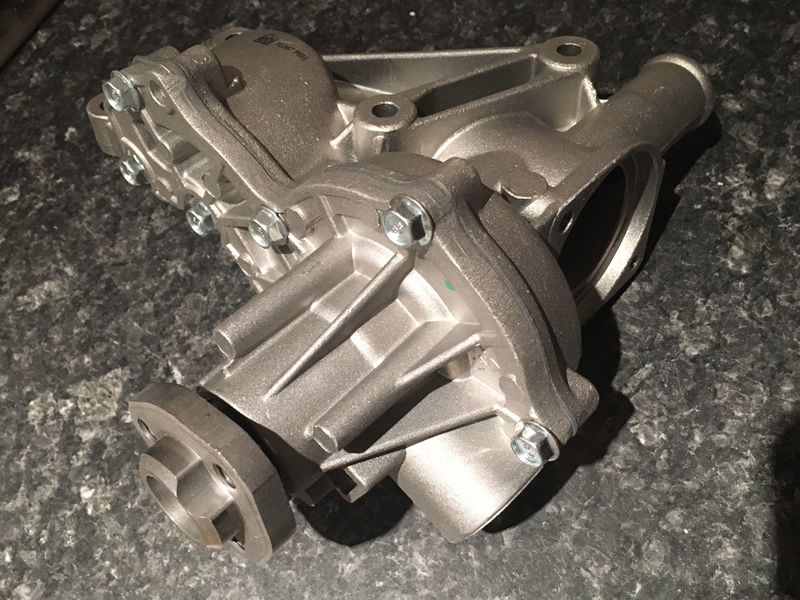
In the process of trying to replace the thermostat the bolt for the housing sheared off:
Exactly what happened to me previously, and just like last time, after trying for a short while to remove the stump I decided it's much easier to just replace the whole water pump. Only £30 ish (think it was more like £20 last time) for a Febi one from B and B components. Should arrive tomorrow and I can continue.
I want to get it back together now, but I also want to continue stripping it to check it all out inside and get it all cleaned up properly. So I'm at the pivot point. Do I fix the heating/cooling and get it back together and deal with the interior later... or do I make a bigger job of it now and keep the car off the road for the coming weeks?
Well the Mk5 is technically Carole's car so I'm on the bike full time at the moment, and it's been a wet couple of weeks, so yes, the wise move will be put it back together asap and enjoy the effective heating system.
I will be using it this time of year, although I'm not afraid to get wet on the bike so I'll split the time equally. Both will be harmed by road salt so there's no winner solution really. I'm not in a position to be precious about it. It's a car, I'm going to be driving it. But I will try to keep it clean over winter. Which may well include a good jet-wash of the under-body and arches.
Oh yeah, and the other thing I forgot to mention, whilst under it I managed to check out the coilovers finally. Disappointingly I discovered they are JOM after-all, the guy suggested they were about £270 which I thought was close to FK or AP money so I was hoping for something a bit better. So he either got ripped off, or simply got his numbers confused as JOMs can be had for more like £170 I thought.
Anyway that said, for cheap coilovers on 17" wheels, and tbf with tyres that don't have a massive amount of life left I do think the ride and handling is very very good. Not really pushed it that hard yet, and I'm sure I'll find the limits, but for now I'm on no rush to change any of it.... it'll do.
November 08 2019
Well yesterday was an odd day. Bike broke down on the way to work, so when I got home I decided to sack off the day as an impromptu day off and as it was dry and bright get the car back together.
This thing of beauty had arrived earlier in the week so I had everything I needed
Fitted: New Febi water pump Tested Febi Thermostat - worked as expected so fitted with new topran housing Fully refurbished heater box back in New topran hoses to do away with the bypass valve Dash back in with cleaned air pipes, refurbished vents etc. System filled up and tested Original steering wheel fitted back on, fairly certain the OMP deep dish wheel is fake Carpets vacuumed as I created a big mess with all the dead foam
Sorry lack of photos, but I was busy getting it all done. But I did take these
The late spec carpets are rubbish, but at least the lack of pile makes them easy to clean.
I did a few other jobs, and still have plenty left to complete but at least I have warmth in the car and transport for work again.
Quote from: rickygolf83
Excellent progress
Did the old thermostat housing remain in one piece? Always good practice to have one on standby as you did; i didnt when i changed one in 2010 lol
From previous experience I treat the housing as a single use item, if nothing else they warp so re-use is not an option. Especially with PAS in the mix, not a job I want to do too many times. It’s a right pain getting that out the way, especially as the pas pump is low down and gets all the grime, water and all the bolts seize up. Happy to report appears to be leak free first time this time and no air lock.
Although I should have followed my previous experience and bought the new water pump to start with too.
November 19 2019
Thanks, been away for a few days - took in the Haynes and Beaulieu Motor Museums (been sticking loads of pics on my Insta @akaeddypeck) so no further updates but using the car for work and I can report it's toastie hot inside.
A little bit too much condensation building up though so I need to work back through my own guide to make sure I'm 100% dry inside as right now I fear I'm not. There will be more to follow.
November 25 2019
Few small jobs over the weekend tweaks
First, the roof areal is rubbish but looking for a quick win I bought an FM amplifier of eBay for a fiver.
It made things better, I could pick up Radio 1 outside of work, but still had a couple of miles of radio black-out on the M5.
Needless to say i didn't use the red scotch block, I crimp fitted a bullet and plugged it into the radios blue accessory feed so it only comes on when the stereo is on.
I also bought a new (Genuine NOS Alpine) CD changer lead, since even though I kept the retro Alpine, I left the old lead in the old car as I'd trapped it under the carpet behind the heater box and was too lazy to free it.
So the CD changer is currently in temporary residence in the first aid box caddy to testing.
I say temporary, because although this ended up being the permanent location in the old car. The old car didn't have stupid low profile tyres on 17" rims with cheap coil-overs! so although I've actually be surprised how smooth the ride is, it actually must be a lot more "crashy" than I realise as it's certainly not smooth enough to play a CD for long without skipping. Luckily I do a lot of motorway miles where it's mostly OK as long as I don't hit a cat's eye too hard changing lanes.
So with the heater-box complete, and now I've finished playing with the front end of the audio I finally refitted the lower dash panels and tucked away all of the alarm wiring and crossovers etc that I discovered.
Milestone, the car's just rolled over to 130k miles last week.
I also bought an adapter ring so I could fit my Italvalonti VW Motorsport wheel to the large spline momo 'type' boss. Since the original boss is small spine and I didn't want to mess around removing the large spline adapter - in case I wanted to revert back to the OE wheel.
It wasn't cheap :eh:
However I discovered the horn didn't work. Which made me suspicious as it used to in the old car, but since the horn didn't work on the fake OMP wheel that was on there when I got the car this got me to thinking....
But it wasn't till yesterday afternoon when I was sitting in the passenger seat as I was letting my 16 year old daughter have a drive round a local disused car park that I caught a glimpse of something from an angle I wouldn't normally have.
The cheapo eBay boss that came with the car sits about 5 mm away from the horn contact.
So now I'm on the look out for a genuine large spline momo boss for not too much money. I have a spare small spline one I might need to pop up for sale to fund said purchase.
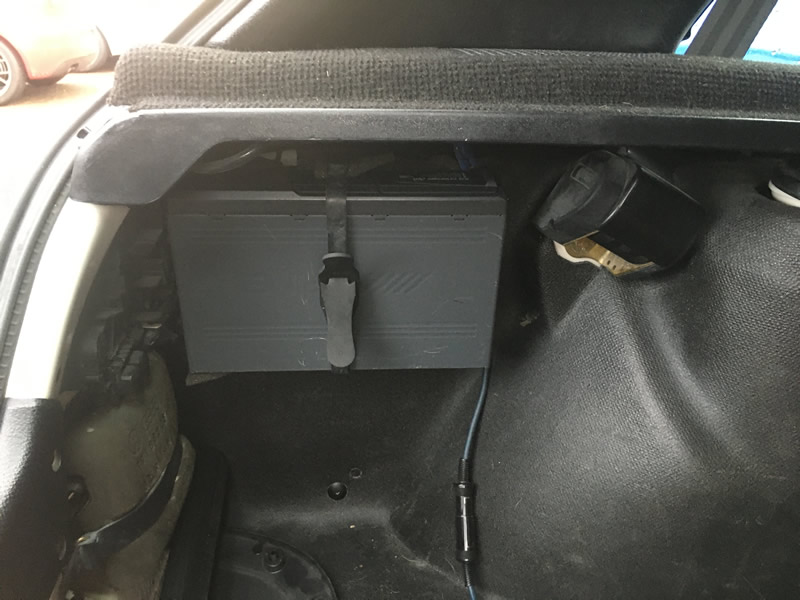
I did a quick Google and the price tags look quite weighty on them, so I'll wait and see what's behind the grills in the front. The original VW 6x4 are still clearly fitted in the parcel-shelf supports. But with the additional wiring in the boot I assume the boot contained a sub and most likely stealth shelf at some point - as the original one is uncut.
There was a rubbish media head unit fitted and as I'm not down with the kids I had no 'digital' media to connect to it, so bunged in my old Alpine, although not the CD muilt-changer yet and I have no tapes and the roof aerial is total rubbish :frustration: so on the odd occasion I get some FM reception the sound is pretty good (for a mk2).
I know we discussed on another thread a 'sensible' but adequate set up for Mk2 Audio would be nice to think I've been left with some useful goodies to keep the cost down.
This thing is in the centre console also
Although I'm sure it's useless/worthless without the hardware it was once connected to. But tells you a bit about the priorities of at least one of the POs.
But this time wanted to be a bit more OEM about it - or I didn't like it that last time I chose light grey foam (as that's all I had) and you could see it in the air vent. I didn't have anything darker till it dawned on me I could sacrifice a splash guard from the side of the heater box, as I had a spare and this one was a bit scruffy - there was also a chunk missing which wasn't there before so I think my dog has had a pop at it while I wasn't looking (note to self keep R A R E parts and soft furnishing out of reach - just remembered one of them eat some small bumper indicators previously, can't remember which dog
Perfect
a bit crude but you get the idea, I binned this one and tried again:
Just as quickie this morning, a freshly painted satin black rear badge almost ready to be fitted
October 24 2019
Parts have been arriving this week, such as:
So the full list consists of:
Hella heater matrix Febi expansion bottle Febi thermostat and O-ring Topran thermostat housing Topran blue coolant cap Topran heater matrix hoses 10L of ready mixed G12+ Coolant
Already in the stash from previous, a load of foam sheeting and high temp adhesive. So hoping to grab some time this weekend. Although with a broken washing machine potentially taking priority and my wife's birthday looming I might have to rethink that. Anyway, for whenever I get chance to get rounds to it I'll be ready.
And to give me a head start I stared by getting the lower dash panels and console out of the way.
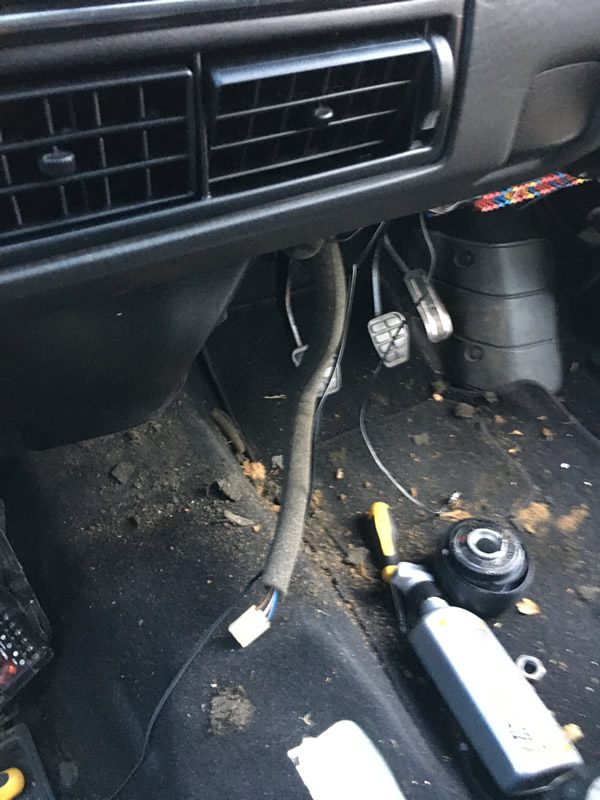
I found a hidden switch, still to discover what it does but I'm not going to try it till I'm safe on my driveway at home. Don't want to get stranded at work.
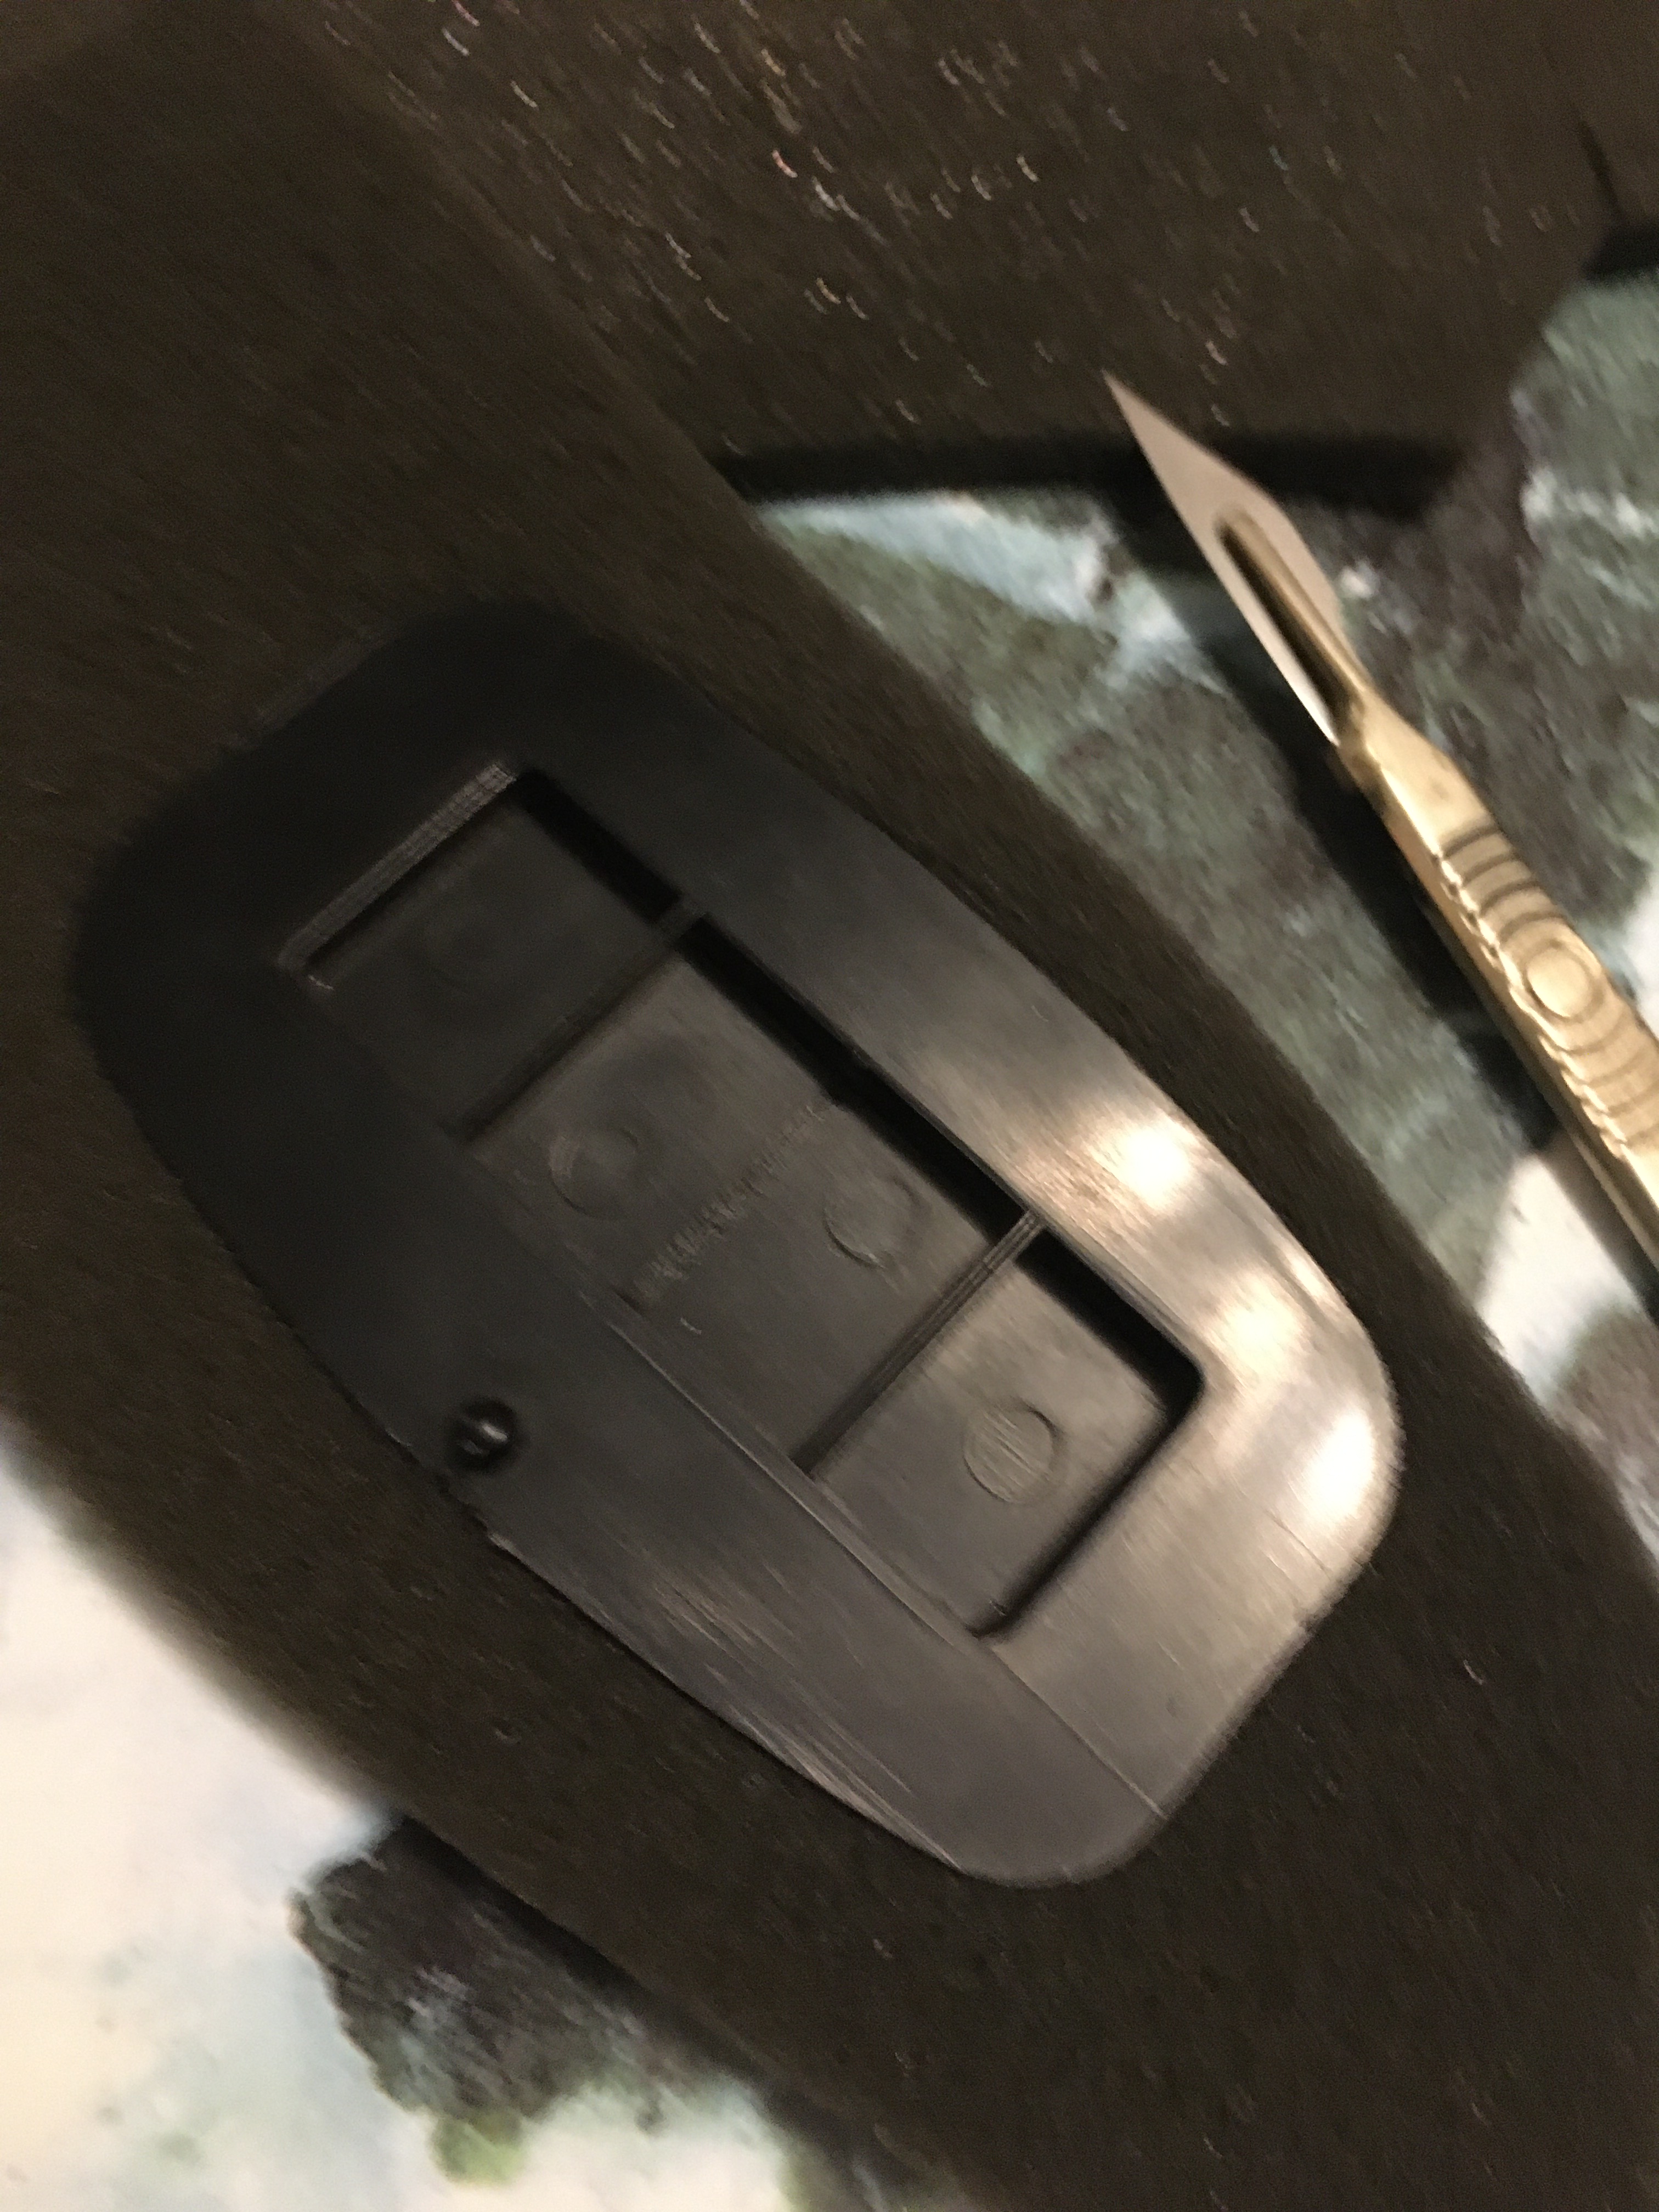
Also found some retro ICE crossovers:
haven't checked out what speakers are fitted yet but a sneaky peak in the dash grills looks like some done tweets and for the first time ever I have a golf with door speakers.
There's obsolete wires in the boot so I'll be interested to see what else I find when I start digging.
And having done this before I'm getting organised this time round. Mapping screws so they go back in the right places. As you may notice not all of these are the correct screws anyway.
Note:
Just adding this here for my own future reference after a bit of a google search.
Re: the hidden button. The alarm is a TOAD and if it ever gets stuck in servicing mode, potentially after battery removal I'll need to get it out of service override mode: • turn the ignition to ON, and leave it on • press the override button (now I know there is one) • the siren will double chirp to confirm exit of service override mode. • turn the ignition back to OFF
Decoded the options, nothing groundbreaking.
X2B - National sales program Great Britain 1AF - Power brake 3FB - Spoiler roof 5JI - ? 1C1 - Antifreeze up to -25 degree celsius tolerance up to -30 degree C 4KC - Side and rear windows in tint glass 4GF - Tint glass windshield 3NB - Rear seat bench/backrest, not split 1ME - Steering wheel GTI PAS 8J1 - Hand brake/low brake fluid level warning light without inscription 8K2 - ? 8M1 - Rear window wiper and washer system with intermittent control 8BK - (Something to do with lights) 8D7 - 6 speakers (passive) 3D1 - Center console 8TD - Rear fog light for driving on the left 8WD - With front fog light 8F2 - Side turn signal lights 8U0 - Without additional instruments for distance measurement 1TB - Fuel tank vent line with gravity valve and PVC breather hose 1H1 - Load-sensitive proportioning valve
Interior code XT which is Ultraviolet so that confirms the interior fitted is the original. Not that I was in doubt, but good to know. Maybe one day I'll find some Corrado Recaros.
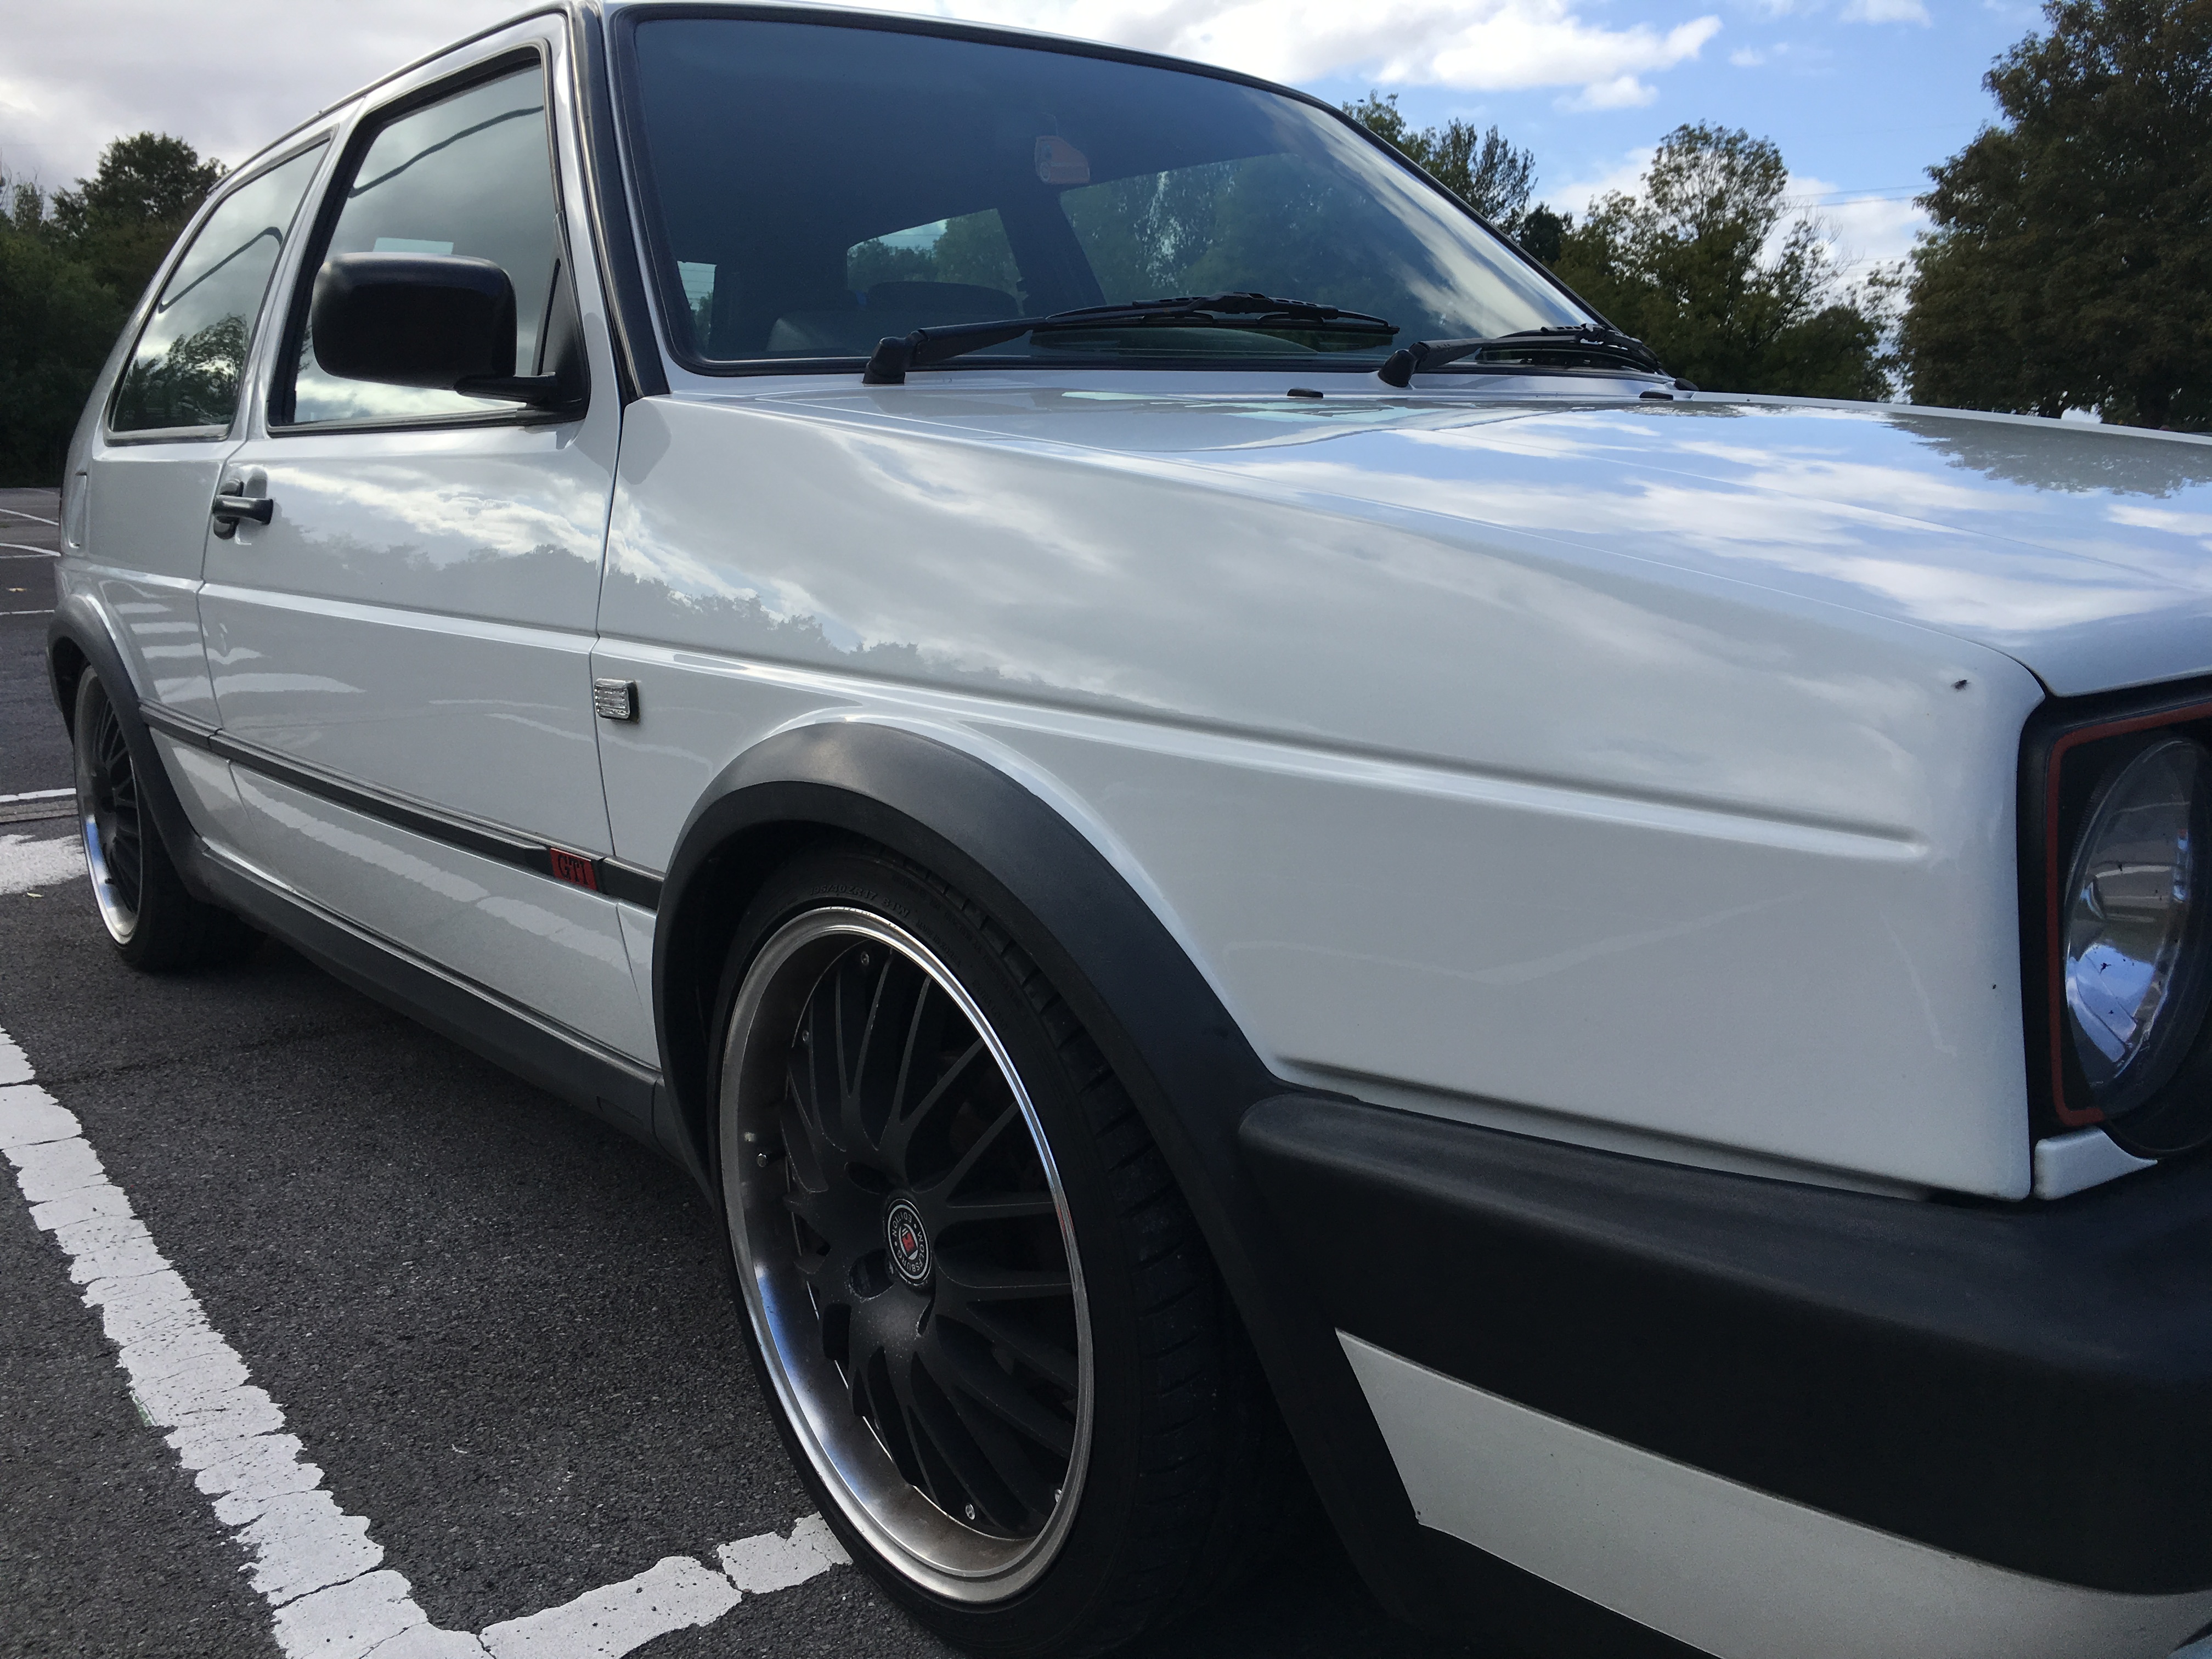
Just less than 3 years I'm back in a mk2 and I think I've found myself a bit of a peach for them money. Not perfect, but good in the right places (i.e. the shell and paint) which as we all know is the important bit these days.
I didn't set out for another white one, but I saw this one on eBay but initially dismissed it, for reasons I'll get to, but after the listing had ended unsold I spotted it in the comments of a Facebook post and recognised it, so decided to make contact with the seller and start a conversation.
It's registered August 91 and is a genuine factory Big Bumper CE2 model. A first for me, door mirrors are in the wrong place and the wipers go the wrong way but I guess I'll just have to get used to that.
Only 128,000 miles, but despite the roof aerial and rear tinted lights (they're FIFFT not Hella) it is in fact an 8v. Major gripe of mine, a bee-sting on an 8v but again a compromise I'll learn to live with.
It has a full Miltex exhaust, It's on coil-overs, I haven't determined the brand yet, but have seen the coils are blue but the gezzer said they more mid-range than budget and to be fair the ride is decent, a lot better than I was expecting so I guess he must be right.
And as for the ride, it's also on 17" wheels, which again has surprised me as I though it would be really harsh and crashy but it's not.... or maybe I've just got used to the MK5 GTI on stiff suspension, 18" wheels with 40 profile. Either-way, I'd say it's on a par with that.
Ultraviolet interior, with no holes...
bolster foam is weak, but I've stripped down and padded out late spec seats before so it's on the list of jobs.
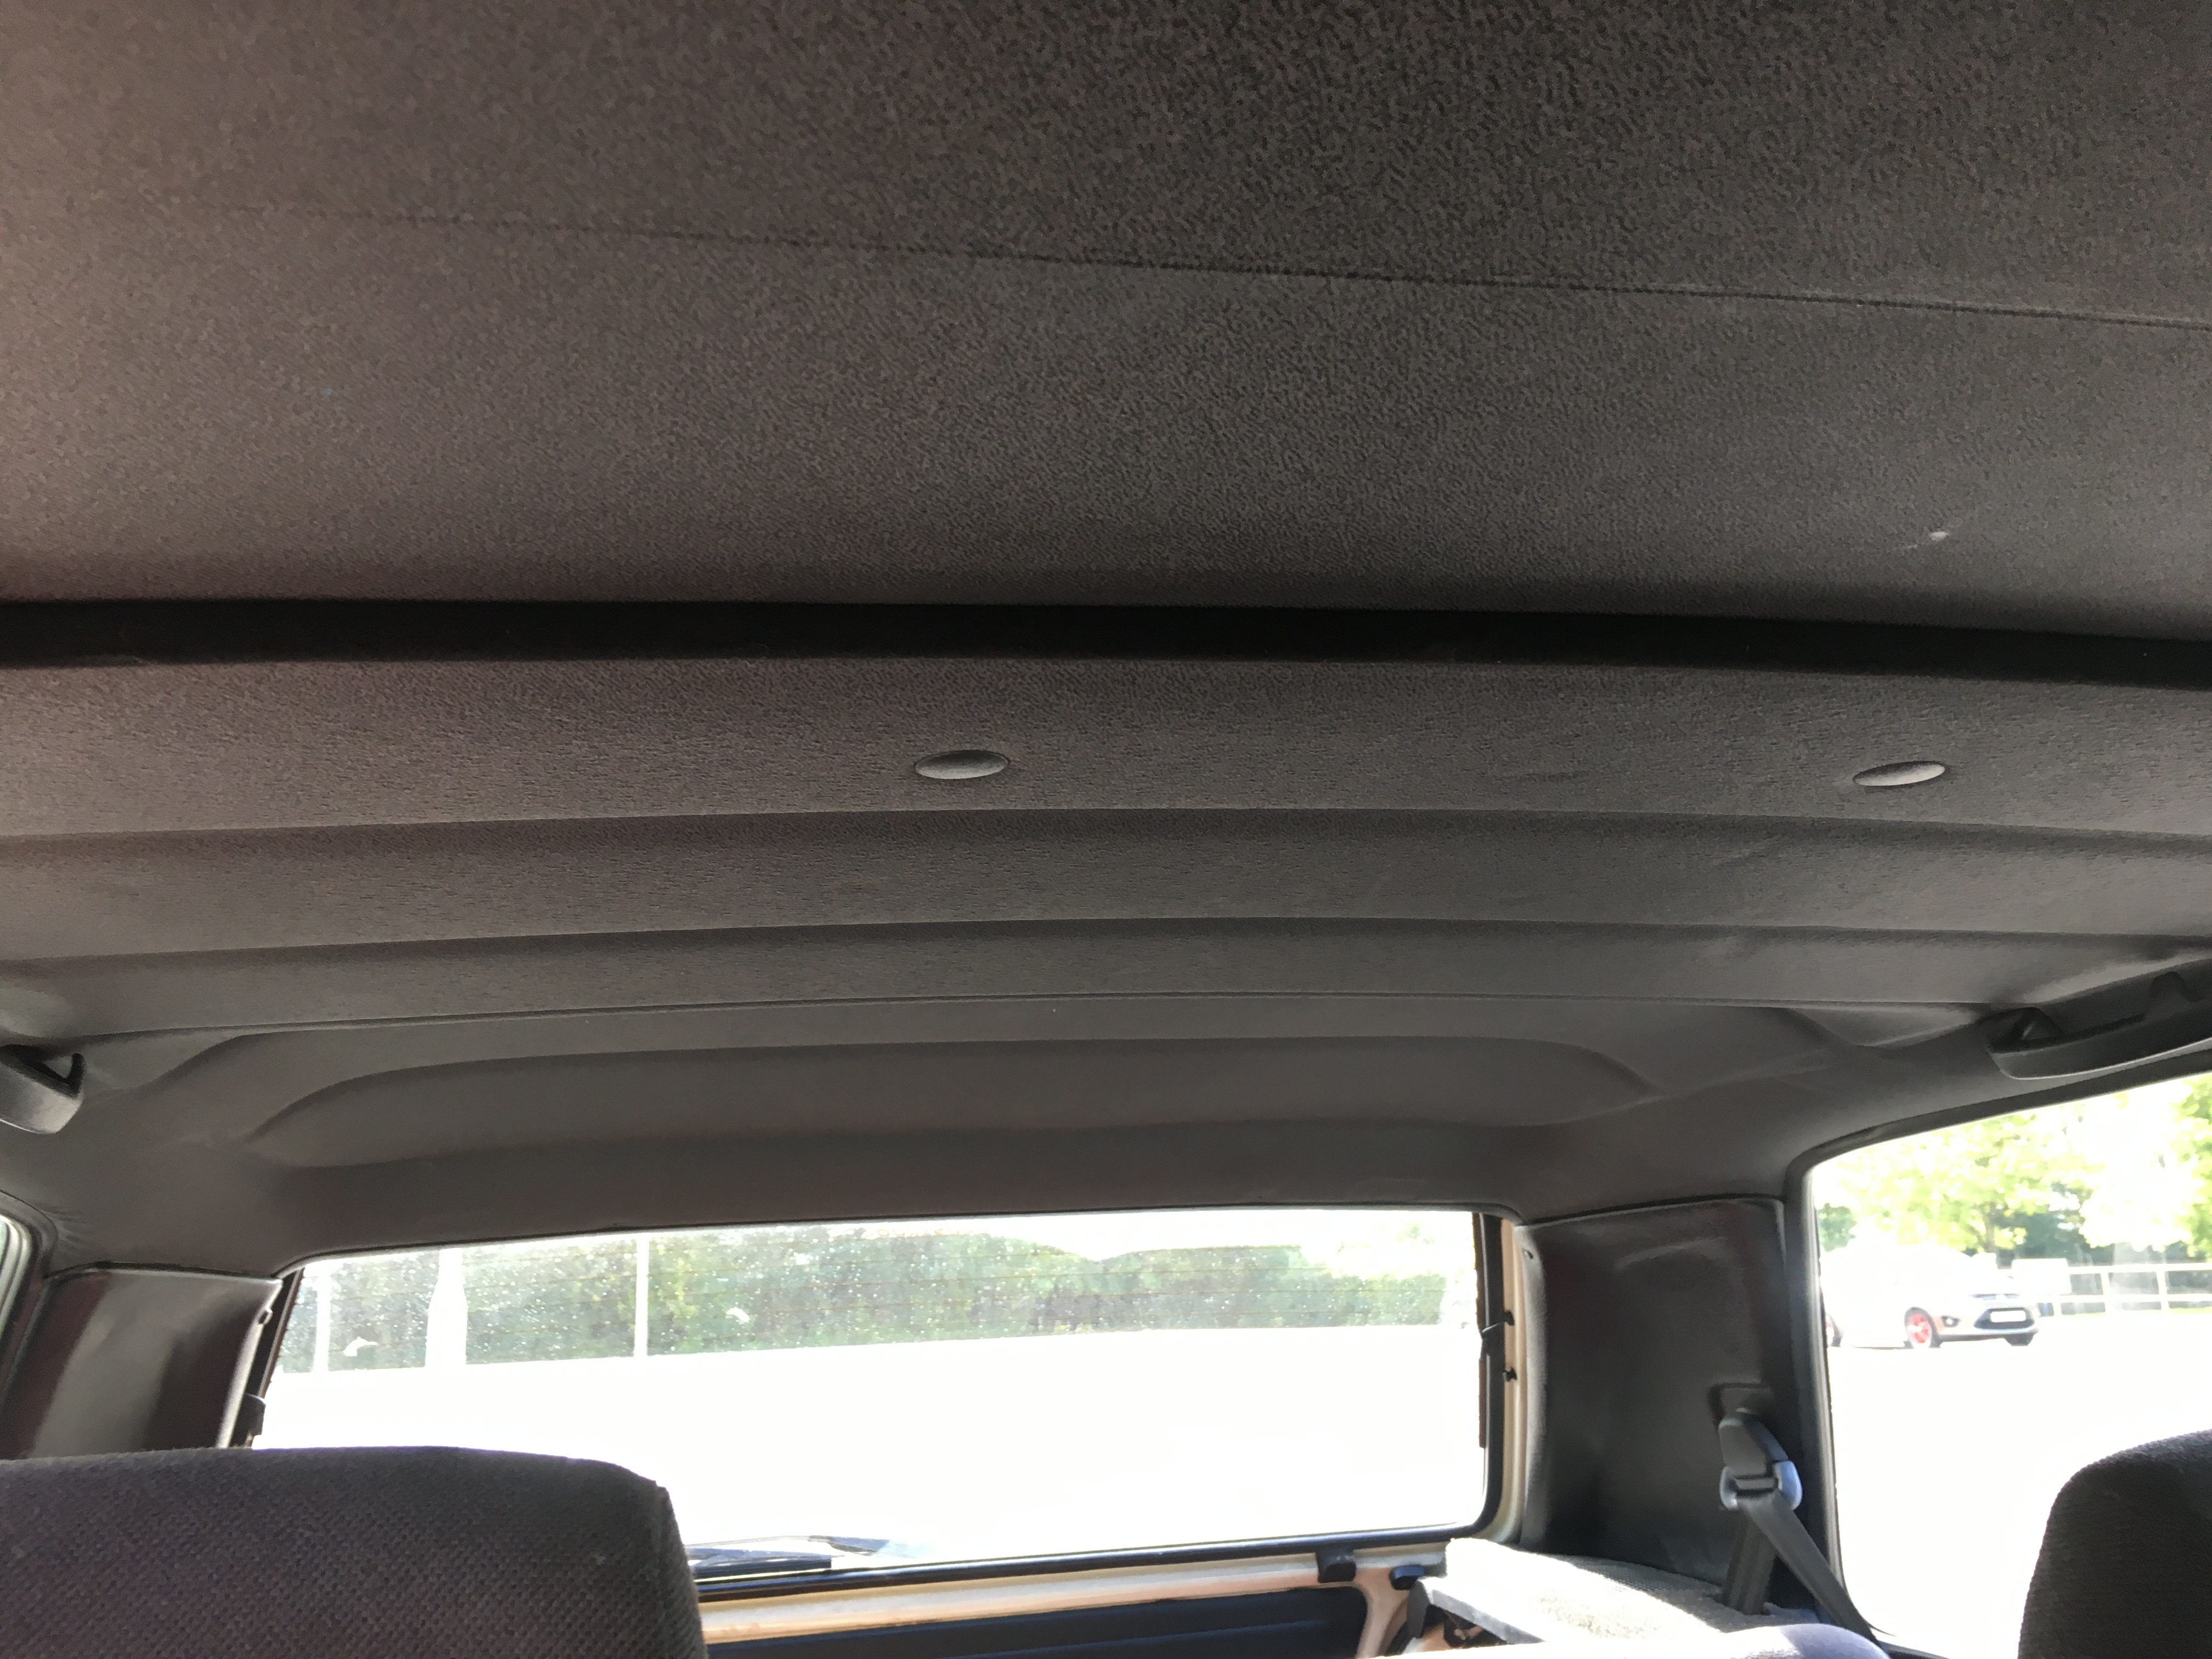
Headlining is in good order...
and dry inside which is great.
Clean in the areas that often aren't...
Factory air fed central locks, which works everywhere apart from the boot.
And standard issues of heaterbox foam hits you in the face on full blow and blows cold as you'd expect.
Thermostat needs replacing, gear linkage bushes have been done but I think the alignment could do with a tweak as 5th isn't always achievable first try.
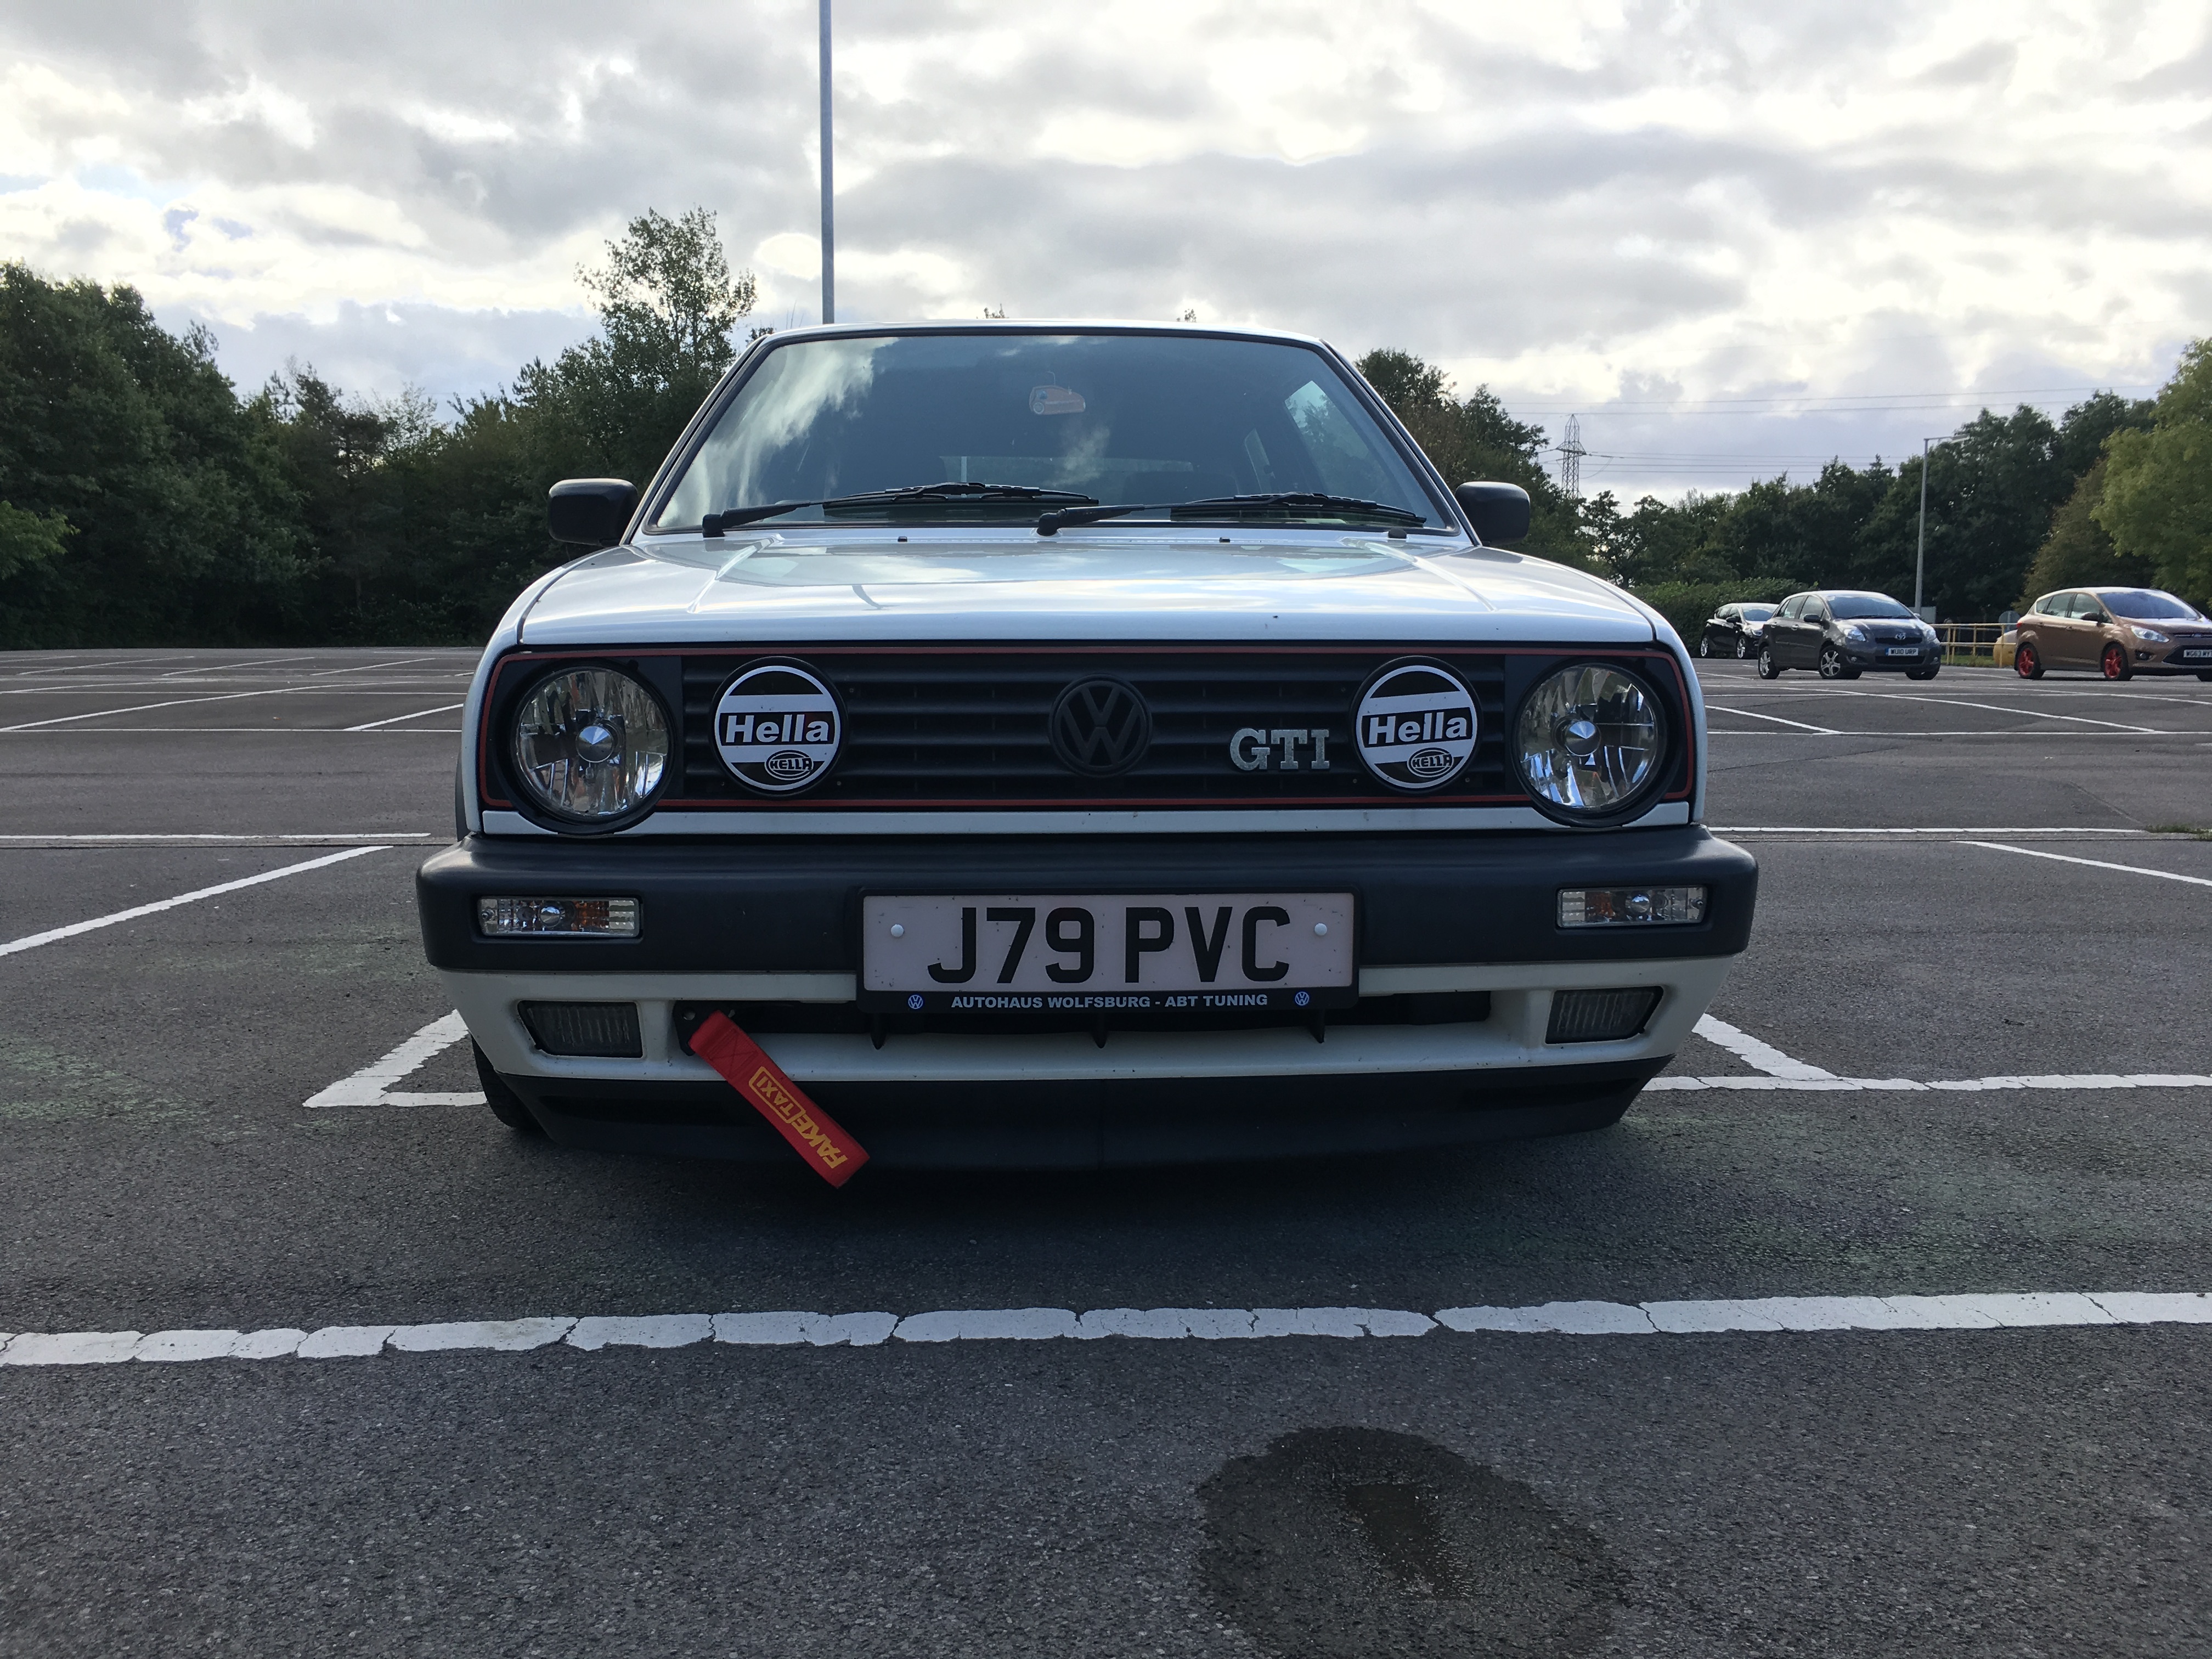
Apart from that it's just the deep dish OMP steering wheel, fake tow strap, hella stickers and over the top Wolfsburg accessories that need to be replaced...
also the door pins, but I forgot to photo those. And just in case there wasn't enough Wolsburg inside...
and a couple of videos the seller sent me pre-purchase.
So that's about it. Apart from the reason I nearly passed it by. Well the first reason was asking price, it was originally listed much higher than I actually paid. And I think the reason it didn't sell at that price and why I was able to knock it down, it has an "accident" recorded against. If what I'm told is true the hand brake was left off and it rolled into a tree on the rear offside quarter. The result it it has been fixed and benefited from full paint, and since most cars of this age have had some work done I thought so what if it's had some metal work, if not from an accident most have had work through rust, rot and neglect.
I scrutinized it as much as I could, under the trims and internal carpets, and could see no obvious signs of repair so happy it's been done to a very high standard so based on that I took the plunge ...
October 08 2019
And so it begins...
Quick fix number one: fake tow strap removed:
Trimsports VW Motorsports gear knob removed and up for sale already, and fitted a decent condition original golf ball that I'd purposely kept back for such an occasion:
On retrieving it form the drawer I noticed how grubby it was so I'm sure I'll be taking an old toothbrush to it at some point along with the rest of the required deep clean. Already much better, the Alloy one is smaller than stock and also cold to touch which I don't like.
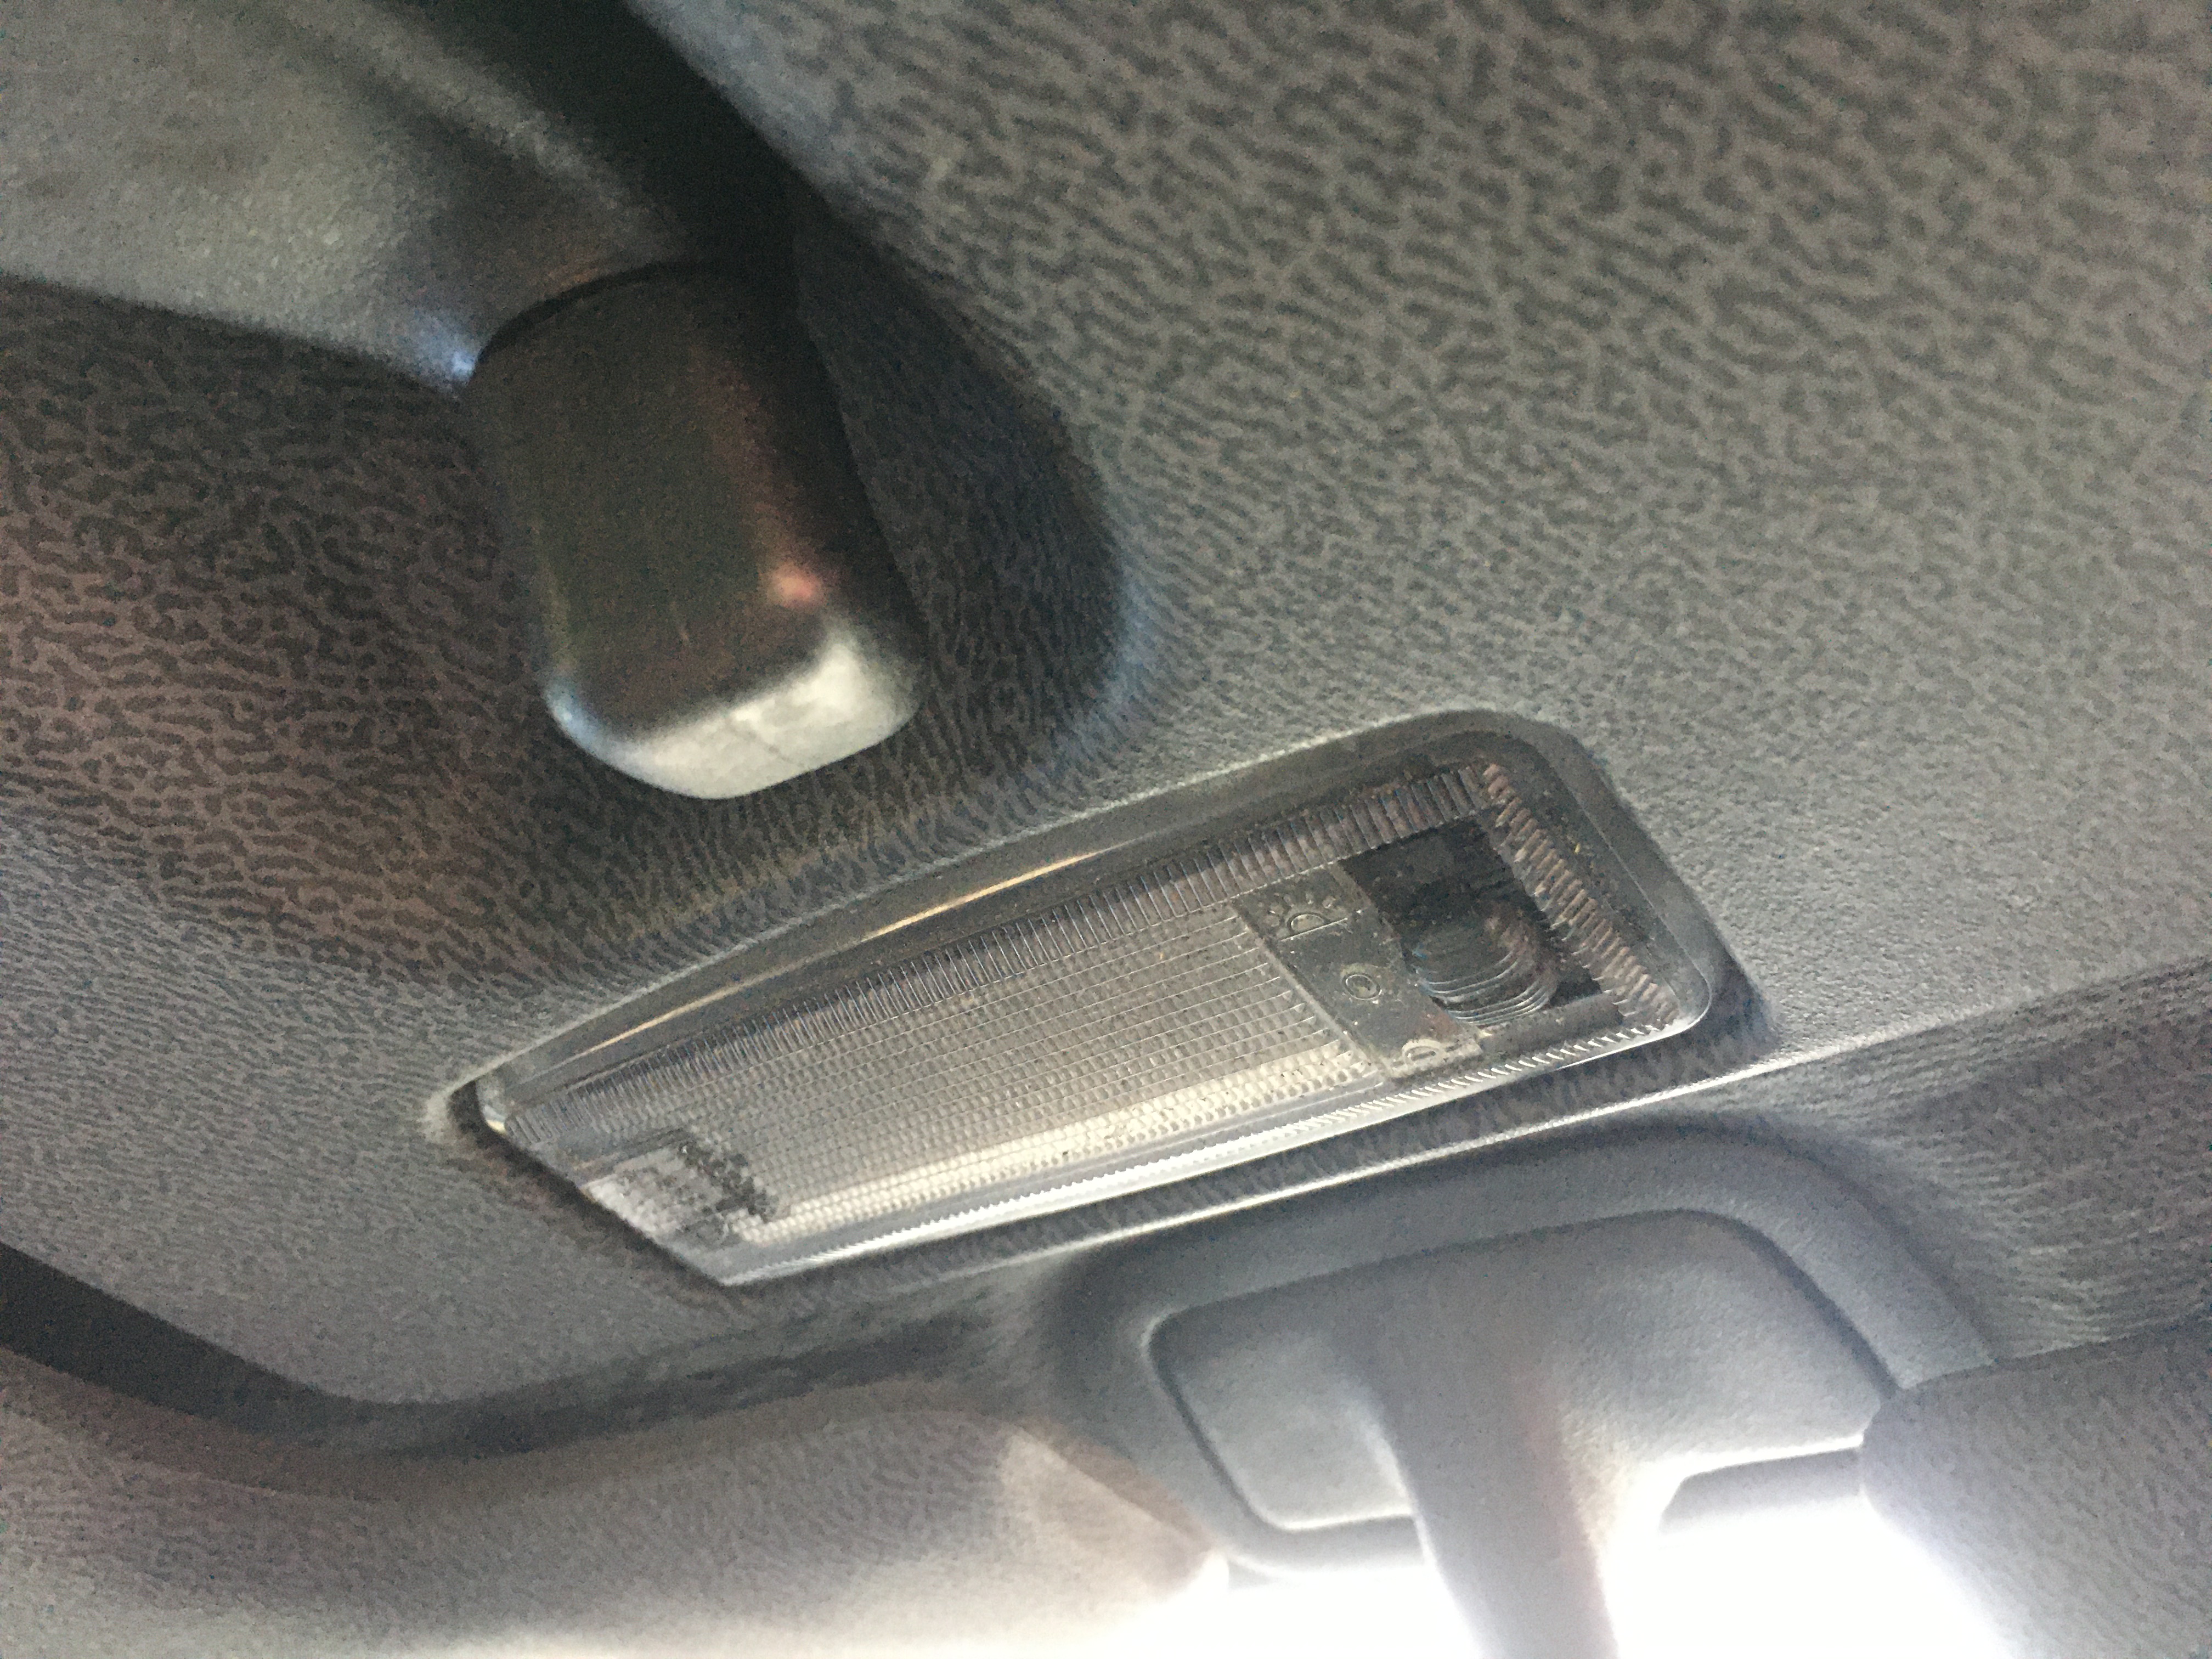
Another quick swap over, a tinted interior light that I'd also wisely kept back in case my next one didn't have one:
and out with the old white plastic one:
Surprising how much this caught my attention every time I looked int he rear-view mirror. I guess knowing I had a tinted one in a drawer didn't help.
And just for good measure and to give a full an complete picture of the madness, here's the Wolfsburg branded billet plunger:
Can't promise an update everyday, and just to confirm, these 'fixes' were done this morning before work. But I'm certainly not going to guarantee a regular Breakfast project.
The original PAS wheel came with the car so I think in the first instance I'll fit that. The horn isn't plugged in on the OMP wheel anyway and the boss must be fitted wrong as the indicators cancel in the wrong place. Being deep dish the stalks are just out of fingers reach which is also annoying. That said the OMP is a nice wheel to handle even if the styling isn't to my liking.
October 10 2019
A bit of tinkering last night. First off did this satisfying little job: [youtube]https://www.youtube.com/watch?v=jU7kf_ZpFv0[/youtube]
Now this does leave me with Crystal clear headlights, spots, indicators and side repeaters.... at least they match :sorry, what?: Which I'm sure most peoples opinion will be to replace. But they work and I need to think about the costs so no immediate plans to replace them all, although I did fine a genuine set of orange side repeaters in my stash. Unfortunately I've only got early bumper front orange indicator lenses.
Then took the OG steering wheel that came with the car into the house. Mixed up a paste of washing up liquid, bicarbonate of soda and white vinegar and got to work: [youtube]https://www.youtube.com/watch?v=Lrdopi9_Jh0[/youtube]
It was pretty grim:
It came up great but even so I'm not 100% convinced all of the grime has gone, I might have another go. I'll sort an after photo at some point.
I also did the golf ball gear knob but that might also need a bit more of a soak to get mint.
October 14 2019
Saturday night, while I waited for my daughter to get in from the Cinema I sat in front of the telly half watching Tron (the new one) with a bowl of soapy water and the infamous toothbrush again, and scrubbed the contents of a "Mk2 Spares" delivery that had previously arrived.
And true to tradition, I took said box of sparkly bits to work with me so I could sit in the car park on this drizzly lunchtime and complete this little task:
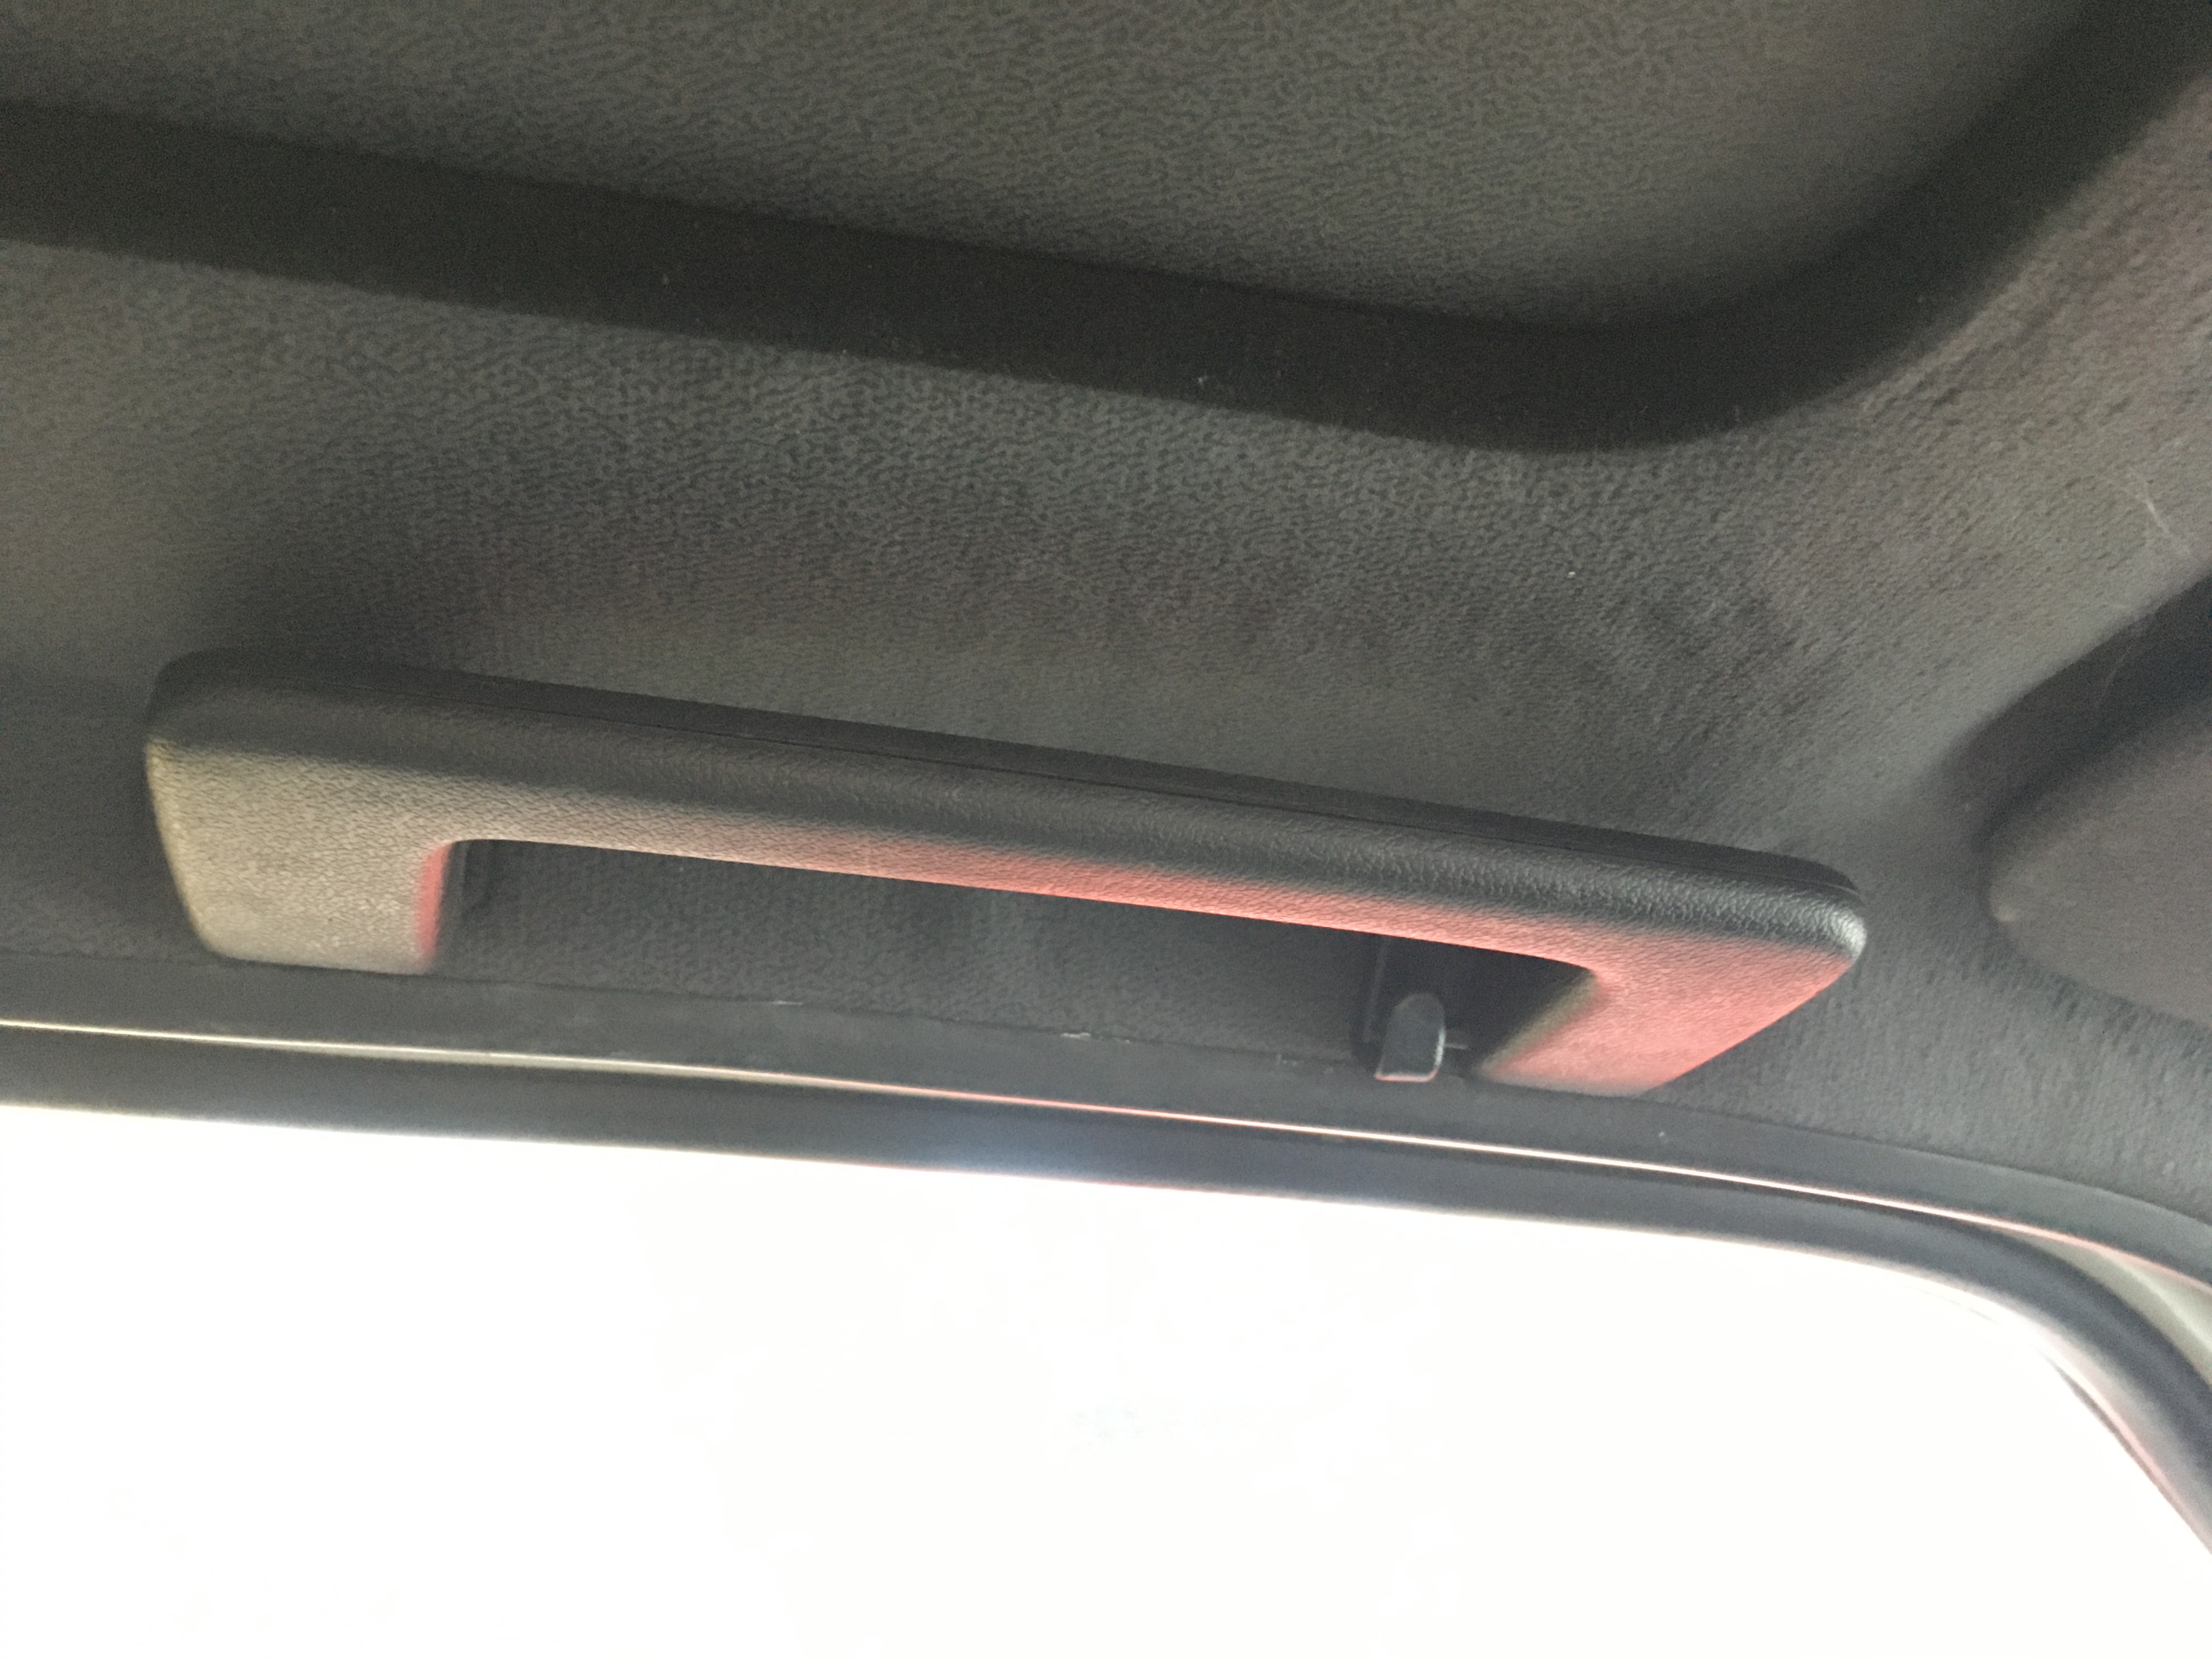
I also fitted the gear lever cover that Matt sent me, as mine was missing and changed over the fixed position grab handles for the flappy ones as they feel more GTI - even though I gather the fixed position ones were fitted at factory:
While I was climbing around the interior of the car I found a few other small interior trim bits that are missing, darn if I'd only looked properly I'm sure Matt would have included them into the box.
In other news, the name has now been chosen. Lucy It just so happened to be the film that was on when we got home last Saturday after collecting her. I bounced it around as an idea for a while but needed some way to qualify the name. Also with the reg being PVC this sort of opened up other ideas ... then in came to me, not sure out of where, but the Lucy Liu scene from the Mel Gibson film of the 90s, Payback. Good film and if you remember it you'll know, if you haven't seen it and don't mind watch old stuff it's worth a look.
Here's one of the few Google images of that particular scene I found that was "work safe" enough to share
October 16 2019
Another quick fix this morning from something I had in my stash.
More to follow as I copy across form the old site.
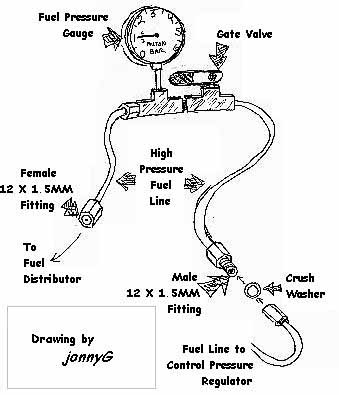
A bit more useful info, it's a Capri, but you can ignore that. This diagram helps define where some of the key bits are and how they relate to the full system.
The following text is also Capri related and take from here: http://www.zeepoort.nl/jetronic/K-Jetronic-troubleshooting.html Please take into account the values and references to locations or precise configuration may not be correct for VW Golf or Jetta, but the correct information is published in the post prior to this one in this thread.
I've copied and pasted to ensure this info isn't lost if that link ever goes down. But all credit goes to the original publisher.
NOTE:- whilst working on any fuel system, care and attention should be taken to avoid the petrol coming in contact with any source of ignition, this can include: hot engine components, High Tension (HT) sparks and smoking. Introduction
This article is taken from a Capri Club International Magazine (May 1999) and was written by: Ian Coulson Aff.IMI.Technical Advisor
"We Unravel The Mystery"
I have been working in the motor trade for almost 10 years years now, and have been working with K-Jetronic for 8 of them. Most of the information I will use comes from course notes I have from attending the Ford Service Training College at Daventry on the Bosch K-Jetronic fuel injection system training course.
I have since moved on from working at a Ford main dealer to a Volkswagen Audi dealer in York, and attending the K-Jetronic training course at the V.A.G training centre at Milton Keynes, as the same system was fitted across the VW Audi range. It is probably the first fuel injection system that was used by a number of motor manufacturers and on the whole, is pretty reliable. it is quite a basic, mechanical system, as opposed to the more technical electronic engine management systems available noe, and as such, is open to wear, corrosion and sticking of components and requires a certain amount of adjusting and cleaning to keep it working in the way Mr. Bosch intended.
General Description
Fuel is supplied from the tank by an electric fuel pump. It passes through to the fuel accumulator, up to the fuel filter, where it then passes to the metering head. Air drawn in by the engine lifts the sensor plate, which in turn is connected to the control plunger inside the metering head.
As this lifts inside it's chamber, pressurised fuel is passed to the injectors, the amount being governed by the amount of air lifting the sensor plate, which sprays continuously on the back of the inlet valves inside the engine. As the valve opens, the air and the sprayed fuel pass into the combustion chamber and ignition takes place.
Firstly, the fuel system.
Fuel Pump
The fuel pump is located at the rear of the car on the drivers side. It is fastened on the side of the tank in a rubber housing to cut down on noise. I tis fed by a rubber pipe which is connected to the fuel tank directly.
It must receive 12 volts to make it work, so it has 2 electrical terminals on it's forward facing end. It is fitted with 2 valves inside, one is the safety valve wich, in the event of a blockage in the system, will release fuel back to the inlet side, and a non-return valve. This keeps fuel in the system ahead of the pump after the engine hads been switched off.
Fuel passes through the body of the pump and out through the cantral union on it's forward facing end and up to the fuel accumulator.
Testing
The fuel pump is a sealed unit and cannot be repired. If it fails, it can give a few symptoms, the most obvious being that the car will not start at all. If it becomes noisy, this is an indication that all is not well. It can cause jerky running when under heavy load when accelerating and even misfiring when revving up when stationary. If it shorts out inside, it will blow the fuse. This is mounted under the dash on the drivers side, but I will cover this more in the elecrical system section.
Only basic tools are required to change the pump, being a 19mm spanner for the fuel pipe union, a screwdriver for the fuel pipe clip and an 8mm spanner or socket to remove the bracket from the fuel tank. You will also need something to plug the supply pipe from the tank otherwise you will get a petrol bath! Not recommended.
Fuel Accumulator
This is also located at the rear of the car, just above the fuel tank. It is a metal housing with 2 fuel pipes bolted into one end and a small breather hole at the other. Inside is a large spring, a diaphragm and a steel plate with a fuel feed hole through it.
Fuel, pressurised by the fuel pump, enters the fuel accumulator and forces the diaphragm against its spring to its stop. It remains in this position all the time the engine is running. When the engine and consequently the fuel pump is switched off, the diaphragm is allowed to return under spring pressure, trapping the residual pressure in the system rather like a tyre valve. It will retain this pressure for about 20 minutes. It is fitted to keep pressure in the system so the fuel, when switcing off a hot engine, does not vapourise causing hot starting difficulties.
Testing
The fuel accumulator is a sealed unit and is not repairable. The spring inside is very strong, so the unit should not be cut open as injury could result.
The 'holding pressure' which this unit provides is difficult to check without the specialist gauges, but no doubt a garage would undertake this for you. The only thing you can really do is to check that the breather hole has not become blocked. Fuel then passes up the engine bay to the fuel filter which is a silver cylindrical object bolted to the passenger side inner wing. If it gets blocked, it can cause the same symptoms as a faulty fuel pump and can be checked by doing a fuel pump delivery rate check which I will describe later.
Metering Head / Fuel Distributor
So the heart of the system - the metering head or fuel distributor as it is sometimes known. This is mounted right at the front of the engine bay on the passenger side and has a host of black pipes leading to and from it. Fuel enters the metering head from the fuel filter, via the union on the passenger side nearest the large black air ducting. Inside it passes into a central chamber. As the plunger travels up the chamber, it uncovers a series of slots which are connected to the unions on its top, which are connect to the fuel injectors in the engine.
The more of these slots it uncovers, the more fuel passes to the injectors. The plunger is connected to an arm which has a large disk on it. If you remove the large black air duct, this disk can be visible. It is bolted to the arm sensor plate and housing. The air drawn in by the engine lifts this sensor plate and, as it is connected to the plunger, also allows more fuel to the injectors. The more air is drawn in, the higher the plate moves so the higher the plunger moves - uncovers more slots and allows more fuel to the injectors.
Testing
The fuel metering head should not be stripped down as it is a very finely machined unit and can be damaged easily. The only real problem that I have encountered with it is of it sticking due to corrosion on it caused by water in the fuel. A good fuel system cleaner added to a tank of fuel will usually cure most problems with it.
The air sensor plate on the other hand can be adjusted. First, it should be clean. it should be cantral in its housing and it should be set at the correct height. The edge of the sensor plate should be level with the start of the cone shaped section of the housing.
If this is incorrectly set, not central and catching on the side of the housing or dirty, it will cause the fel/air ratio to be wrong for the whole engine rev range leading to poor starting, lack of power, flatspots and high fuel consumtion.
After cleaning, raise the sensor plate right up and underneath is a metal 'R' shaped spring. Bend this spring up or down to acheive the correct height. If it is not central, undo the 10mm bolt in the centre and pass a feeler blade around its edge until it centralises itself. After adjusting, it will be necessary to have idle speed and mixture reset using a CO meter. Again, most garages would carry this out for you.
Injectors
These are monted underneath the ribbed air chamber on to of the engine and are secured in the inlet manifold. They release a finely atomised spray in a cone shape, contiuously - the amount depending on the position of the plunger in the metering head.
Testing
Again, they are a sealed unit, but they can be cleaned by fuel system cleaner as described previously. If they get dirt in them or the spring goes weak, they can give an incorrect spray pattern causing a reduction of power in the associated cylinder. the main fault with injectors is 'dribbling'. When the engine is switched off, pressure is still in the system - thanks to the accumulator.
If the injector is not seating properly due to dirt or wear, it will allow fuel to dribble into the cylinder, wetting the lug and more importantly reducing the holding pressure. This can cause various hot starting problems, mainly starting on 4 or 5 cylinders, then clearing after a rev. This can be checked by running the engine and then removing the injectors with the pipes still attached and placing them on some tissue paper and watching to see if they are damp.
The Warm-up-Regulator
This is mounted right at the front of the engine with 2 fuel pipes bolted to it, with different size unions and a grey electrical plug. Basically, it is the 'choke'. It provides a richer mixture for cold starting and during the warm up phase. Fuel passes to it from the central union on the metering head. When the engine is cold, the warm up regulator is open, allowing fuel to pass through it. This reduces the pressure acting downwards on the plunger in the metering head, allowing it to lift higher than normal so allowing more fuel to the injectors and giving a richer mixture. As it heats up, by engine temperature and its heating element inside, it closes off slowly causing higher pressure to act on top of the plunger, forcing it down again, so weakening off the mixture. This pressure is called 'control pressure' and again needs the special gauges to check it.
Testing
Behind the larger of the 2 unions is a metal gauze filter. If this gets blocked, it causes the warm up regulator to remain closed, causing very bad flatspots and poor acceleration during the warm up phase, just like trying to drive without using the choke. It can be cleaned out using clean petrol. It also has a vacuum connection to it. This is for full load enrichment. At full load, engine vacuum is low, which opens the valve slightly, reducing the pressure on the control plunger and giving a slightly richer mixture.
The Electrical System
There are various switches, valves and realysin the K-Jetronic fuel injection system, so I will try and describe their function and how to test them.
Fuel Pump Relay
This is to be found under the dash on the drivers side, above the bonnet release handle along with a few other relays. It si pink in colour and has 5 terminals. The brown wire is connecte to earth, the red wire is connected to battery live via a 20 amp fuse which is mounted next to the relay, the black wire is fed with ignition live, the green wire is from the coil terminal 1 with a pulsed live to tell the relay the engine is running and the last terminal has 2 wires going to it. They are both black with a red tracer, the thickest of which goes to the fuel pump. The other wire goes to the heating element of the warm up regulator and the auxiliary air valve, whose operation I will cover shortly. Just switching on the ignition will not not cause the fuel pump relay, and consequently the fuel pump to switch on. It must receive a pulse from the coil before it will work. This is a safety device so in the event of an accident when the engine is stalled but the ignition is left on, the fuel pump is automatically switched off to reduce the risk of fire.
for test purposes, the 4 pin heated rear window relay can be substituted for the fuel pump relay to make the pump run with just the ignition on. This relay is in the same place as the fuel pump relay and is black in colour and has a red 16 amp fuse on top of it, under the plastic cover. I must stress that this must ONLY be done when doing the fuel pump delivery test. This test is described later.
Auxiliary Air Valve
This provides the fast idle during the warm up phase and is bolted to the front of the ribbed air chamber with 2 black pipes going to it, one from each side and a black electrical plug. When the engineis cold, the valve is open. You can check this by removing both pipes from it. You should be able to see through it. It allows air into the engine without it going through the throttle valve almost like an air leak. This extra air, coupled with the extra fuel allowed in by the warm up regulator, gives increased idle and mixture to run the cold engine.
As it warms up, it slowly closes until when hot it is closed completely. This can be checked by squeezing one of the hoses. If the engine is cold, the revs must drop; if the engine is hot it should not affect the speed.
It is heated by the engine and also by a heating element - hence the electrical plug. It is a 2 pin plug, one connection being earth,the other being live via the fuel pump relay. This can be checked with a tes light or meter. The resistance of the heating coil can be checked. This is done by unplugging the electrical plug and putting an ohmeter across the 2 terminals of the valve. It should be approximately 40 ohms. The electrical plug to the warm up regulator can be checked for voltage and resistance in exactly the same way although the resistance of its heating element is only 25 ohms.
Thermo-Time Switch & Cold Start Injector
I have linked these 2 items as they work hand in hand with each other. The thermo-time switch is a large brass switch screwed into the water jacket at the very front of the engine and has a brown electrical plug. It has 2 wires going to it, one from the starter motor i.e. only live when the starter is cranking and the other goes to the cold start injector.
The cold start injector is bolted onto the drivers side of the ribbed air chamber and has a fuel pipe and a blue electrical plug. This also gets a live from the starter motor and gets its earth via the contacts inside the thermo-time switch. this can be checked with a meter or test light as previously described.
To check the valve itself, it should be removed from the air chamber and placed in a measuring container. It should spray for between 1 and 8 seconds dependant on temperature (it will not spray at all over 40 degrees C) and should give a fine conical spray. It should not 'dribble' at all once the valve has shut down. this test should be carried out with the coil lead removed and the engine cranked on the starter.
There is an extra item fitted to the Capri injection, which you may have heard 'clicking' from time to time. this is the 'impulse module' and is a 4 pin relay mounted under the dash near the fuel pump relay.
When the engine is cranked when it is hot, if it does not start after 2 seconds, the impulse module provides an earth to the cold start valve inthe form of a pulse, making it spray fuel to aid starting. It pulses for 1 second and then switches off and then pulses at 1 second intervals until starting takes place.
Fuel Pump Delivery Rate
The fuel pump delivery rate is checked at the return line at the fuel metering head. It is checked here because it not only checks the pressure from the pump, bit it also checks to see if there are any blockages on the way. For example, the fuel filter maybe.The return line union is on the passenger side of the metering head and is the larger of the 2 unions side by side and has an arrow on it pointing away from the metering head. Attach a pipe of approximately 2 feet long to the short rubber hose coming from the union and place it in a measuring container, then substitute the fuel pump relay with the heated rear window relay and switch on the ignition. The fuel pump should deliver a minimum of 750cc of fuel in 30 seconds. If this is not obtained, check the voltage of the fuel pump. A minimum of 11.5 volts is required and if this is OK, repeat the test at the fuel filter inlet pipe. If the required amount of fuel is obtained then the fuel filter must be partially blocked.
This is basically the K-Jetronic fuel injection system.
I hope I have covered all the problem areas and lifted some of the mist surrounding this system. It is quite straightforward in its operation, providing diagnosis and testing is acrried out logically and one step at a time.
Just to close, this system is quite reliable and as such, you should not jump to the conclusion that there is something wrong with it when the car is difficult to start or is not running quite right. You must always check the basics first. Check the idle and mixture, spark plugs can cause all sorts of problems if they are worn or are cracked. Plug leads can also cause problems, especially in damp weather. if the engine earth strap is broken or the contacts dirty, then the starter can demand extra current so not leaving enough for the spark to be sufficient for cold starting. Basic items such as these should be checked prior to diving into the injection system.
Happy diagnosing and keep the legend alive. Ian Coulson Aff.I.M.I. Technical Advisor.
Not cheap, but not that expensive either when you consider what a used plastic one goes for. And this is going to be a lifetime replacement - fit and forget!
An american based company that offer a sales and refurbishment service similar to KMI, however among their website pages are a bunch of technical articles for set up, testing and analysis.
I'll be reading through and making pointers to anything significant that I find.
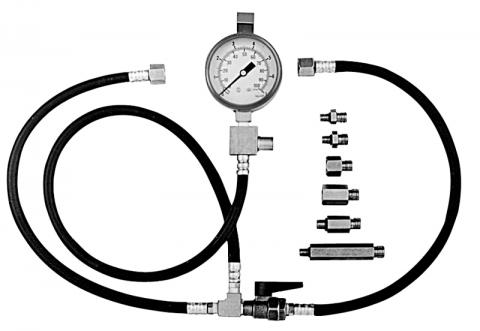
If you want to test your k-jet system you'll need a pressure testing kit. Ideally you only need a few key bit and if you can match the sizes can make one yourself. Unfortunately since Photobucket has shafted nearly every forum details on this are limited.
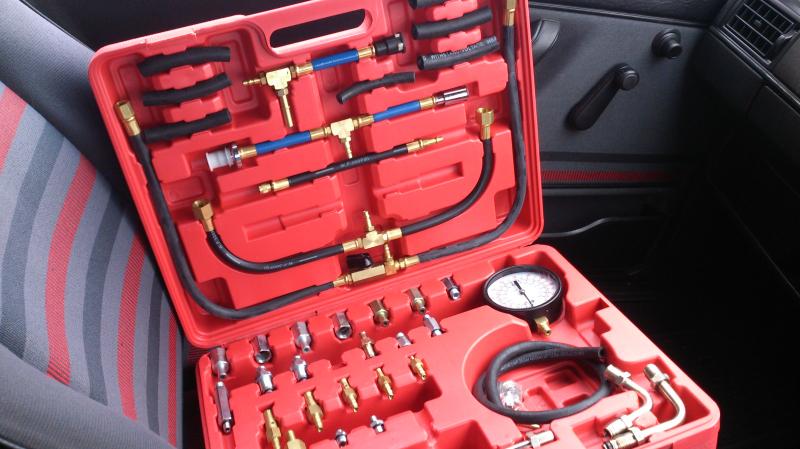
I managed to get this kit:
It's a universal kit so about 75% of it I'll never use, I got it cheap as it had a few components missing unfortunately the bits missing were from the 25% I did need but I went into Pirtek and managed to get the connectors I needed to hook it up.
Instructions in using it and the values to be looking for should all be in the documents already listed in this thread.
This retails for about £70 on eBay, note the connections are American standard - which was what gave the guy in Pirtek a headache when he was trying to help me out. But as long as you get the full kit it doesn't really matter how the bits of it connect. Smaller kits are available on eBay but they don't contain the tap you'd need so it's an option to get one of those £15-20 kits and then try and customize it to what you need.
However this does talk about MAF sensors, on-board computers, exhaust-gas oxygen sensors and check engine lights :lol: what is all this mumbo jumbo? but hey the principle still applies.
Anyway, cut out all that crap, and the fact this is basically a sales pitch for an expensive bit of equipment and I've copied and pasted the important bit here in case the link ever dies.
Quote
The Carb-Cleaner Trick
Here's how we old-line mechanics learned to chase leaks: To keep the engine computer from richening up the mix, pull the wire on the throttle position sensor or some other handy sensor that will keep the engine in open-loop mode, where the computer just uses hard-coded default values for the amount of fuel instead of dithering the values around to stay near that golden 14.7:1 ratio.
This is analogous to the situation in a carbureted car (or motorcycle, or any other IC engine that doesn't have a computer). Start the engine and let it idle. Now spray aerosol carb cleaner onto the suspected leak. Yes, this is dangerous, especially if you consider your eyebrows important. There's not supposed to be an ignition source on the engine anywhere, but once in a blue moon, a stray spark or an overheated exhaust manifold can make the carb cleaner flare up. You've been warned.
The combustible carb cleaner will be sucked into the leak, and the engine will pick up its idle speed momentarily—and probably run on all cylinders if it's been misfiring. We quickly learned to use short, directed puffs of carb cleaner to localize the leak.
Another option is to use an unlit propane torch to prospect for leaks. A piece of hose shoved over the torch's valve outlet will let you poke around the engine bay. When the combustible propane is sucked into the lean-running engine, it will smooth out and speed up slightly. Similarly, you can spray water or motor oil onto a suspected leak and achieve the same end. When the water gets sucked into the leak, it momentarily interrupts the extra O2 stream, and the engine's idle will change.
Fuel supply The fuel pump operates continuously while the engine is running, excess fuel being returned to the fuel tank. The pump is operated when the ignition switch is in the START position. Once the starter is released, a switch which is connected to the air plate, prevents the pump from operating unless the engine is running. The fuel line to the fuel supply valve incorporates a filter and also a fuel accumulator. The function of the accumulator is to maintain pressure in the fuel system after the engine has been switched off and so give good hot restarting. Associated with the accumulator is a pressure regulator which is an integral part of the fuel metering device. When the engine is switched off, the pressure regulator lets the pressure to the injection valves fall rapidly to cut off the fuel flow through them and so prevent the engine from “dieseling” or “running on”. The valve closes at just below the opening pressure of the injector valves and this pressure is then maintained by the accumulator.
Fuel distributor The fuel distributor is mounted on the air metering device and is controlled by the vertical movement of the airflow sensor plate. It comprises a spool valve which moves vertically in a sleeve, the sleeve having as many vertical slots around its circumference as there are cylinders on the engine. The spool valve is adjusted to hydraulic pressure on the upper end and this balances the pressure on the air plate which is applied to the bottom of the valve by a plunger. As the spool valve rises and falls, it uncovers a greater or lesser length of metering slot and so controls the volume of fuel fed to each injector. Each metering slot has a differential pressure valve, which ensures that the difference in pressure between the two sides of the slot is always the same. Because the drop in pressure across the metering slot is unaffected by the length of slot exposed, the amount of fuel flowing depends only on the exposed area of the slots.
Cold start valve (5th Injector) The cold start valve is mounted in the inlet manifold and sprays additional fuel into the manifold during cold starting. The valve is solenoid operated and is controlled by a thermotime switch in the engine cooling system. The thermotime switch is actuated for a period which depends upon coolant temperature, the period decreasing with rise in coolant temperature. If the coolant temperature is high enough for the engine not to need additional fuel for starting, the switch does not operate.
Warm-up regulator - WUR (Control Pressure Valve - CPR) While warming up, the engine needs a richer mixture to compensate for fuel which condenses on the cold walls of the inlet manifold and cylinder walls. It also needs more fuel to compensate for power lost because of increased friction losses and increased oil drag in a cold engine. The mixture is made richer during warming up by the warm-up regulator. This is a pressure regulator which lowers the pressure applied to the control plunger of the fuel regulator during warm-up. This reduced pressure causes the airflow plate to rise higher than it would do otherwise, thus uncovering a greater length of metering slot and making the mixture richer. The valve is operated by a bi-metallic strip which is heated by an electric heater. When the engine is cold, the bi-metallic strip presses against the delivery valve spring to reduce the pressure on the diaphragm and enlarge the discharge cross-section. This increase in cross-section results in a lowering of the pressure fed to the control plunger.
Auxiliary air device Compensation for power lost by greater friction is achieved by feeding a larger volume of fuel/air mixture to the engine than is supplied by the normal opening of the throttle. The auxiliary air device bypasses the throttle with a channel having a variable aperture valve in it. The aperture is varied by a pivoted plate controlled by a spring and a bi-metallic strip. During cold starting, the channel is open and increases the volume of air passing to the engine. As the bi-metallic strip bends, it allows a control spring to pull the plate over the aperture until at normal operating temperature the aperture is closed.
Cold acceleration enrichment This system is fitted to later models only. When the engine is cold (below 35°C), acceleration is improved by briefly enriching the fuel mixture for a period of approximately 0.4 seconds. This cold acceleration enrichment will only operate if the thermotime switch, the diaphragm pressure switch and the throttle valve switch are shut off.
Temperature sensor From March 1986, a temperature sensor is located between injectors 1 and 2. After switching off the ignition, this switches on the cooling fan when the temperature of the cylinder head exceeds 110°C. A time relay is incorporated in the circuit. This switches off the function between ten and twelve minutes after switching off the ignition.


 :
: